Naam auteur: Hondermooi

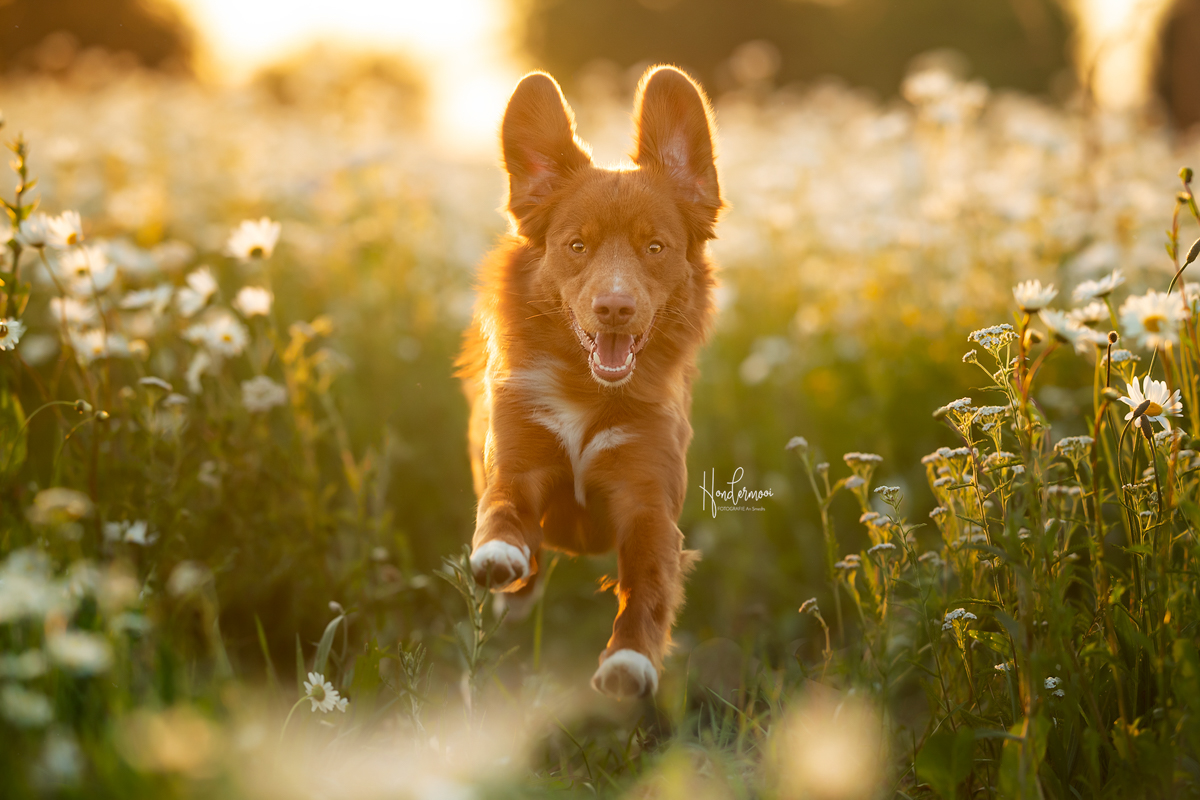
Dogs love to run and play during a photoshoot, but capturing this sharply and with quality in your photos can be quite a challenge! In this article, I’d like to share 10 tips for anyone who wants to learn how to photograph dogs in action.

1. Spontaneous yet controlled

An action shot should look spontaneous, but it’s not a good idea to let the dog run wildly and then snap away “on a wing and a prayer.”

Observe the dog carefully during your shoot and try to figure out what action it will enjoy the most. Is the dog a bit older? Then a simple sprint towards the photographer might be quite a challenge! Do you have a real agility champion in front of your lens? Then you can raise the bar a bit higher! Is there a real playful pup in front of your lens? Then go for an action shot including its favorite toy!

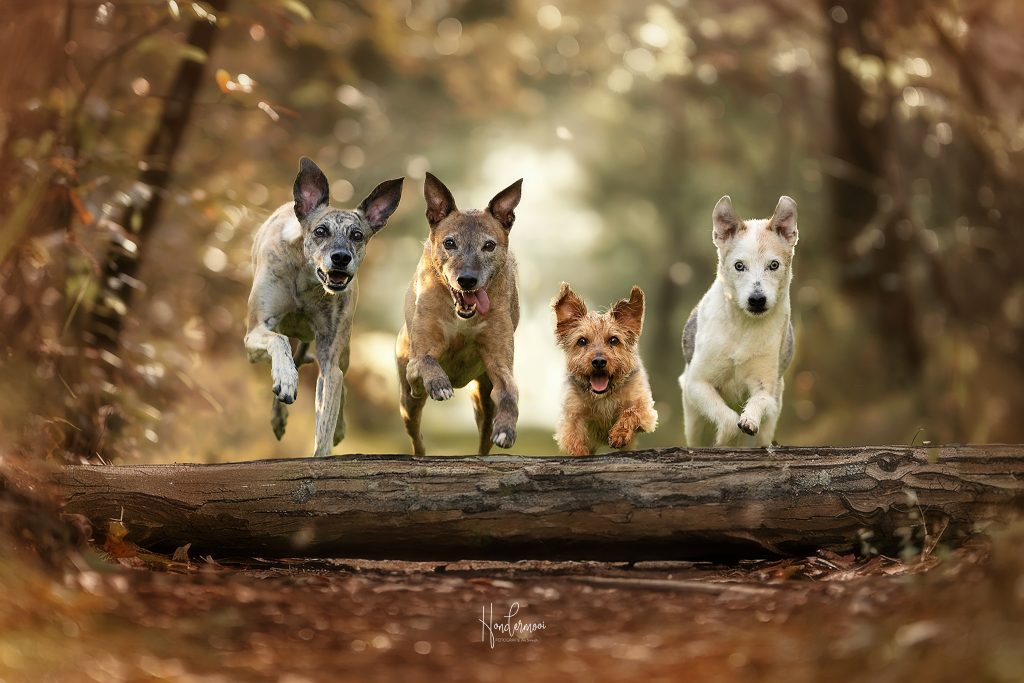
If the dog can sit and stay well, you’re lucky; the owner can stand over you and call the dog. However, if the dog is not one to sit still, you’ll need to get a bit more creative. If you don’t have much experience with action photography, it’s helpful to lay a stick on your path for the dog to jump over. This way, you’ll know exactly where the “action” will take place, and with luck, you’ll capture a beautiful flying dog in action right away.

10 tips for photographing dogs in action

2. Camera settings and lenses

To capture a sharp action shot, you need a fast shutter speed. Typically, 1/1000 sec is sufficient to freeze the action.

I prefer a blurred background in my photos to make the dog stand out. To achieve this, use the widest aperture available to you. For example, if you’re shooting with a 70-200mm lens – a popular choice for action photography – zoom in to 200mm and use an aperture of f/2.8.

The ISO value determines the amount of noise in your photo, and with a high shutter speed, your ISO value can quickly escalate. Therefore, it’s crucial to carefully choose your location when shooting action scenes (see point 7). Ideally, an ISO of 100 is perfect, but you’ll need to adjust according to the lighting conditions.

I shoot with a mirrorless camera (Canon R6 and Canon R5) and use the automatic animal eye autofocus for all my shoots to achieve sharp focus. If you’re using a DSLR or don’t have this function, use a single focus point and focus on the nearest eye.

Switch to continuous autofocus mode to keep the moving dog in focus. This allows the camera to continuously adjust focus as the subject moves.

Finally, utilize burst mode to capture multiple photos rapidly. The number of shots you can take in burst mode depends on your camera. Ensure you have a fast memory card to store all this data without your camera starting to lag; more on this in the point below!
10 tips for photographing dogs in action

3. Check your memory card!

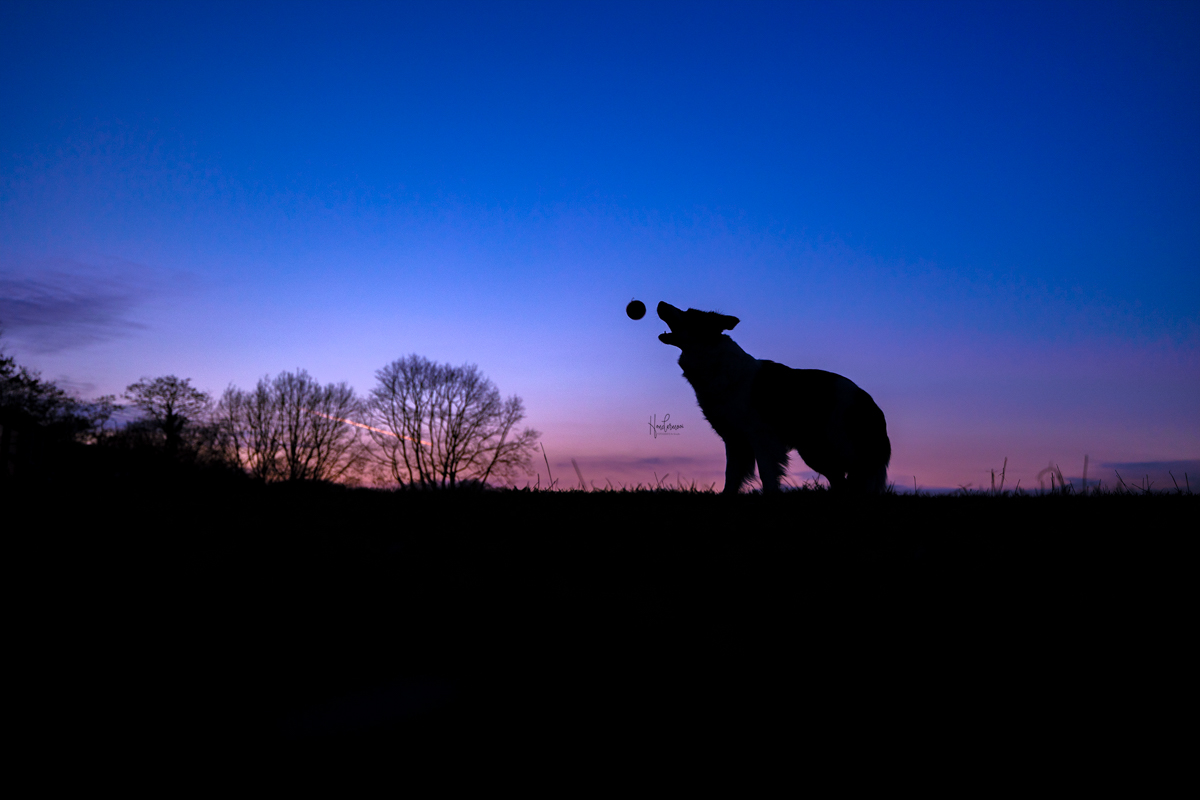
For photographing dogs in action, it’s important to use a fast memory card. This is often overlooked. You can have a camera that can capture a perfect number of images per second, but if you insert a slow memory card, your camera will quickly lock up because it can’t write the data fast enough.

On a camera’s memory card, you’ll find various symbols and numbers that indicate the card’s specifications and performance. Buy a memory card with sufficient capacity (I personally use a 128GB card) and a high write speed. These are the actual read and write speeds of the card, expressed in megabytes per second (MB/s). I prefer a card with a write speed of 300 megabytes per second.
10 tips for photographing dogs in action

4. Use a toy!

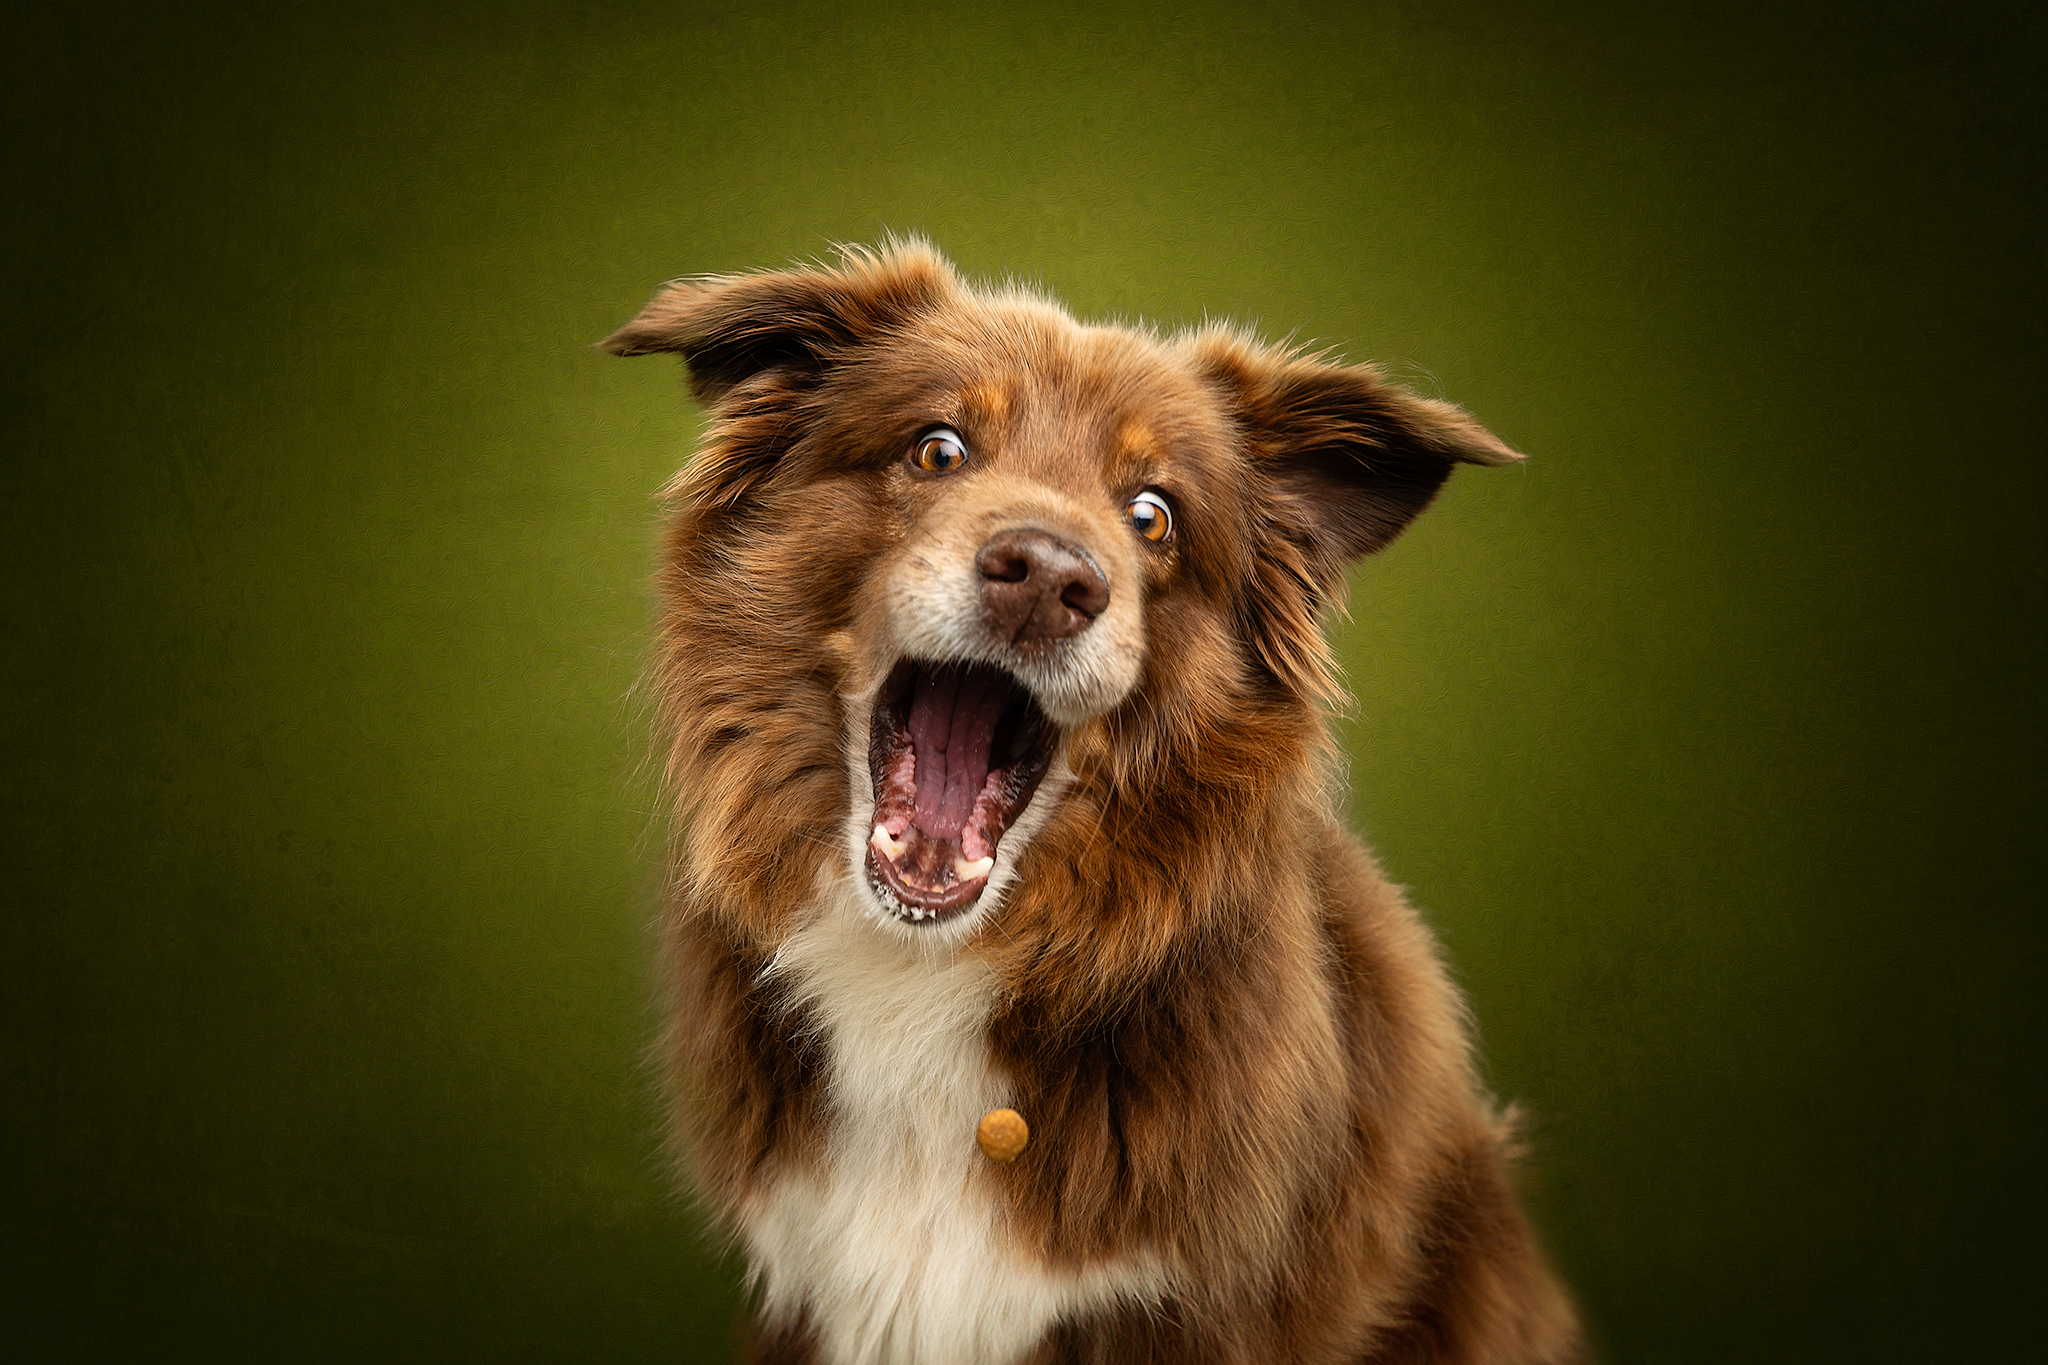
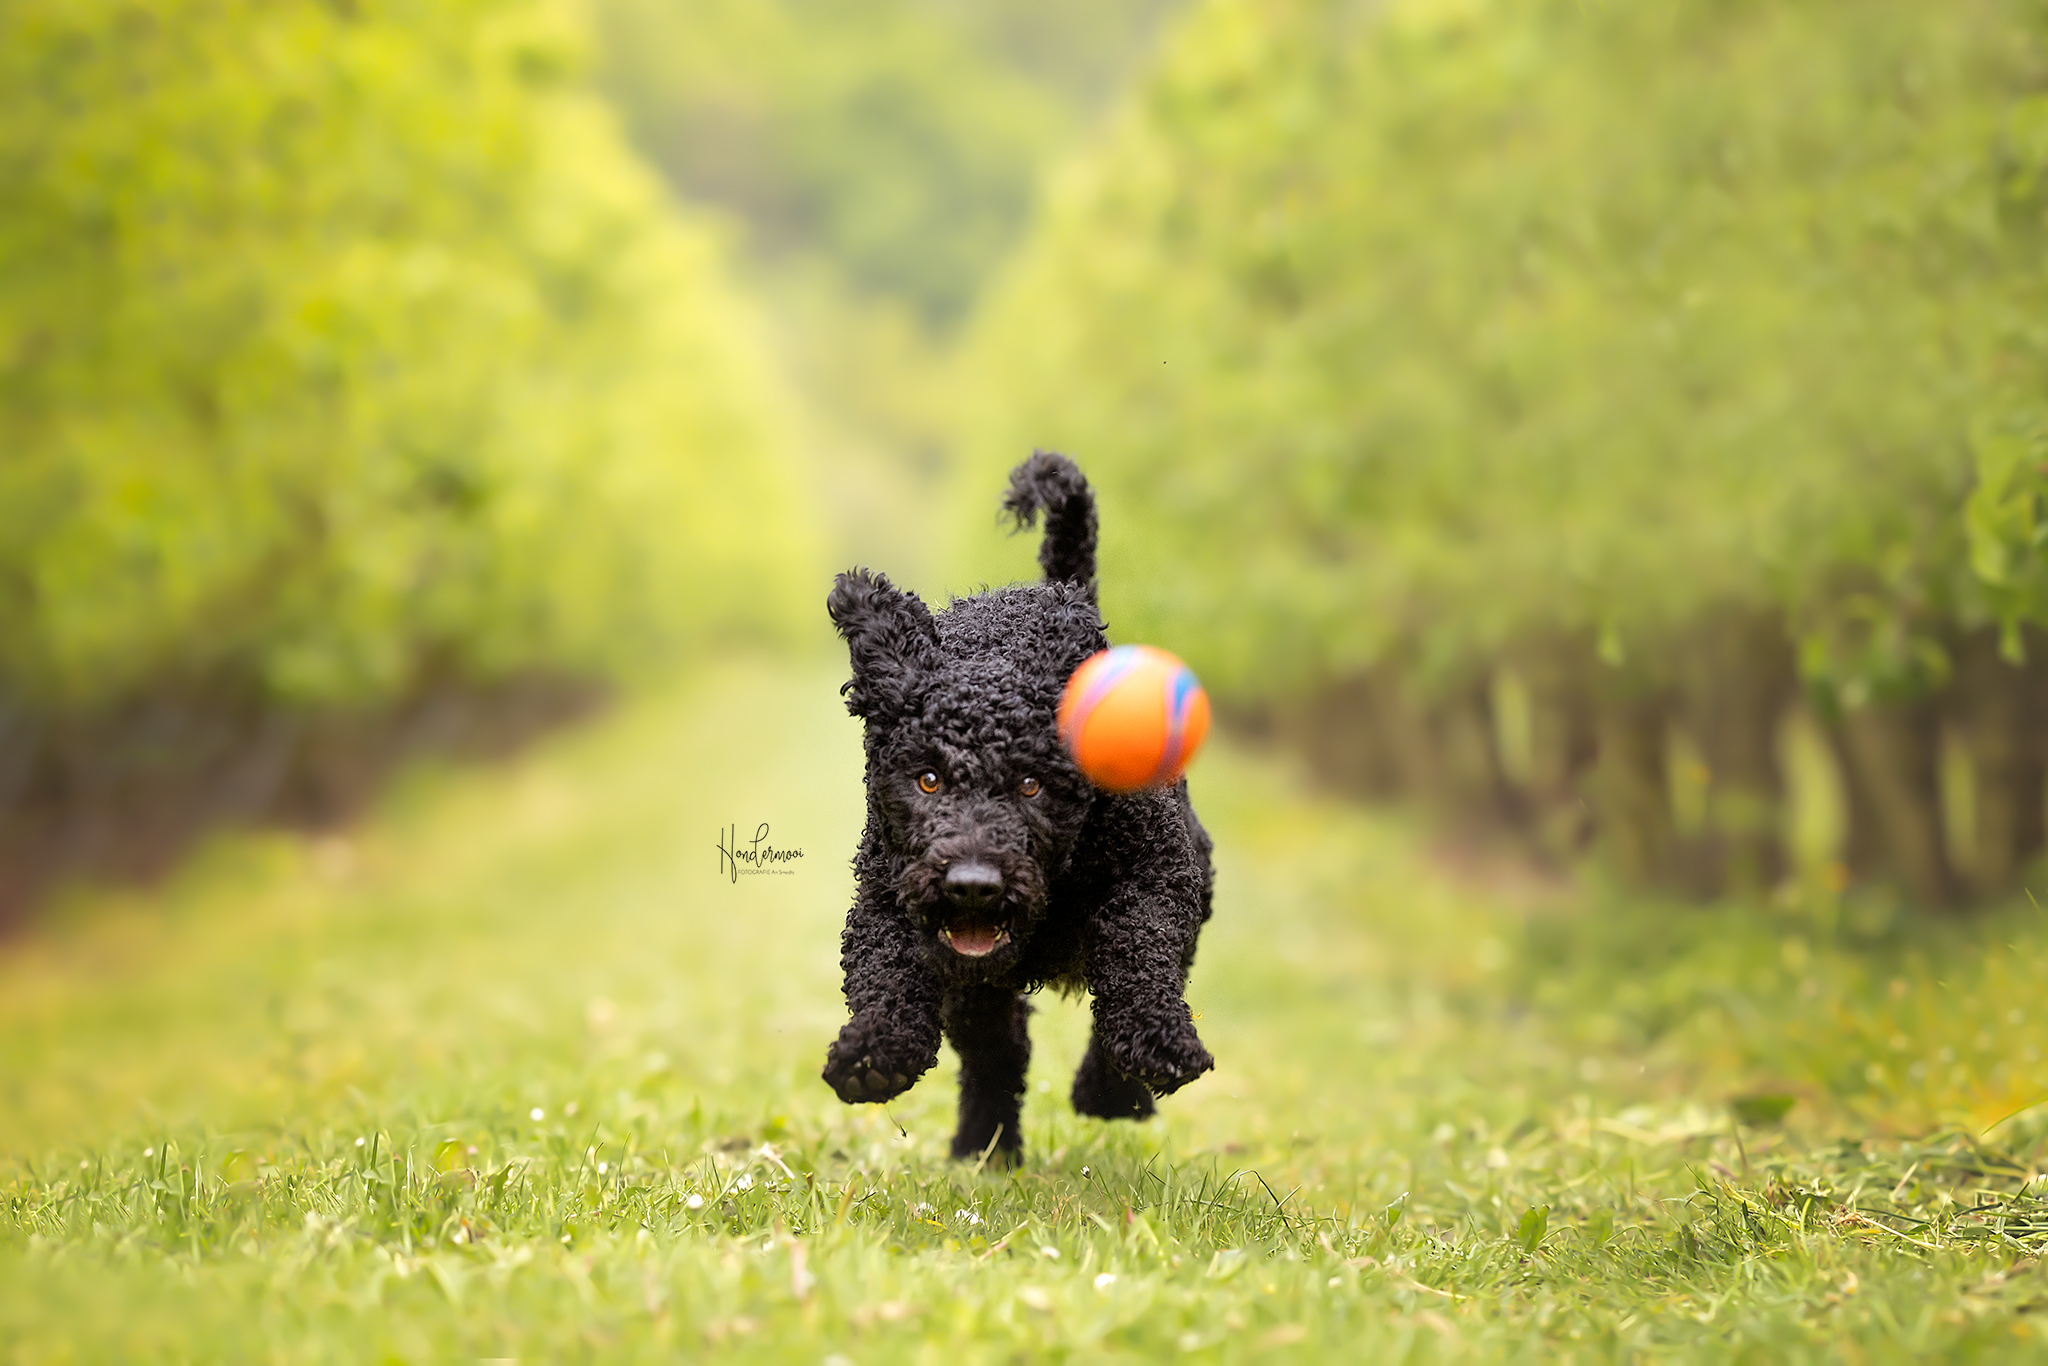
Some dogs go absolutely wild when you bring out their favorite toy, so it’s extra fun to include it in the photos too!
10 tips for photographing dogs in action

5. Multiple dogs in action

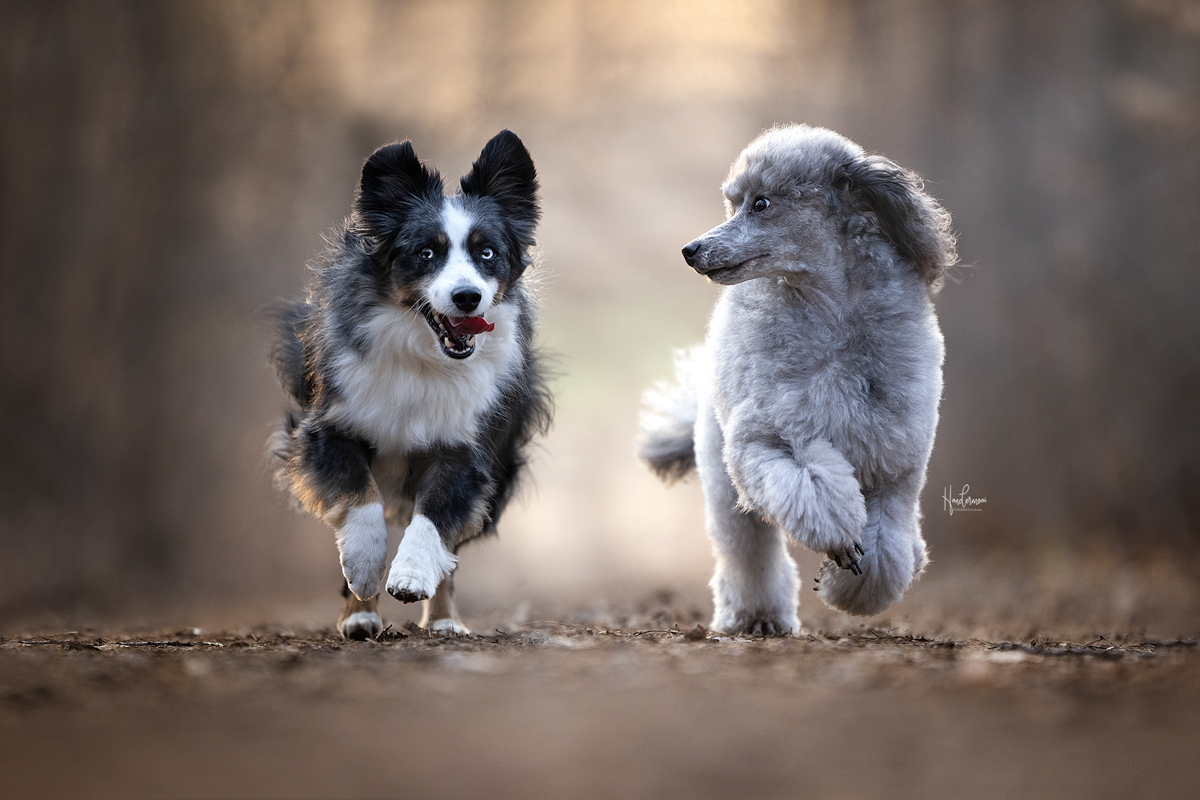
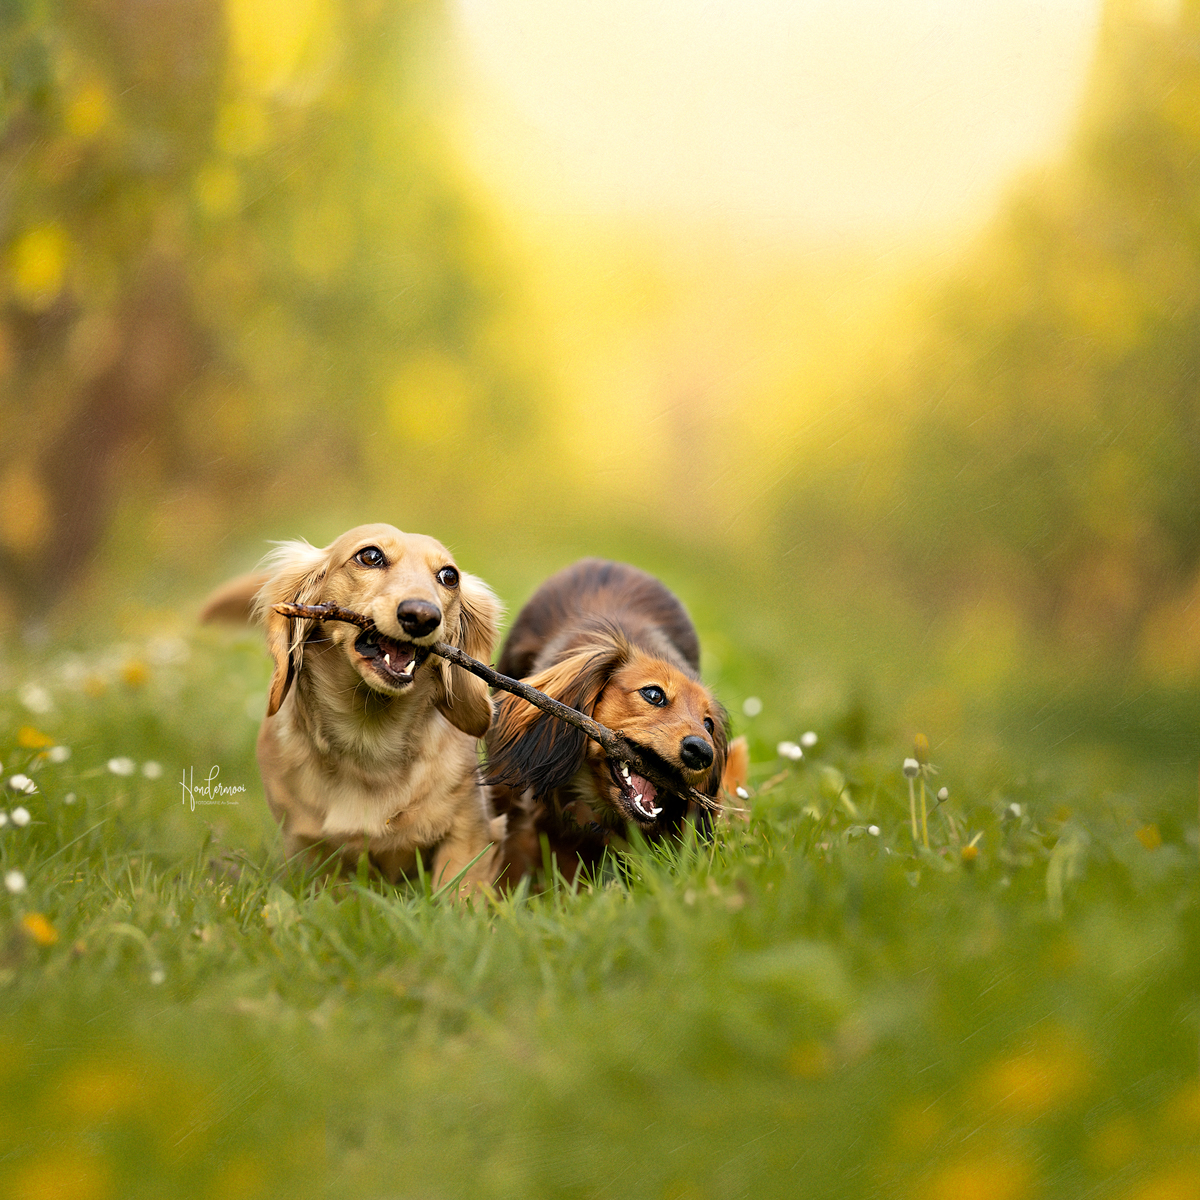
When owners come with multiple dogs, it’s always fun to capture an action shot of them together. However, it’s quite a challenge to get both dogs sharply in focus because they rarely walk in a straight line together.

Opt for a location with a lot of depth, blur your background as much as possible (read in this article how to achieve this), and keep in mind that Photoshop can come to the rescue if they don’t walk neatly side by side!
10 tips for photographing dogs in action

A stick or another toy can be very helpful in keeping your models more or less in the same position while they are still in full action!
10 tips for photographing dogs in action

6. Run together!

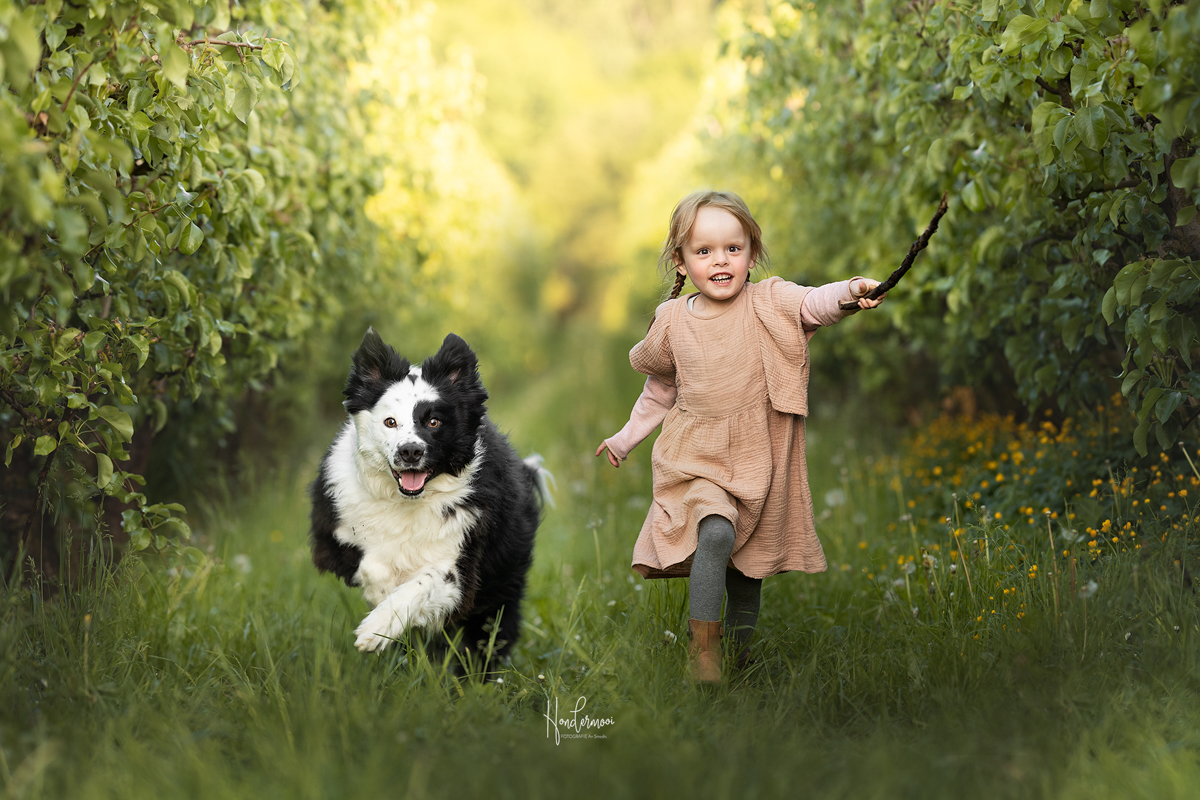
If you encounter a sporty owner or an enthusiastic child who wants to join in the photo, I always love capturing them running together. With children, this results in delightful spontaneous photos; they stay warm and didn’t expect the photoshoot to be so fun and active!
10 tips for photographing dogs in action

7. Location choice

Since you use a high shutter speed for action photography, the choice of your location is extra important if you want to capture action shots. With a high shutter speed, your ISO can quickly escalate in a dark environment, resulting in low-quality photos with a lot of noise.

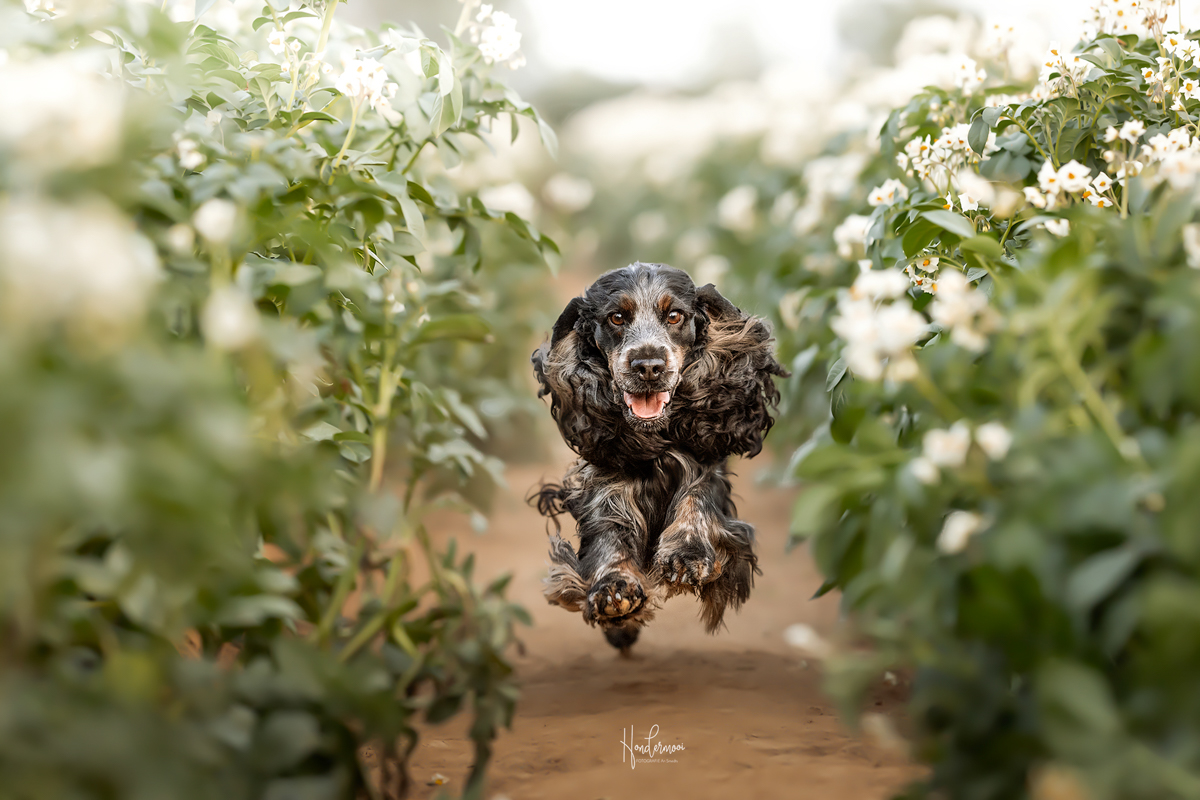
An open field is therefore my preference for capturing action shots. Below, the cocker spaniel is running in a potato field. The direction of movement is “under control,” there is enough light to keep your ISO low, and you immediately have an original environment with “flowers” in your photo! An orchard or the winter forest when the trees are bare also lend themselves excellently to action shots.
10 tips for photographing dogs in action

8. Back button focus

You love it or you hate it, but I am already a fan!

Back button focus is an advanced technique in photography where the autofocus function of a camera is decoupled from the shutter button and assigned to a separate button on the back of the camera, often referred to as the AF-ON button.

Normally, the autofocus of a camera is activated when you half-press the shutter button. This means the camera activates both focusing and capturing the image when you press the shutter button. With back button focus, however, autofocus is activated by pressing the AF-ON button on the back of the camera, while the shutter button is only used to actually take the photo.

This has various benefits for photographing dogs in action! By separating autofocus from the shutter button, you have more control over the focusing point. For example, you can focus on a subject and lock the focus by holding down the AF-ON button, allowing you to adjust the composition without changing the focus.

Since autofocus is set before pressing the shutter button, the camera can react faster to changing scenes or moving subjects. This is especially useful for our fast-moving dogs!

Furthermore, you reduce the chance of blurry photos because autofocus isn’t reactivated every time you press the shutter button!

Refer to your camera’s manual for the best setup and give it a try to see if you like it!
9. Low perspective

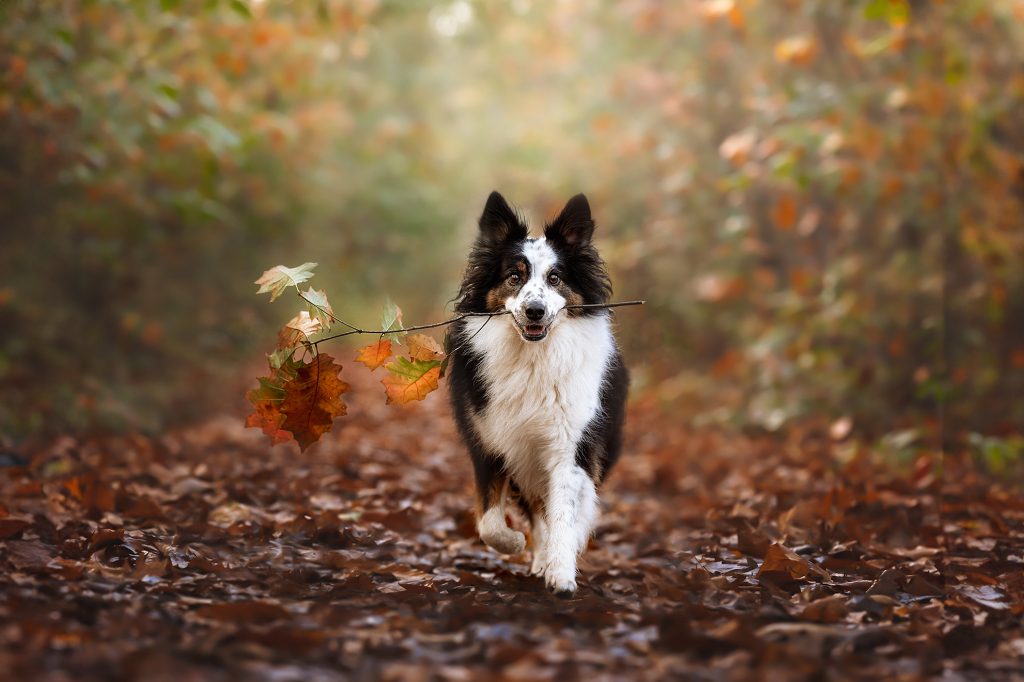
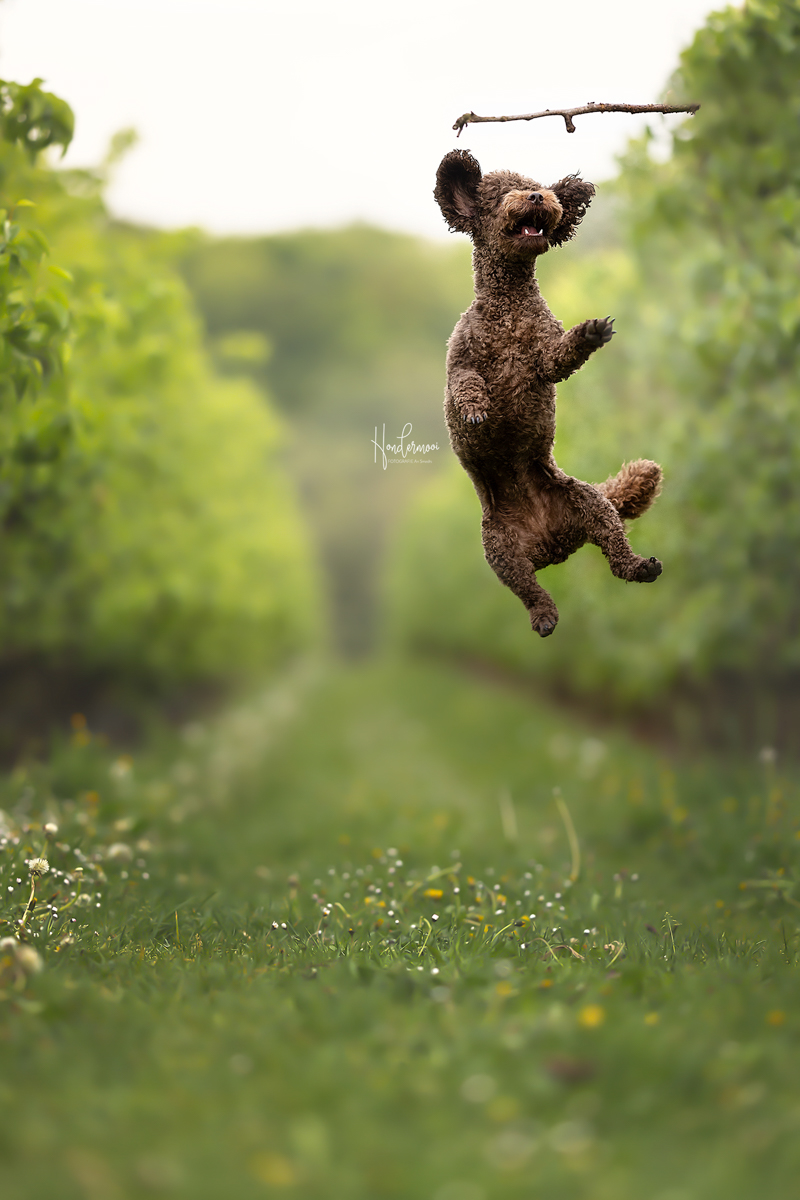
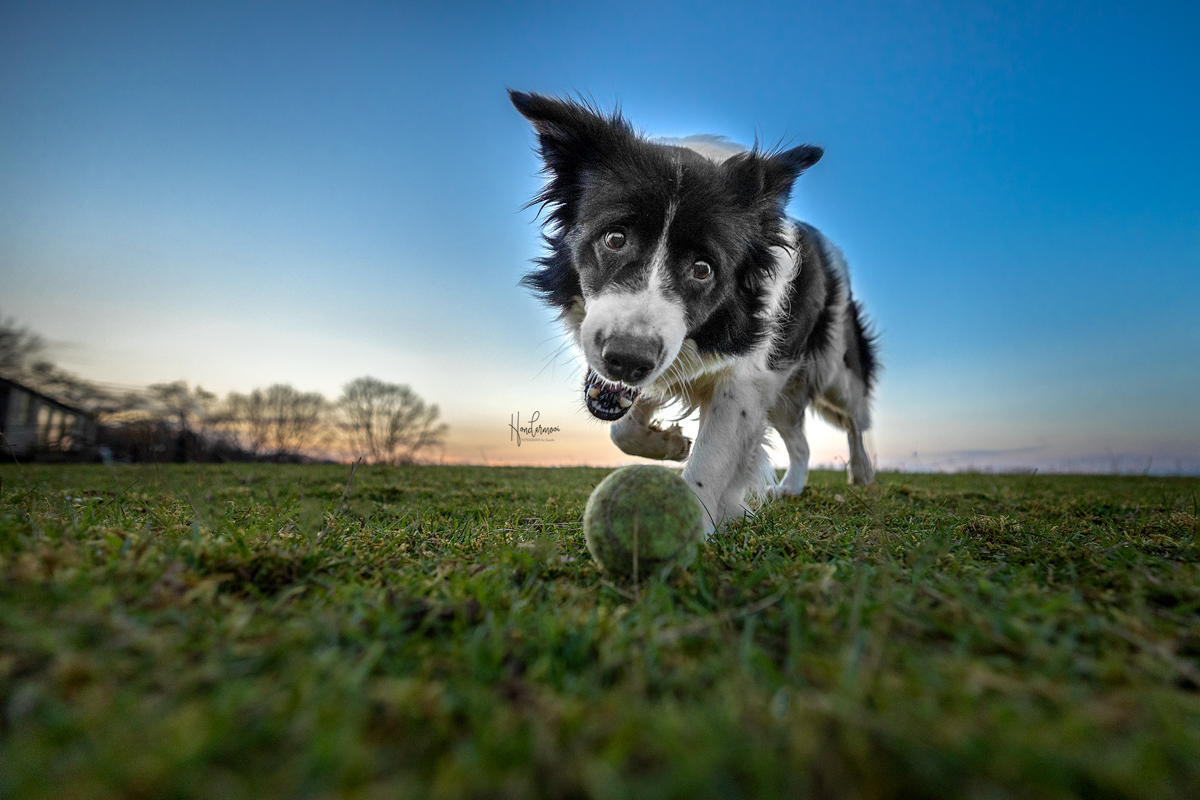
Lie down on the ground when taking action photos; this makes the dog really pop in your photo and gives it an imposing presence. Also, try experimenting with a wide-angle lens like in the photo below (taken with the RF 16-35mm) if you want to capture more of the surroundings in your shot.
10. Additional tips

  • If you also want to take portrait photos during the shoot, start with those first before switching to action shots; otherwise, you might end up with portrait photos with reaaaaaally long tongues and tired looks!
  • Always bring enough water for the dog and avoid action shots when temperatures are too high. Winter is the most ideal season for action!
  • Ensure a safe environment with minimal distractions and respect the dog’s boundaries if you notice it starting to get tired.
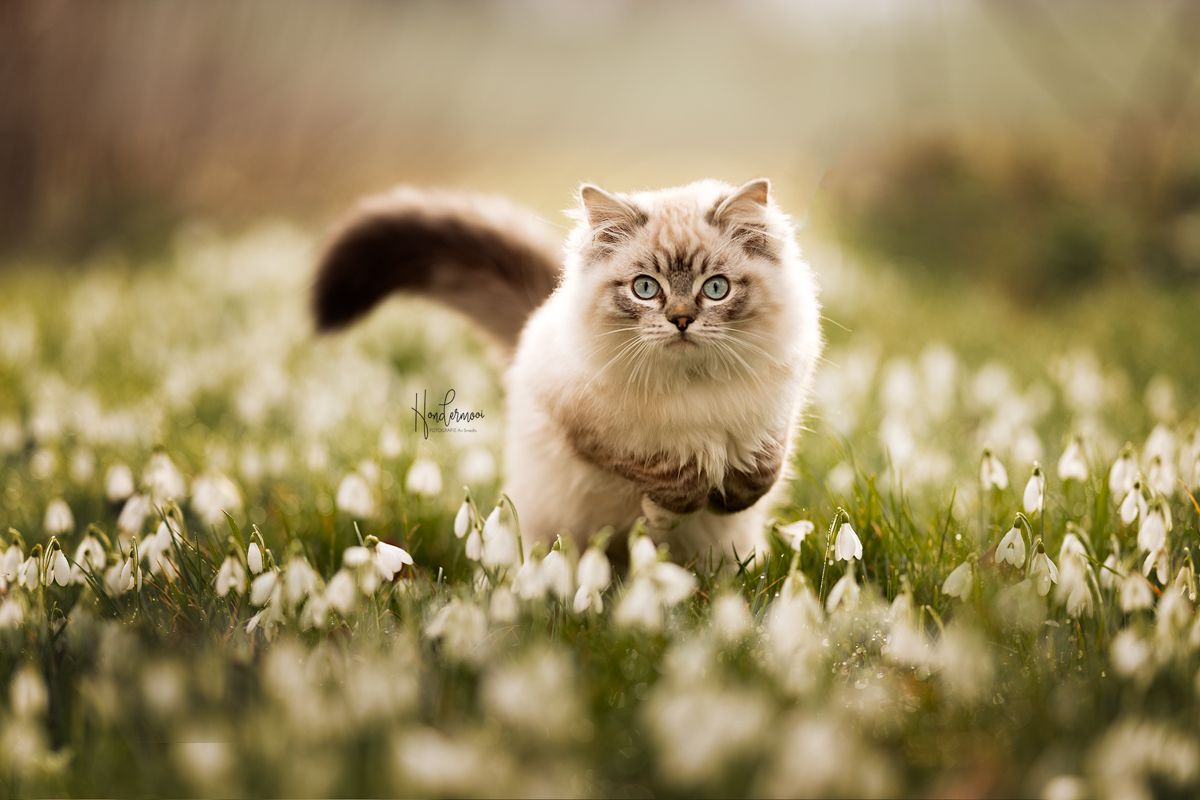
  • Try it with a cat too if you want to challenge yourself; they also enjoy a sprint now and then 🙂
Are you looking to further specialize in dog photography and learn how to capture dogs in an artistic way? Consider attending a workshop on artistic dog photography to boost your skills and take your photography to a new level!

English

10 tips for photographing dogs in action

10 tips for photographing dogs in action Meer lezen »

Honden vinden het heerlijk om tijdens een shoot te rennen en te spelen maar het kan een hele uitdaging zijn om dit scherp en kwalitatief vast te leggen in je foto! In dit artikel deel ik graag 10 tips voor iedereen die graag honden in actie wil leren fotograferen.

1. Spontaan maar gecontroleerd

Een actiefoto moet spontaan ogen maar toch is het geen goed idee om de hond in het wilde weg wat te laten rennen en vervolgens “op goed geluk” er op los te fotograferen.

Observeer de hond goed tijdens je shoot en probeer uit te zoeken welke actie hij het leukste zal vinden. Is de hond al wat ouder? Dan is een eenvoudig sprintje richting de fotograaf misschien al een hele uitdaging! Heb je echt een echte agility kampioen voor je lens? Dan kan je de lat wat hoger leggen! Staat er een echte speelvogel voor je lens? Ga dan voor een actiefoto inclusief het favoriete speeltje!

Als de hond goed kan zitten en blijven heb je geluk en kan het baasje over je komen staan en vervolgens de hond roepen. Heeft de hond echter geen zittend gat dan zal je wat creatiever te werk moeten gaan. Als je nog niet veel ervaring hebt met actiefotografie is het handig om een tak te leggen op je pad waar je de hond overheen laat springen, dan weet je perfect waar de “actie” zal plaatsvinden en met wat geluk heb je meteen een prachtige vliegende hond in actie!

10 tips voor het fotograferen van honden in actie!

2. Camera instellingen en lenzen

Voor het maken van een scherpe actiefoto heb je een snelle sluitertijd nodig. Doorgaans volstaat 1/1000 sec voor het bevriezen van de actie.

Ik verkies een vage achtergrond voor mijn foto’s zodat de hond er echt uitspringt. Hiervoor neem je het meest open diafragma dat je hebt. Fotografeer je bijvoorbeeld met de 70-200mm lens -een erg geliefde lens voor actiefotografie- dan zoom je in op 200 mm en gebruik je diafragma 2.8.

De ISO waarde is de hoeveelheid ruis in je foto en door de hoge sluitertijd kan je ISO waarde al gauw de pan uit swingen. Daarom is het extra belangrijk om zorgvuldig je locatie te kiezen als je met actie aan de slag gaat (zie punt 7). Uiteraard is een ISO van 100 ideaal maar je zal je moeten aanpassen aan de lichtomstandigheden.

Ik fotografeer met een systeemcamera (canon R6 en canon R5) en gebruik voor alle shoots de automatische oog auto focus voor dieren om scherp te stellen. Werk je met een spiegelreflex of heb je die functie niet? Gebruik dan 1 scherpstelpunt en focus op het dichtsbijzijnde oog.

Schakel over naar de continue autofocusmodus om de bewegende hond scherp te houden. Hierdoor past de camera voortdurend de scherpstelling aan terwijl het onderwerp beweegt.

Maak tenslotte gebruik van de burst-modus om meerdere foto’s snel achter elkaar te nemen. Hoeveel foto’s je kan maken hangt af van je camera. Zorg voor een snel geheugenkaartje om al deze data te kunnen opslagen zonder dat je camera begint te haperen, meer hierover in het punt hieronder!

10 tips voor het fotograferen van honden in actie!

3. Check je geheugenkaartje!

Voor het fotograferen van honden in actie is het belangrijk om een snel geheugenkaartje te gebruiken. Dit wordt vaak over het hoofd gezien. Je kan een camera hebben die perfect veel beelden per seconde kan maken, maar als je hier een traag geheugenkaartje insteekt zal je camera al gauw blokkeren omdat het de hoeveelheid aan gegevens niet tijdig kan wegschrijven.


Op een geheugenkaart van een camera vind je verschillende symbolen en cijfers die de specificaties en prestaties van de kaart aangeven. Koop een geheugenkaartje met voldoende capaciteit (zelf gebruik ik een kaartje van 128 GB) en een hoge schrijfsnelheid. Dit zijn de daadwerkelijke lees- en schrijfsnelheden van de kaart, uitgedrukt in megabytes per seconde (MB/s). Een kaartje met een schrijfsnelheid van 300 megabytes per seconde geniet mijn voorkeur.

10 tips voor het fotograferen van honden in actie!

4. Varieer met een speeltje!

Sommige honden worden helemaal “gek” als je hun favoriete speeltje tevoorschijn haalt, extra leuk dus om dat ook mee in de foto’s te betrekken!

10 tips voor het fotograferen van honden in actie!

5. Meerdere honden in actie

Als baasjes met meerdere honden komen is het altijd leuk om een actiefoto van hen samen te maken. Het is echter een hele uitdaging om beide honden dan scherp in beeld te krijgen omdat ze maar zelden op eenzelfde lijn lopen samen.

Kies voor een locatie met veel diepte, maak je achtergrond zo vaag mogelijk (lees in dit artikel hoe je dit voor elkaar krijgt) en houd Photoshop to the rescue in gedachten als ze niet netjes naast elkaar lopen!

10 tips voor het fotograferen van honden in actie!

Een stok of ander speeltje kan erg helpend zijn om je modellen min of meer in dezelfde positie te houden terwijl ze toch in volle actie zijn!

10 tips voor het fotograferen van honden in actie!

6. Een sprintje trekken met het baasje

Tref je een sportief baasje of een enthousiast kind dat mee op de foto wil? Dan vind ik het altijd geweldig om ze samen te laten lopen en dit te fotograferen. Met kinderen levert dit heerlijke spontane foto’s op, ze krijgen het alvast niet koud en hadden niet verwacht dat de fotoshoot zo leuk en actief zou zijn!

10 tips voor het fotograferen van honden in actie!

7. Keuze van je locatie

Aangezien je een hoge sluitertijd gebruikt voor actiefotografie is de keuze van je locatie extra belangrijk als je actiefoto’s wil maken. Door de hoge sluitertijd kan je ISO al gauw de pan uit swingen als je in een donkere omgeving zit, wat resulteert in foto’s van slechte kwaliteit met heel veel ruis.

Een open veld verdient daarom mijn voorkeur voor het maken van actiefoto’s. Hieronder loopt de cocker spaniël in een aardappelveld. De looprichting is hiermee “onder controle”, er is voldoende licht om je ISO laag te houden en je hebt meteen een originele omgeving met “bloemen” in je foto! Ook een boomgaard of het bos in de winter als er geen bladeren aan de bomen hangen lenen zich uitstekend voor actiefoto’s.

8. Back button focus

You love it or you hate it, ik ben alvast een fan!

Back button focus is een geavanceerde techniek in de fotografie waarbij de autofocusfunctie van een camera wordt losgekoppeld van de ontspanknop en wordt toegewezen aan een aparte knop op de achterkant van de camera, vaak aangeduid als de AF-ON-knop.

Normaal gesproken wordt de autofocus van een camera geactiveerd wanneer je de ontspanknop half indrukt. Dit betekent dat de camera zowel het scherpstellen als het vastleggen van het beeld activeert wanneer je de ontspanknop indrukt. Bij back button focus wordt de autofocus echter geactiveerd door de AF-ON-knop op de achterkant van de camera in te drukken, terwijl de ontspanknop alleen wordt gebruikt om de foto daadwerkelijk te maken.

Dit heeft voor het fotograferen van honden in actie allerlei voordelen! Door de autofocus te scheiden van de ontspanknop, heb je meer controle over het scherpstelpunt. Je kunt bijvoorbeeld scherpstellen op een onderwerp en de scherpstelling vergrendelen door de AF-ON-knop ingedrukt te houden, terwijl je de compositie aanpast zonder dat de focus verandert.

Omdat de autofocus al is ingesteld voordat je de ontspanknop indrukt, kan de camera sneller reageren op veranderende scènes of bewegende onderwerpen. Extra handig dus voor onze snel bewegende honden!

Bovendien verklein je de kans op onscherpe foto’s doordat de autofocus niet opnieuw wordt geactiveerd telkens wanneer je de ontspanknop indrukt!

Kijk in de handleiding van je camera hoe je dit best instelt en experimenteer er een keertje mee om te zien of het je bevalt!

9. Laag perspectief

Ga op de grond liggen bij het maken van actiefotos, zo knalt de hond echt uit je foto en geef je hem een imposante uitstraling. Experimenteer ook eens met een groothoeklens zoals op onderstaande foto (gemaakt met de RF 16-35 mm) als je wat meer van de omgeving in je beeld wil laten zien.

10. Extra tips

  • Als je ook nog portretfoto’s wil maken tijdens de shoot begin daar dan eerst mee voor je overschakelt naar actiefoto’s, anders eindig je al snel met portretfoto’s met hééééle lange tongen en vermoeide blikken!
  • Neem altijd voldoende water mee voor de hond en vermijd actiefoto’s als de temperaturen te hoog zijn. De winter is de meest ideale periode voor actie!
  • Zorg voor een veilige omgeving met weinig afleiding en respecteer de grenzen van de hond als je merkt dat die vermoeid begint te worden.
  • Probeer het ook eens met een kat als je jezelf wil uitdagen, ze trekken ook al eens graag een sprintje 🙂

Wil jij je verder specialiseren in hondenfotografie en honden op een artistieke manier in beeld leren brengen? Overweeg dan een workshop artistieke hondenfotografie om je vaardigheden een boost te geven en je fotografie naar een nieuw niveau te tillen!

Nederlands

10 tips voor het fotograferen van honden in actie

10 tips voor het fotograferen van honden in actie Meer lezen »

In the TV program “The Perfect Picture” 8 well-known Flemish personalities, under the direction of presenter Manu Van Acker, compete against each other to take the perfect photo!

Each episode features two specializations in photography, and of course, dog photography couldn’t be left out!

So one day, I was contacted by the production company asking if I wanted to participate in this episode. Of course, I immediately agreed and off we went!

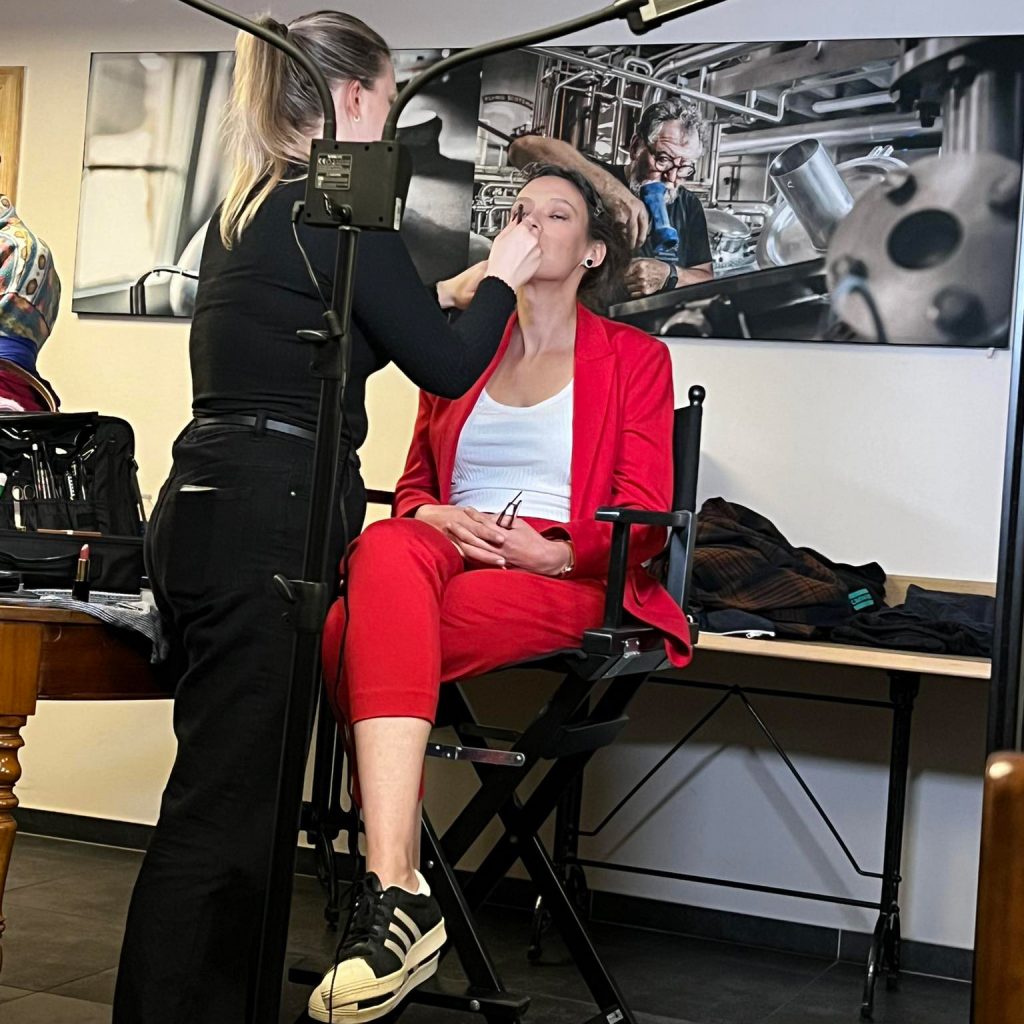
A quick touch of makeup before meeting the contestants and explaining the task to them!

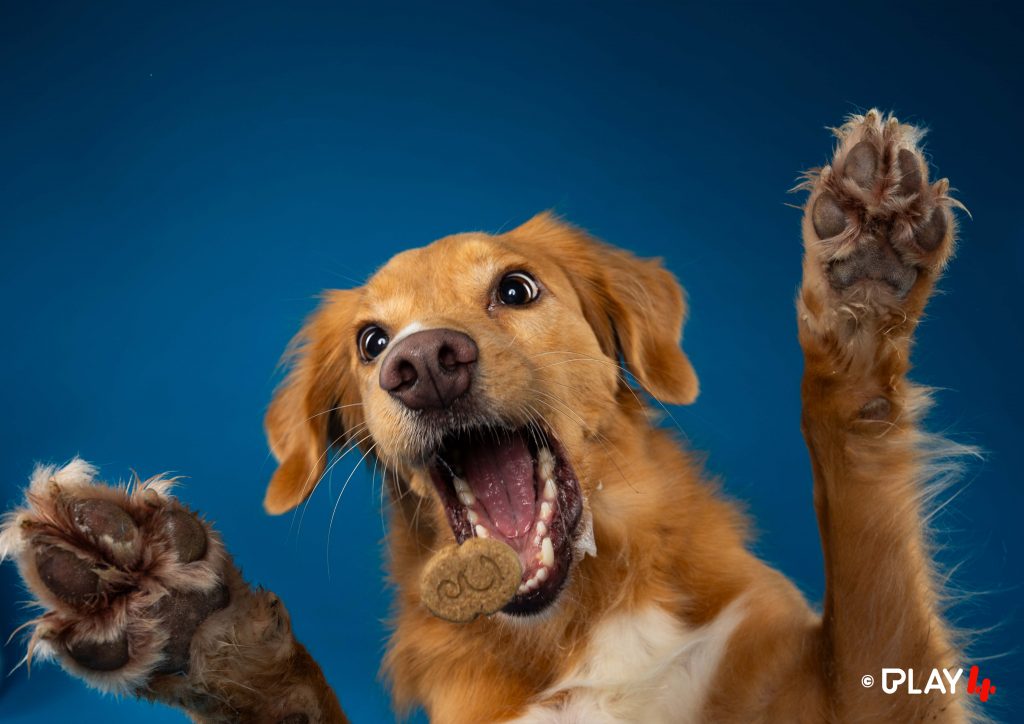
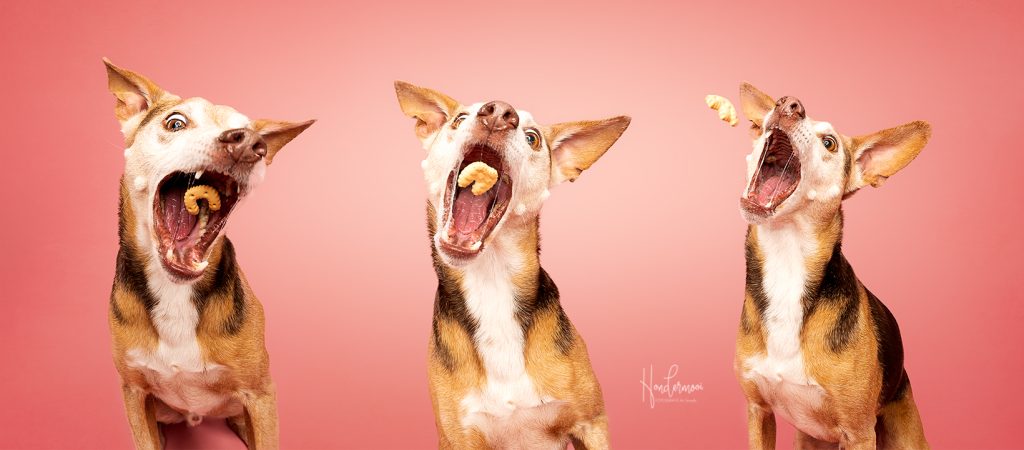
Catching treats for "The perfect picture" on Play4

Theme

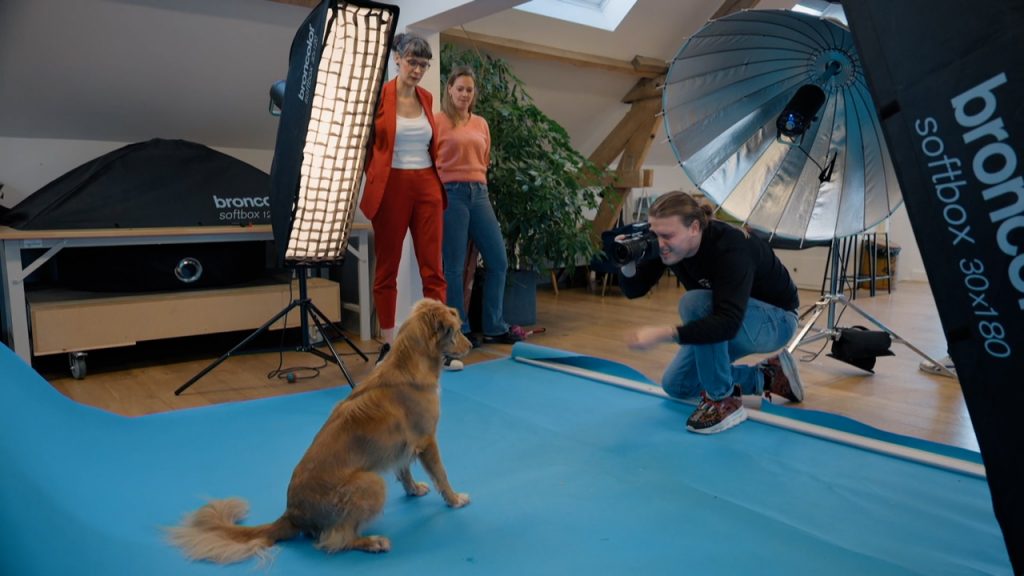
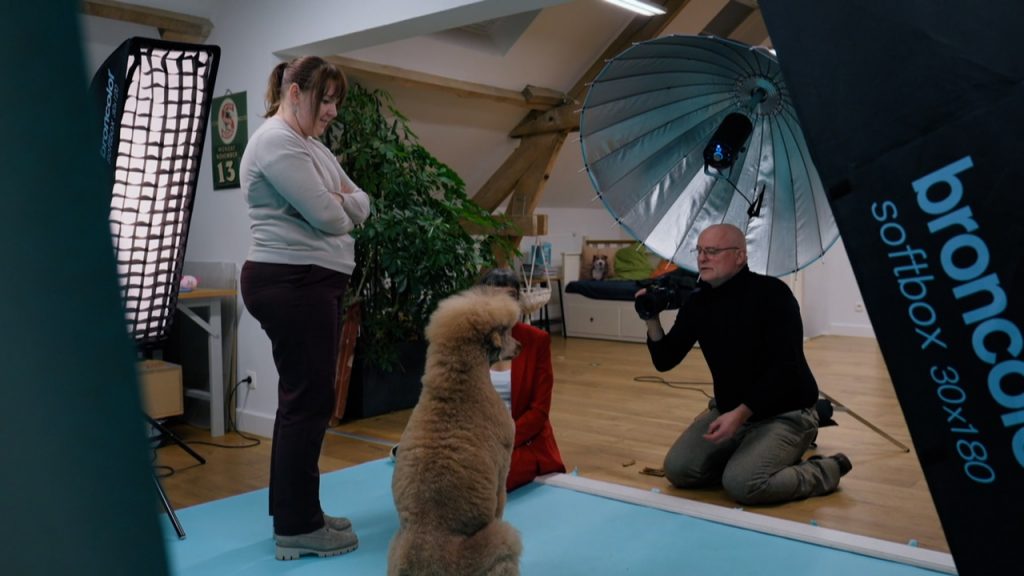
The theme was “dogs catching treats” and the celebrities descended to Pellenberg where they were each assigned a wonderful model to work with in my studio.

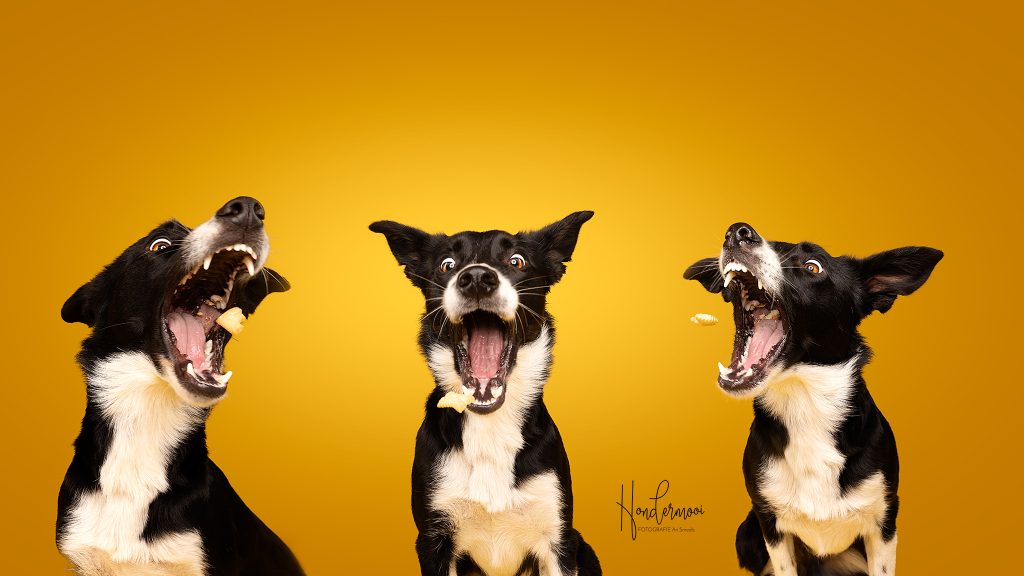
Ingeborg Sergeant was assigned Niké the border collie as a model. Bie Baert got to work with the super cute Cas the bichon frisé. Filip Peeters had Aslan the standard poodle in front of his lens, Joffrey Anane had Bean the beautiful wolfhound, and Julius Persoone got to throw treats for Nysha the toller.

They were given a time limit of 30 minutes to complete the task, and there had to be a clear “action” in the photo.

Especially for those who had no experience with dogs, it became quite a challenge to complete the task successfully, but all’s well that ends well! After 30 minutes, they had all managed to deliver at least 1 “Perfect Picture”!

Catching treats for "The perfect picture" on Play4

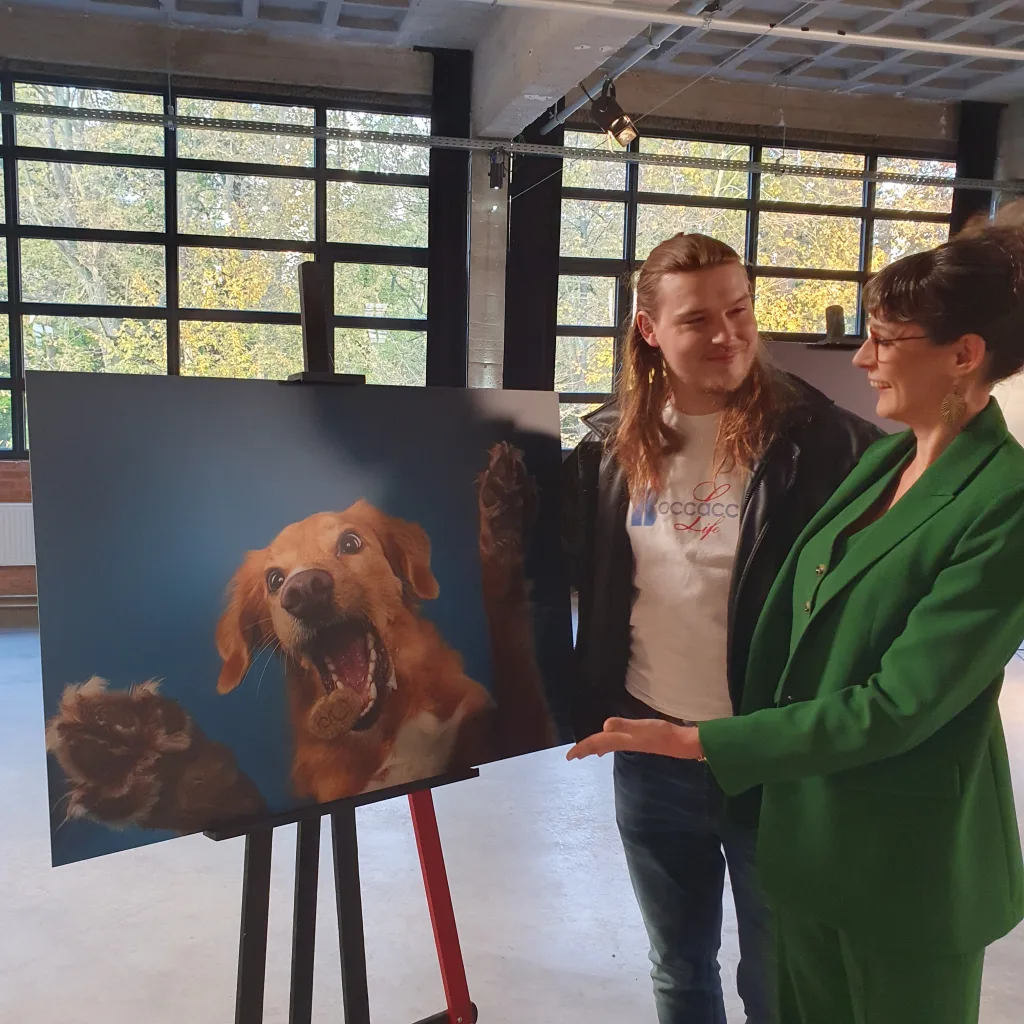
Next, the photos were printed, and as a jury member, I got to give points alongside the regular judges Sofie Van De Velde and Zeger Garré, and assess who had executed the task the best.

Catching treats for "The perfect picture" on Play4

Catching treats for "The perfect picture" on Play4

Julius immediately succeeded in gaining the trust of Nysha with his calm approach and even added an original extra touch by combining a trick with the catching action.

A big congratulations to Julius on your well-deserved victory!

Catching treats for "The perfect picture" on Play4

Would you like to try this yourself with your dog? Below, I’ll gladly give you some tips to help you succeed!

1. Use a wide-angle lens

With a wide-angle lens, you can get close to your dog and throw the treat at the right moment. Your eye-hand coordination will be put to the test, but by throwing it yourself, you can easily capture the right “action moment.” If you have trouble holding your camera steady, use a camera hand strap; it will also support your wrist more.

2. The right flash equipment

When working with flash lighting, you need a flash with a short flash duration and a fast recycle time. Personally, I use broncolor siros flashes for this purpose. Each flash has a different flash duration, and at full power, the flash has a slower speed than at half power.

Now, getting a bit technical… You need to look for the T1 value of your flash. This indicates the time needed for 90% of the total flash to be discharged.

Many photographers in Belgium use Godox, so let’s take a look at the T1 values of the Godox AD600 Pro:

  • 1/1 1/220
  • 1/2 1/740
  • 1/4 1/1470
  • 1/8 1/2352
  • 1/16 1/3448
  • 1/32 1/4651
  • 1/64 1/5780
  • 1/128 1/8130
  • 1/256 1/10000

To photograph dogs in action outdoors, a shutter speed of 1/1000 is sufficient, but in the studio, it’s a bit different. You can expect that from a shutter speed of 1/2000 or more, you have a good chance of completely freezing your motion and keeping it sharp.

3. Camera settings

Each camera brand and model has its own sync speed. This is the maximum shutter speed at which the camera can work with the flash. If you’re unsure of yours, check the manual or use 1/160 to avoid black bars in your image.

Once you’ve set the shutter speed, adjust your ISO. This is the sensitivity of the sensor. I prefer to shoot in the studio at ISO 100 for optimal quality!

Finally, choose your aperture; I typically use around f/8 in the studio.

I set the white balance to flash and for focusing, I use automatic eye autofocus for animals on my mirrorless camera (Canon R6 and Canon R5). If you’re using a DSLR, use a single focus point and focus on the nearest eye.

4. Extra tips

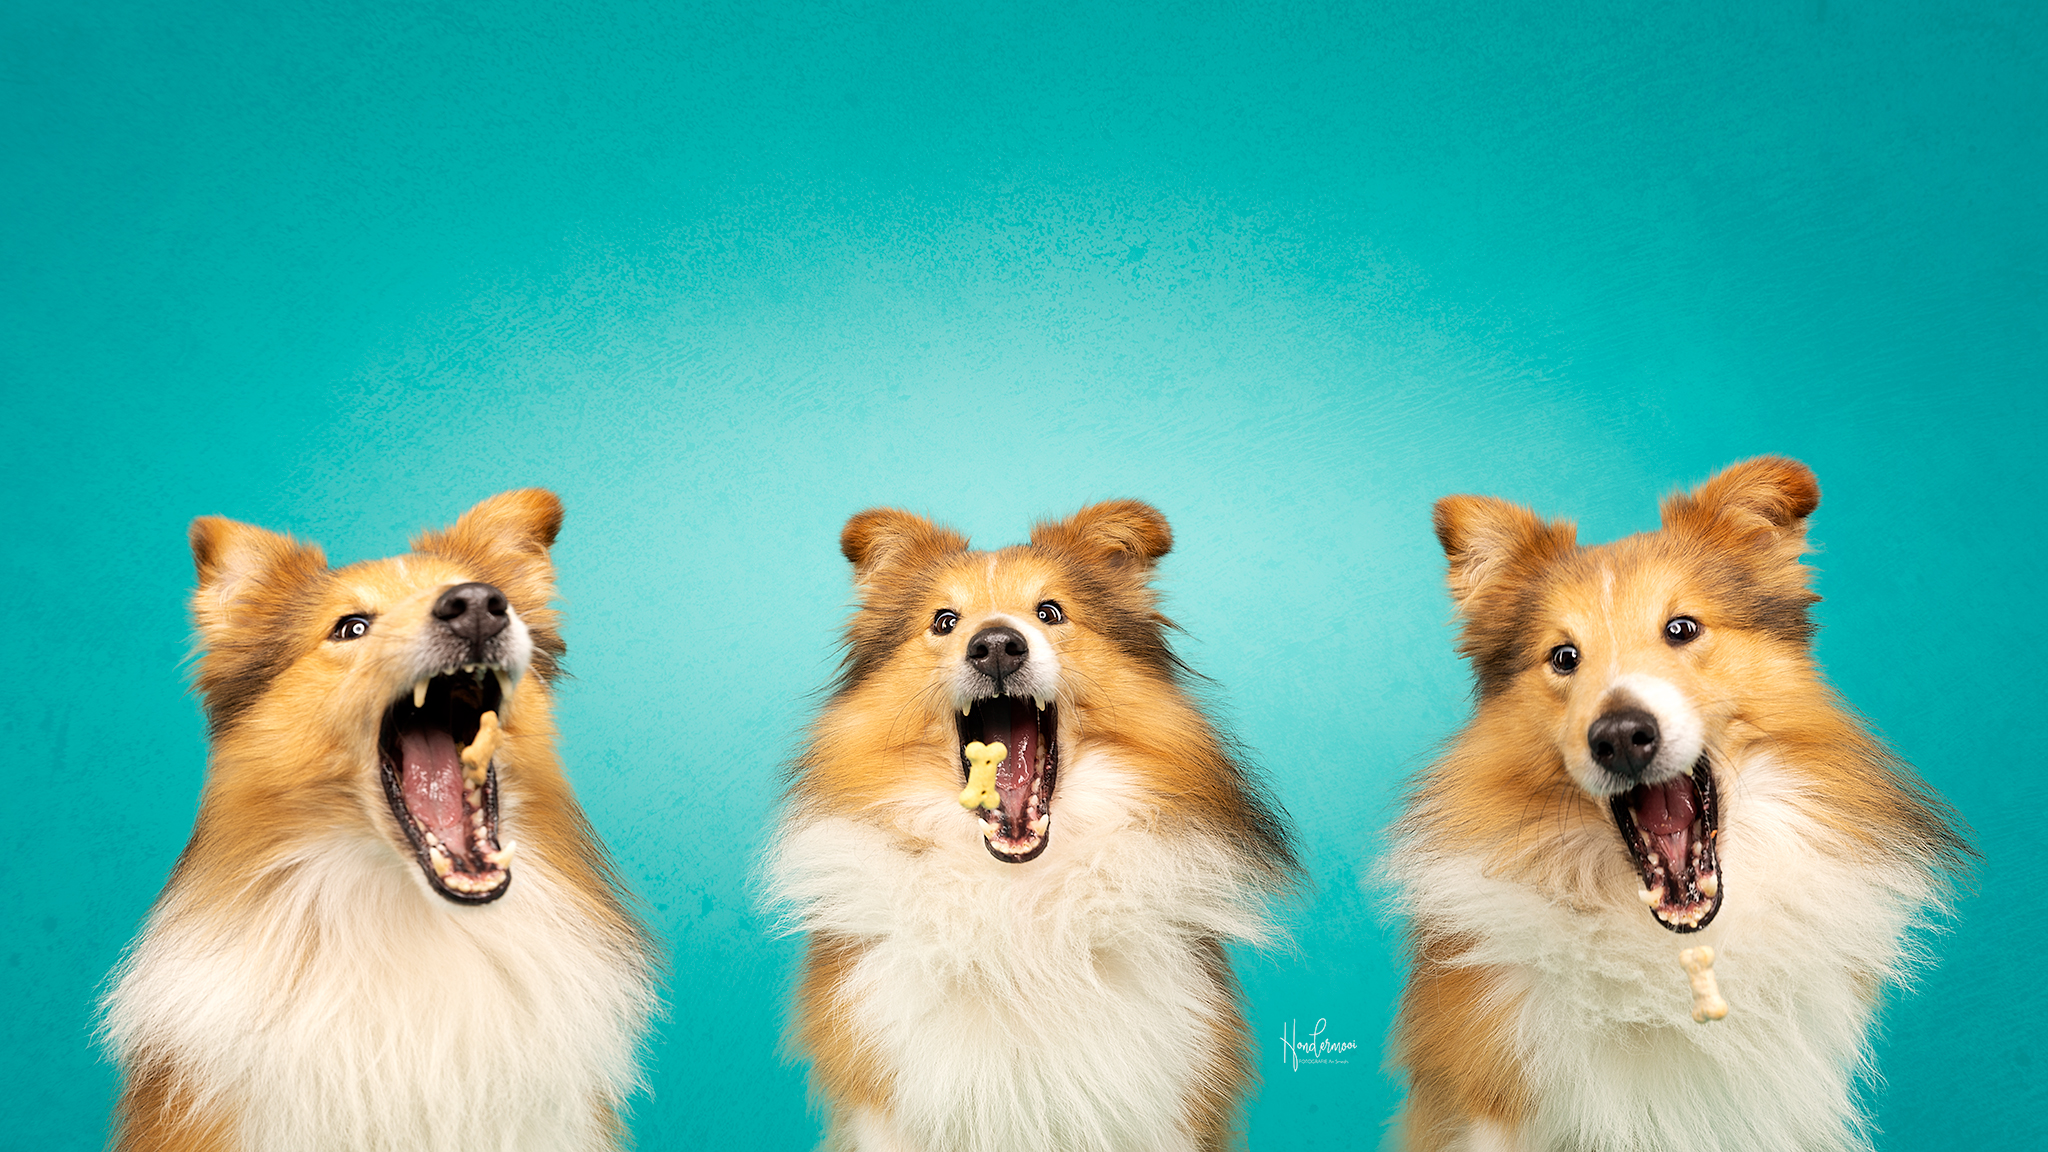
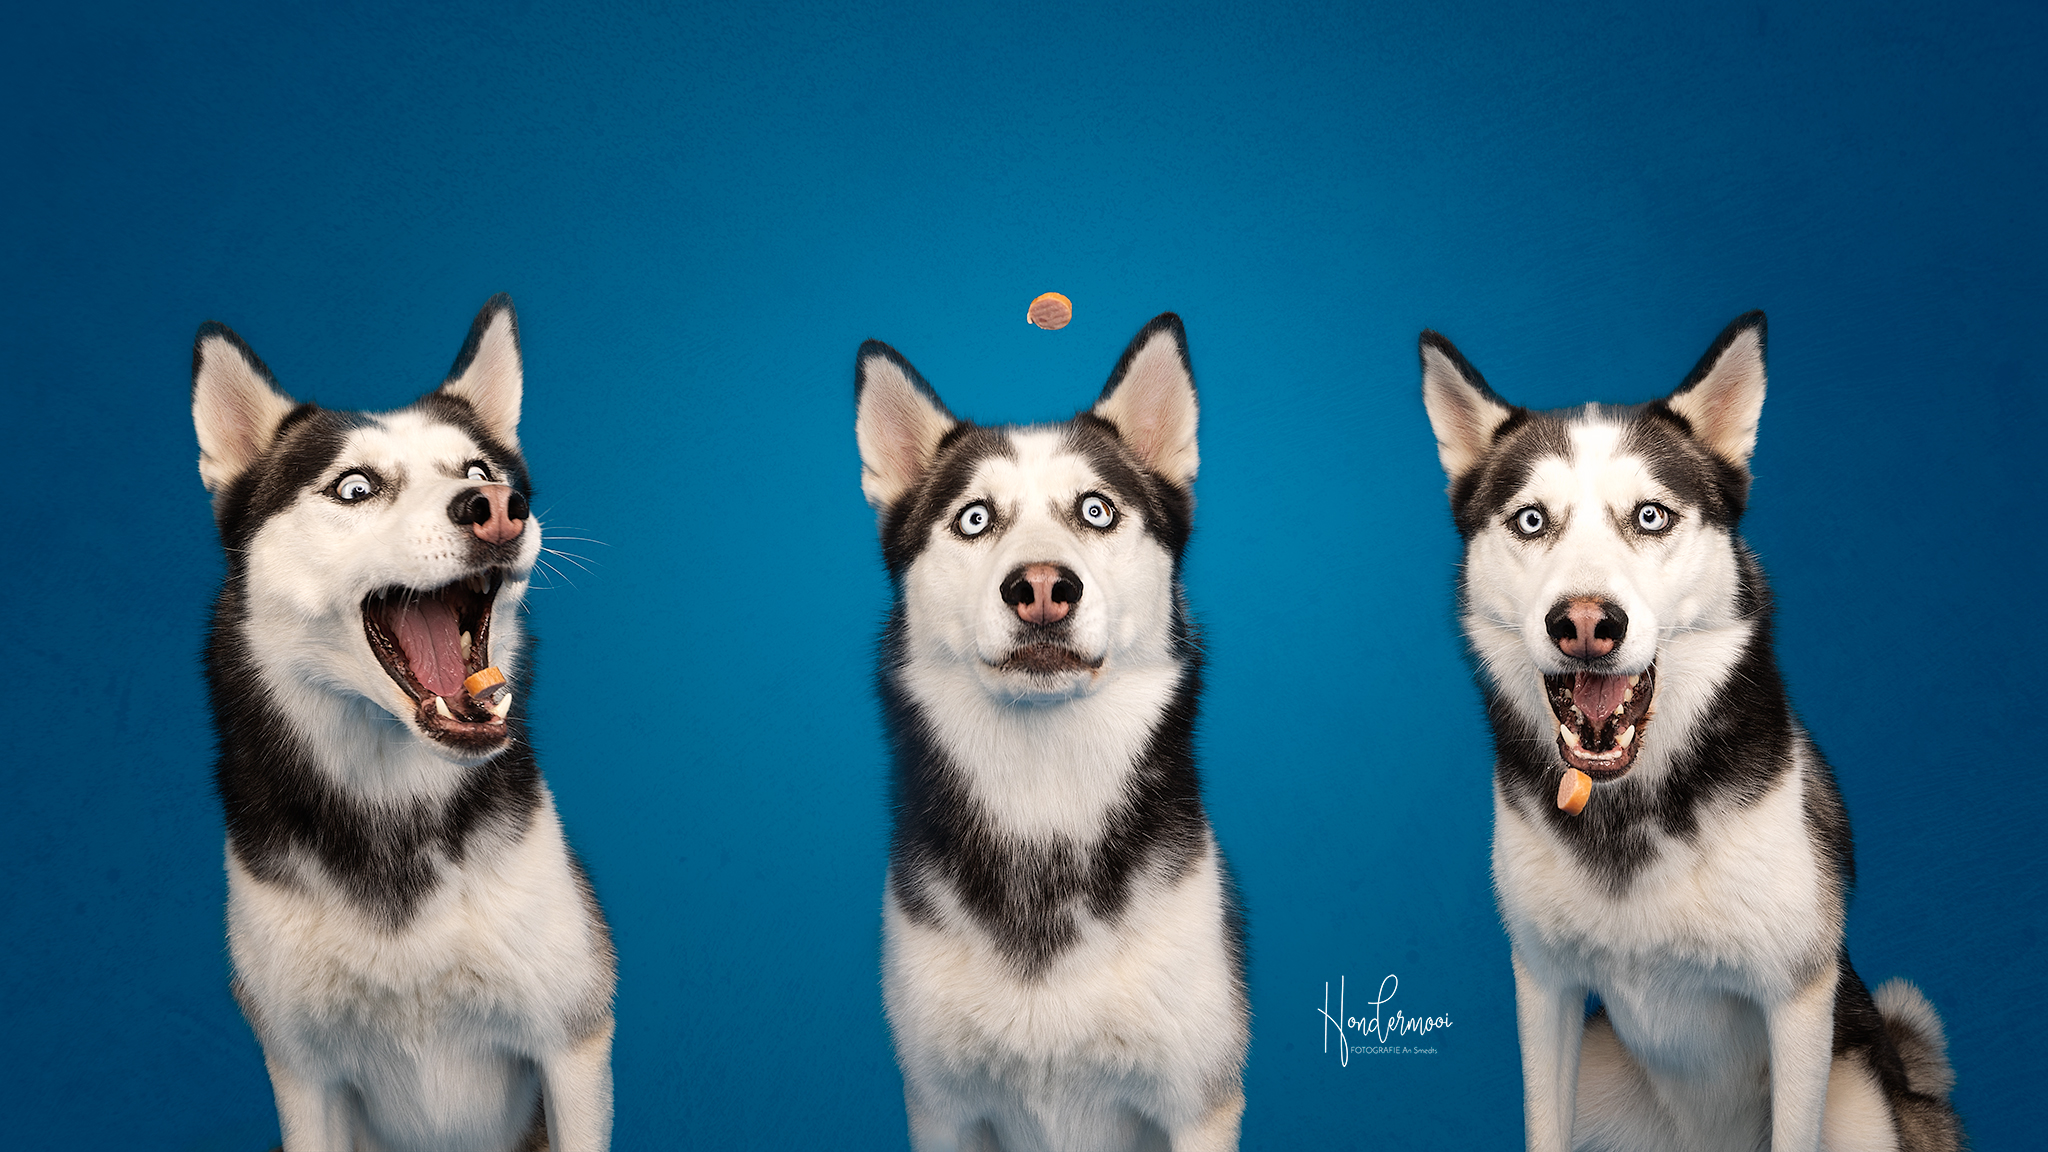
  • If you want a real “catch” photo, it’s important that the dog knows how to do this. Most dogs won’t catch at a treat if they haven’t been taught to do so. Of course, this can also result in hilarious photos!
  • Use a toy as an alternative if the dog doesn’t want to catch the treat.
  • Create a collage in Photoshop instead of a single catching photo if you can’t decide which photo you like the most!
  • Always check with the owner first if the dog has any food allergies before using your own treats.
  • Practice! Practice! Practice! Your dog certainly won’t get tired of those treats quickly!
  • Once you’ve mastered it, experiment with what you throw. Maybe shaping a letter of the dog’s name with a letter-shaped treat is just that bit more original than a regular treat. Ultimately, we aim for nothing less than “The Perfect Picture” 🙂 !

G O O D L U C K !

English

Catching treats for “The perfect picture” on Play4

Catching treats for “The perfect picture” on Play4 Meer lezen »

In het TV programma “Het perfecte Plaatje” gaan 8 bekende Vlamingen onder leiding van presentator Manu Van Acker de strijd met elkaar aan om de perfecte foto te maken!

Elke aflevering komen er twee specialisaties in de fotografie aan bod en natuurlijk mocht hondenfotografie niet ontbreken!

Zo werd ik op een dag gecontacteerd door het productiehuis met de vraag of ik aan deze aflevering wilde meewerken. Uiteraard zag ik het meteen zitten om de allerleukste tak van de fotografie als expert mee in de spotlights te zetten! Daar gingen we dan!

Nog even wat make up alvorens kennis te maken met de kandidaten en hen de opdracht uit te leggen!

Brokjes happen voor het Perfecte Plaatje

Voor de opdracht kregen de kandidaten een Canon R6 met een 14-35 mm lens. Niet alleen de techniek is belangrijk, nog veel belangrijker is dat de hond zich op zijn gemak voelt tijdens de fotoshoot!

Het thema werd “brokjes happen” en de BV’s zakten af naar Pellenberg waar ze elk een whondermooi model toegewezen kregen om mee aan de slag te gaan in mijn studio.

Ze kregen een tijdslimiet opgelegd van 30 minuten om de opdracht uit te voeren en er moest een duidelijk “actie” in de foto te zien zijn.

Zeker voor diegenen die geen ervaring hebben met honden werd het een hele uitdaging om de opdracht tot een goed einde te brengen maar eind goed, al goed! Na 30 minuten waren ze er allemaal in geslaagd om minstens 1 “Perfect Plaatje” af te leveren!

Julius Persoone met Nysha de toller

Ingeborg Sergeant met Niké de border collie

Flilip Peeters met Aslan de koningspoedel

Vervolgens werden de foto’s afgedrukt en mocht ik als jurylid samen met de vaste jury Sofie Van De Velde en Zeger Garré punten geven en bekijken wie de opdracht het beste had uitgevoerd.

Brokjes happen voor het Perfecte Plaatje

Brokjes happen voor het Perfecte Plaatje

Julius slaagde er met zijn rustige aanpak meteen in om Nysha voor zich te winnen en voegde zelfs een origineel extraatje aan toe door een trucje te combineren met de vangactie. Een prachtig beeld!

Een dikke proficiat Julius met je welverdiende overwinning en ook een pluim voor de andere kandidaten om de opdracht tot een goed einde te brengen!

Brokjes happen voor het Perfecte Plaatje

Wil je dit zelf graag eens proberen met je hond? Hieronder geef ik jullie graag enkele tips om er mee aan de slag te gaan!

1. Gebruik een groothoeklens

Met een groothoeklens kan je zelf dicht bij de hond komen en het brokje op het juiste moment gooien. Je oog-hand coördinatie zal op de proef gesteld worden maar door zelf te gooien kan je makkelijk het juiste “actiemoment” vangen. Heb je moeite om je camera stabiel vast te houden? Gebruik dan een camera hand strap, het zal ook je pols meer ondersteunen.

2. De juiste flitsapparatuur

Als je werkt met flitslicht heb je een flits nodig met een korte flitsduur en een snelle recycletijd. Zelf werk ik hiervoor met broncolor siros flitsers. Elke flits heeft een andere flitsduur en bij volledig vermogen heeft de flits een tragere snelheid dan bij half vermogen.

Even technisch….. Je moet op zoek naar de T1 waarde van je flitser. Dit geeft de tijd aan die nodig is voor 90% van de totale flits om te worden ontladen.

Veel fotografen in België gebruiken Godox dus laten we even kijken naar de T1 waarden van de Godox AD600 pro

  • 1/1 1/220
  • 1/2 1/740
  • 1/4 1/1470
  • 1/8 1/2352
  • 1/16 1/3448
  • 1/32 1/4651
  • 1/64 1/5780
  • 1/128 1/8130
  • 1/256 1/10000

Om honden in actie te fotograferen buiten is een sluitertijd van 1/1000 voldoende maar voor studio ligt dit toch wat anders. Je kan er van uitgaan dat je vanaf een sluitertijd van 1/2000 een goede kans hebt om je beweging volledig scherp te bevriezen.

3. Camera instellingen

Elk cameramerk en model heeft zijn eigen synchronisatiesnelheid. Dit is de maximale sluitertijd waarmee de camera met de flitser kan werken. Als je de jouwe niet kent, kijk dan even in de handleiding of gebruik 1/160 om zwarte strepen in je beeld te vermijden.

Met de sluitertijd ingesteld, stel je vervolgens je ISO in. Dit is de gevoeligheid van de sensor. Ik geef er de voorkeur aan om in de studio te fotograferen met ISO 100 voor een perfecte kwaliteit!

Tenslotte kies je nog je diafragma, meestal gebruik ik een waarde rond f8 in de studio.

De witbalans zet ik op flits en voor de scherpstelling maak ik gebruik van de automatische eye auto focus voor dieren in mijn systeemcamera (canon R6 en canon R5). Werk je met een digitale spiegelreflex camera? Gebruik dan 1 scherpstelpunt en stel scherp op het dichtsbijzijnde oog.

4. Extra tips

  • Als je een echte “hap” foto wil is het belangrijk dat de hond dit kent. De meeste honden zullen helemaal niet happen naar een brokje als ze dit niet geleerd hebben om te doen. Uiteraard kan dit ook hilarische foto’s opleveren!
  • Gebruik een speeltje als alternatief als de hond niet naar het brokje wil happen.
  • Maak een collage in Photoshop in plaats van 1 enkele vangfoto als je niet kan kiezen welke foto je de leukste vindt!
  • Check altijd eerst bij het baasje of de hond een voedsel allergie heeft als je gebruik wil maken van je eigen koekjes.
  • Oefen! Oefen! Oefen! Je hond zal al die koekjes alvast niet snel beu worden!
  • Heb je het onder de knie? Experimenteer dan eens met wat je gooit. Misschien is de eerste letter van de hond zijn naam in de vorm van een letterkoekje nog net dat tikje origineler dan een gewoon brokje. Uiteindelijk gaan we voor niets minder dan “Het Perfecte Plaatje” 🙂 !

S U C C E S !

Nederlands

Brokjes happen voor het Perfecte Plaatje op Play 4

Brokjes happen voor het Perfecte Plaatje op Play 4 Meer lezen »

In dit artikel deel ik graag 10 tips voor iedereen die aan het begin van zijn avontuur staat als hondenfotograaf!

1. Werk met natuurlijk licht

Als je een mooie sfeer in je foto’s wil is het belangrijk om met het juiste licht te werken.

Het mooiste licht vind je meestal tijdens het blue hour, een uur na zonsopgang, of tijdens het golden hour, een uur voor zonsondergang. Het licht is dan minder hard waardoor je minder harde schaduwen krijgt in je beeld en een zachtere sfeer kan creeëren.

Ook een bewolkte dag is prima voor foto’s. De bewolking zorgt voor een mooie egale verdeling van het licht met een zacht effect op je model!

10 tips voor de beginnende hondenfotograaf buiten

2. Besteed voldoende aandacht aan de achtergrond

Kies je locatie zorgvuldig en let hierbij vooral op de achtergrond. Plaats de hond niet net voor een boom want dan lijkt het alsof die uit zijn hoofd groeit! Zoek een plek waar je veel diepte hebt zoals een dreef of een lang bospad. Op die manier kan je de achtergrond mooi vaag houden zodat alle aandacht naar je onderwerp gaat!

Lees hier meer over hoe je een zachte achtergrond kan creeëren in je foto’s!

10 tips voor de beginnende hondenfotograaf buiten

3. Werk op ooghoogte van de hond

Zelf lig ik tijdens een fotoshoot buiten meestal plat op de grond! Op die manier lijkt het alsof de hond recht je camera binnen stapt en krijg je een meer sprekend beeld dan wanneer je de hond “uit de hoogte” fotografeert.

Uiteraard zijn regels er ook om van af te wijken en kan je soms ook eens een ander perspectief kiezen om wat meer variatie te brengen in je shoot.

10 tips voor de beginnende hondenfotograaf buiten

4. Stel scherp op het dichtsbijzijnde oog

Gebruik 1 scherpstelpunt in je camera of gebruik de animal eye autofocus als je deze in je camera hebt. Stel altijd scherp op het dichtsbijzijnde oog.

Als je met meerdere honden werkt probeer ze dan op 1 lijn te zetten zodat ze allemaal scherp zijn.

10 tips voor de beginnende hondenfotograaf buiten

5. Gebruik een voldoende hoge sluitertijd!

Honden vinden het heerlijk om te rennen en in beweging te zijn. Ook tijdens het maken van een portret zal de hond niet altijd volledig “stil” zitten. Anticipeer hierop door je sluitertijd voldoende hoog in te stellen.

Een sluitertijd van 1/1000 is een goed uitgangspunt om de beweging van een hond in actie te kunnen bevriezen.

10 tips voor de beginnende hondenfotograaf buiten

6. Beloon! Beloon! Beloon!

Het allerbelangrijkste tijdens een fotoshoot met honden is dat de hond er plezier aan heeft! Uiteraard zal het hem niet veel kunnen schelen dat het baasje een prachtige foto aan de muur wil maar hoe meer plezier de hond heeft tijdens de shoot, hoe meer je dit ook zal terugzien in de foto’s!

Beloon de hond dus uitgebreid met lekkers, zijn favoriete speeltje of een dikke knuffel tijdens de sessie!

10 tips voor de beginnende hondenfotograaf buiten

7. Trek de aandacht met je stem

Uiteraard hoeft de hond op elke foto niet recht in de camera te kijken maar voor het maken van een sprekend portret is het handig als je op een snelle manier de aandacht kan trekken. Zelf werk ik het liefst met mijn stem. Die heb je altijd bij je en je hoeft geen pieper of iets anders in je hand te houden.

Maak hoge piepgeluidjes of een onverwacht geluid om de aandacht te trekken. Ook woordjes zoals “koekje?” kunnen een goed effect geven! Dit zorgt voor een expressieve blik met mooie rechtopstaande oortjes! Vermijd echter wel om de naam van de hond te roepen, veel honden zullen dan namelijk naar je toe komen!

8. Breng variatie in je shoot

Eens je de “klassieke” houdingen zoals “zit” en “lig” hebt vereeuwigd is het leuk om wat meer afwisseling in je shoot te brengen. Vraag aan het baasje of de hond nog andere dingen kent, wissel eens van lens, probeer een ander perspectief of neem een prop mee zoals een tas, sjaal, lantaarn, deken, kar voor wat variatie!

Wie weet kent de hond ook enkele leuke trucjes die je in je shoot kan integreren? Lees dit artikel als je meer inspiratie wil voor leuke hondentrucjes!

9. Maak je actiefoto’s als laatste

Actiefoto’s zijn altijd leuk maar ook vermoeiend voor de hond. Als je hiermee begint en je laat de hond een aantal keren lekker rennen zal zijn tong al gauw tot op de grond hangen, zeker in de zomer! Het wordt dan een stuk moeilijker om daarna nog mooie portretten te maken. Daarom houd ik de actiefoto’s altijd voor het laatste en is het ook een positieve manier om de shoot te eindigen!

10. Vergeet de baasjes niet…..

Veel baasjes maken eindeloos veel foto’s van hun geliefde viervoeter maar hebben bijna geen enkele foto waar ze zelf mee opstaan. Het is dus fijn om ook hen even een moment te geven tijdens de shoot om in de spotlights te staan samen met hun hond!

Wil jij je verder specialiseren in hondenfotografie en honden op een artistieke manier in beeld leren brengen? Overweeg dan een workshop artistieke hondenfotografie om je vaardigheden een boost te geven en je fotografie naar een nieuw niveau te tillen!

Nederlands

10 tips voor de beginnende hondenfotograaf buiten

10 tips voor de beginnende hondenfotograaf buiten Meer lezen »
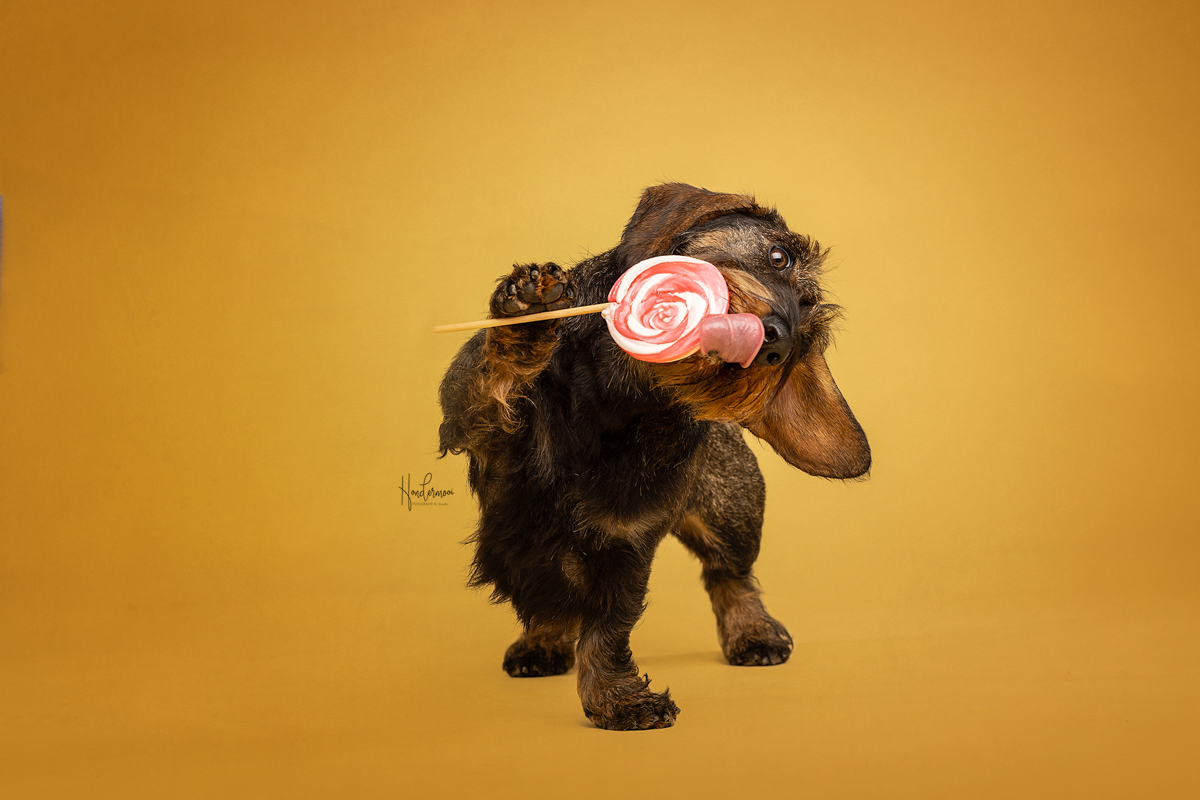
In this article, I’d like to share 10 dog photography tips for beginners who are embarking on their journey as a dog photographer!

1. Work with natural light

If you want to create a beautiful atmosphere in your photos, it’s important to work with the right light.

The most beautiful light is usually found during the blue hour, an hour after sunrise, or during the golden hour, an hour before sunset. During these times, the light is less harsh, resulting in softer shadows and a more gentle atmosphere in your images.

Even a cloudy day is fine for photos. The cloud cover provides a beautiful even distribution of light with a soft effect on your subject!

10 dog photography tips for beginners

2. Pay attention to the background

Choose your location carefully, paying special attention to the background. Avoid placing the dog directly in front of a tree, as it may appear as if the tree is growing out of its head! Look for a location with ample depth, such as an alleyway or a long forest path. This way, you can keep the background nicely blurred, directing all the attention to your subject!

Read more here about how to create a soft background in your photos!

10 dog photography tips for beginners

3. Work at the dog’s eye level

During an outdoor photoshoot, I typically lie flat on the ground! This creates the impression that the dog is stepping directly into your camera, resulting in a more engaging image compared to shooting the dog from above.

Of course, rules are also meant to be broken, and occasionally, you can choose a different perspective to add some variety to your shoot.

10 dog photography tips for beginners

4. Focus on the closest eye

Use a single focus point in your camera or utilize the animal eye autofocus if available. Always focus on the closest eye.

If you’re working with multiple dogs, try to align them on the same plane so that they are all in focus.

10 dog photography tips for beginners

5. Use a high shutter speed

Dogs love to run and be active. Even during a portrait session, the dog may not always remain completely still. Anticipate this by setting your shutter speed high enough.

A shutter speed of 1/1000 is a good starting point to freeze the motion of a dog in action.

10 dog photography tips for beginners

6. Reward!

The most crucial aspect during a photoshoot with dogs is that the dog enjoys it! Of course, the dog won’t care much about the owner wanting a beautiful photo on the wall, but the more fun the dog has during the shoot, the more it will reflect in the photos!

Reward the dog generously with treats, its favorite toy, or a big cuddle during the session!

10 dog photography tips for beginners

7. Capture attention with your voice

Of course, the dog doesn’t need to look directly into the camera for every photo, but for creating a compelling portrait, it’s helpful if you can quickly grab their attention. Personally, I prefer using my voice. It’s always with you, and you don’t need to hold a squeaker or anything else in your hand.

Make high-pitched squeaking noises or an unexpected sound to grab attention. Also, words like “treat?” can have a good effect! This results in an expressive gaze with beautifully perked-up ears! However, avoid calling the dog’s name; many dogs will come to you then!

10 dog photography tips for beginners

8. Introduce variation into your shoot

Once you’ve immortalized the “classic” poses like “sit” and “down,” it’s fun to bring some more diversity into your shoot. Ask the owner if the dog knows any other commands, switch lenses, try a different perspective, or bring a prop like a bag, scarf, lantern, blanket, or cart for some variety!

Who knows, the dog might also know some fun tricks that you can integrate into your shoot? Read this article if you want more inspiration for fun dog tricks!

9. Save your action shots for last!

Action shots are always fun but also tiring for the dog. If you start with them and let the dog run around several times, its tongue will soon be hanging out, especially in the summer! It then becomes much harder to take beautiful portraits afterward. That’s why I always save the action shots for last, and it’s also a positive way to end the shoot!

10. Don’t forget the owners…

Many owners take endless photos of their beloved four-legged friends but have hardly any photos with themselves in them. So, it’s nice to give them a moment during the shoot to be in the spotlight together with their dog!

Are you looking to further specialize in dog photography and learn how to capture dogs in an artistic manner? Consider taking a workshop on artistic dog photography to boost your skills and elevate your photography to a new level!

English

10 dog photography tips for beginners

10 dog photography tips for beginners Meer lezen »
A frequently asked question during studio photography workshops is which studio flash is best to purchase when working with dogs. It’s difficult to give a straightforward answer because it depends on your budget, the space you have available, whether you also want to capture action, and so on…

In the article below, I’d like to provide some guidelines to consider when purchasing a flash.

1. Flash power

The power of a studio flash is expressed in Watts and determines how much light the flash emits. The smaller your space, the quicker you’ll get by with less power; the larger your space, the more you’ll benefit from a flash with higher power. Also, if you plan to photograph multiple dogs simultaneously, higher power can be advantageous.

Specifically for dogs, it’s important to consider that the higher you set the flash output, the more “noise” the flash will make, which could be disturbing for some breeds sensitive to noise. From that perspective, it’s interesting to invest in a flash with higher power so that you don’t have to set it at full power, making it less threatening for the dog.

Personally, I have a large space available and work with flashes at 400 and 800 Watts. Also, keep in mind that the more power you bring in, the more expensive your purchase will be.

6 tips for purchasing a studio flash

2. Flash speed

When purchasing your studio flash, it’s important to determine what you want to capture in your studio. Are you primarily planning to take portraits, or do you also enjoy capturing movement, such as dogs catching treats?

In the latter case, it’s important to buy a flash with a sufficiently short flash duration. This way, you can freeze the movement perfectly!

6 tips for purchasing a studio flash

3. Flash recycle time

In addition to speed, it’s also important that your flash has a sufficiently fast recycle time.

The recycle time of a studio flash refers to the time it takes for the flash to recharge after firing a flash.

Generally, studio flashes have recycle times that vary from a fraction of a second to several seconds, depending on their power and design. Some professional studio flashes can have a very short recycle time, allowing them to flash rapidly in succession. Other models may require more time to recharge between flashes.

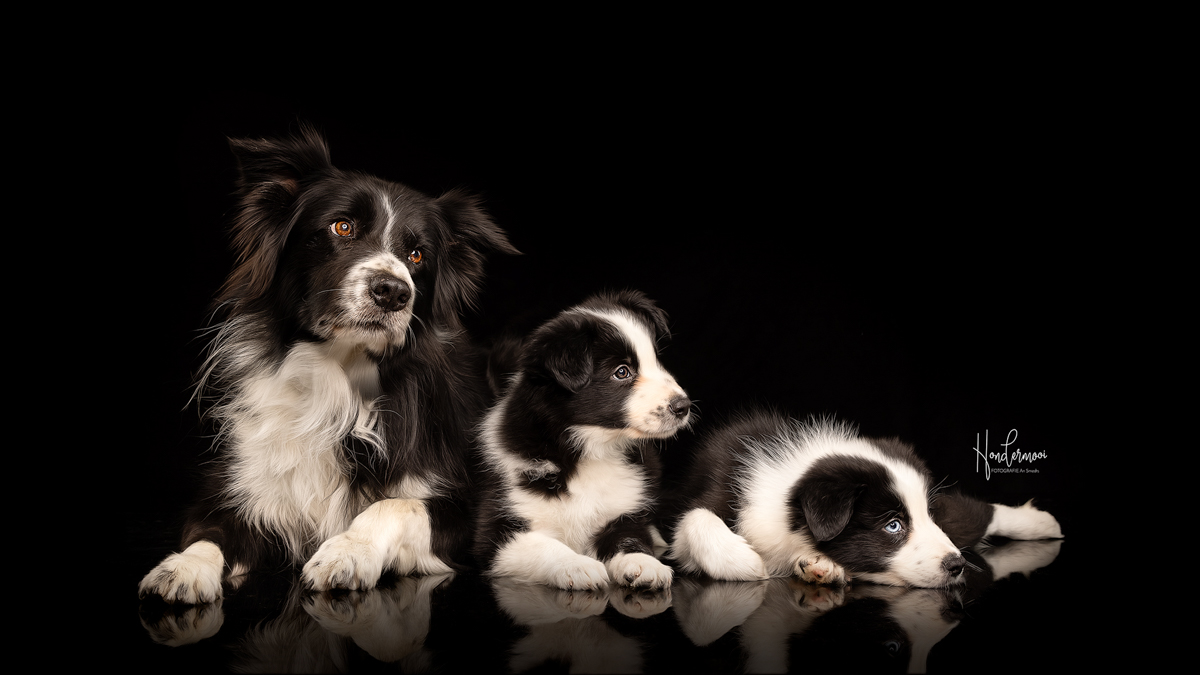
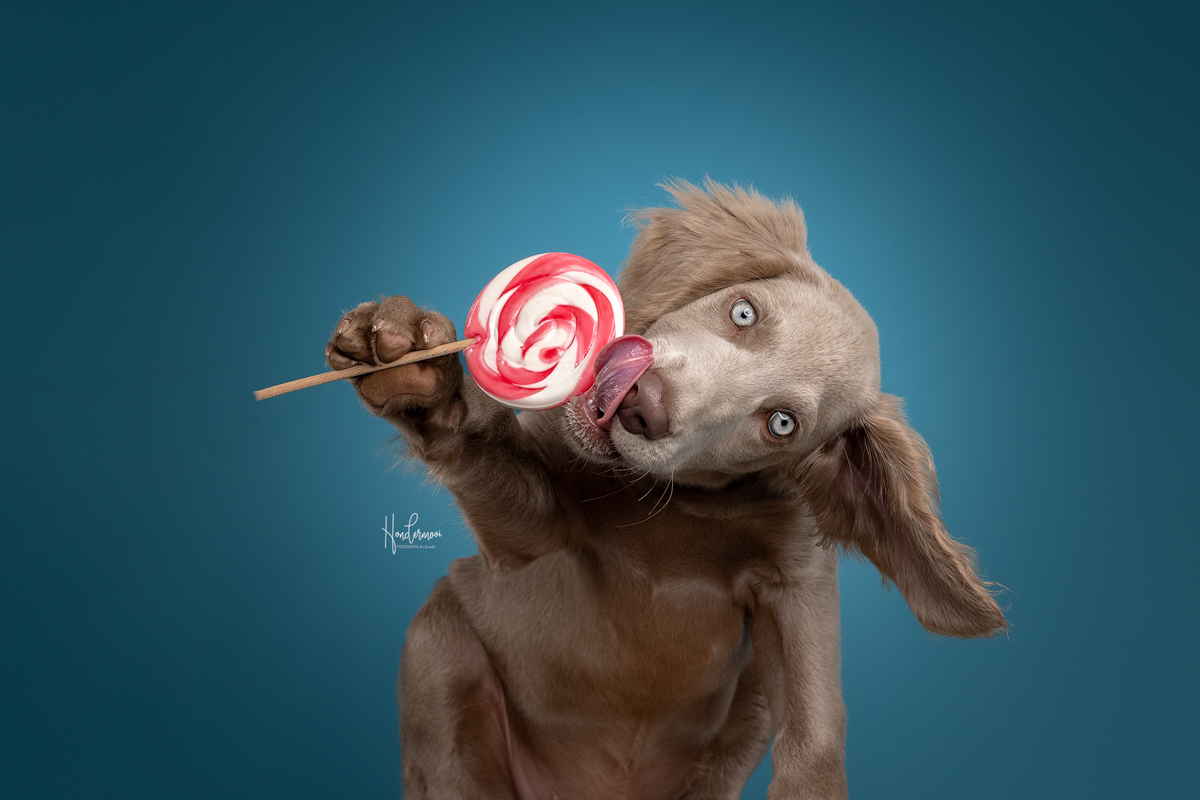
If you’re working with dogs and you want to capture the puppy like in the photo below, you can imagine that you need to quickly take multiple photos in succession to capture this moment at the right time.

6 tips for purchasing a studio flash

4. Flash sound

You might be considered crazy if you ask about the sound a flash makes in the store, but for dogs, this is indeed important. The quieter the flash, the less some sensitive dogs will have problems with it; the louder the flash, the more sensitive the reaction might be.

Most flashes also have built-in ventilation, which can sometimes be very distracting for a dog when it suddenly starts to “cool down.” So, the quieter the flash, the better! As you could already read in point 1, you can also purchase a flash with higher power with the intention of not using it at maximum power to make less noise.

6 tips for purchasing a studio flash

5. Compatibility with light modifiers

In addition to purchasing a studio flash, you will also need a light modifier to mount on your flash.

Light modifiers, such as softboxes, umbrellas, grids, and beauty dishes, are designed with a specific mounting system that depends on the brand. There are Bowens mounts, Elinchrom mounts, Profoto mounts, Broncolor mounts, and so on…

Therefore, it’s important to check whether the light modifier is compatible with the specific mounting system of your studio flash. Some brands may have their own unique mounting systems that may not be compatible with light modifiers from other brands without the use of adapters or specific accessories.

6. Flash with batteries or not?

There are both flash units that operate with batteries and those that operate on mains power.

If you don’t plan to start a mobile studio, then mains-powered flashes are ideal for studio photography if you have a location where you can permanently supply power to the flash. These flashes are often more powerful than battery-powered flashes because of the power they can draw from the outlet.

A disadvantage is that they are less portable and rely on the availability of electricity, which can sometimes be a challenge on location.

If you plan to start a mobile studio, it’s definitely worth looking into the range of battery-powered flashes so that you can capture the best shots even in situations where mains power isn’t available.

Are you looking to start with studio photography but not sure where to begin? Consider a private studio photography workshop. Tell me more about the space you have available and the goals you’d like to achieve, and I’ll be happy to show you all the possibilities for starting your own studio at home!

English

6 tips for purchasing a studio flash

6 tips for purchasing a studio flash Meer lezen »
Een veel gestelde vraag tijdens de workshops studiofotografie is welke studioflitser je nu het beste kan aanschaffen als je met honden aan de slag wil gaan. Het is moeilijk om hier een éénduidig antwoord op te geven omdat dit afhangt van je budget, de ruimte die je ter beschikking hebt, of je ook actie wil gaan fotograferen enz…..

In onderstaand artikel geef ik graag enkele richtlijnen mee waar je op kan letten bij de aankoop van een flitser.

1. Het vermogen van de flitser

Het vermogen van een studioflitser wordt uitgedrukt in Watt en is bepalend voor hoeveel licht de flitser geeft. Hoe kleiner je ruimte, hoe sneller je toekomt met minder vermogen, hoe groter je ruimte, hoe meer je baat zal hebben bij een flitser met een wat hoger vermogen. Ook als je meerdere honden tegelijk wil gaan fotograferen kan een hoger vermogen van pas komen.

Specifiek voor honden is het belangrijk om er bij stil te staan dat hoe hoger je de flitslamp instelt, hoe meer “lawaai” de flitser zal maken en hoe storender dit zal zijn voor sommige rassen die hier gevoelig voor zijn. Vanuit die optiek is het dus interessant om een flitser met een hoger vermogen te kopen zodat je die niet op volle kracht moet instellen en dit dus minder bedreigend is voor de hond.

Zelf heb ik een grote ruimte ter beschikking en werk ik met flitsers op 400 en 800 Watt. Houd er ook rekening mee dat hoe meer vermogen je in huis haalt, hoe duurder je aankoop zal zijn!

6 tips voor de aankoop van een studioflitser

2. De snelheid van je flitser

Voor de aankoop van je studioflitser is het belangrijk om voor jezelf uit te maken wat je graag wil vastleggen in je studio. Ben je vooral van plan om portretten te maken of houd je er ook van om beweging vast te leggen zoals honden die brokjes vangen? In dat laatste geval is het belangrijk om een flitser te kopen die een voldoende korte flitsduur heeft. Op die manier kan je de beweging perfect bevriezen!

6 tips voor de aankoop van een studioflitser

3. De recycletijd van de flitser

Naast de snelheid is het ook belangrijk dat je flitser een voldoende snelle recycletijd heeft.

De recycletijd van een studioflitser verwijst naar de tijd die nodig is voor de flitser om op te laden nadat hij een flits heeft afgevuurd.

Over het algemeen hebben studioflitsers een recycletijd die varieert van een fractie van een seconde tot enkele seconden, afhankelijk van hun vermogen en ontwerp. Sommige professionele studioflitsers kunnen een zeer korte recycletijd hebben, waardoor ze snel achter elkaar kunnen flitsen, terwijl andere modellen meer tijd nodig hebben om op te laden tussen de flitsen door.

Als je werkt met honden en je wil zoals op de foto hieronder de puppy vastleggen net op het moment dat hij aan de lolly likt en ook nog eens in de camera kijkt kan je je inbeelden dat je snel meerdere foto’s na elkaar moet kunnen nemen om dit moment op het juiste moment te kunnen vastleggen.

6 tips voor de aankoop van een studioflitsergrafie

4. Het geluid van je flitser

Waarschijnlijk verklaren ze je voor gek als je in de winkel vraagt naar welk geluid de flitser maakt maar voor honden is dit wel degelijk van belang. Hoe stiller de flitser hoe minder sommige gevoelige honden hier problemen mee zullen hebben, hoe luider de flitser hoe gevoeliger hierop kan gereageerd worden.

In de meeste flitsers zit ook ventilatie ingebouwd en ook dit kan soms erg afleidend zijn voor een hond als deze plots begint te “koelen”. Hoe stiller de flitser, hoe beter dus! Zoals je al kon lezen in punt 1 kan je ook een flitser met hoger vermogen aanschaffen met het doel deze niet op maximaal vermogen te gebruiken om zo minder geluid te maken.

6 tips voor de aankoop van een studioflitser

5. Compatibiliteit met lichtvervormers

Naast de aanschaf van een studioflitser zal je ook een lichtvervormer nodig hebben om op je flitser te monteren.

Lichtvervormers, zoals softboxen, paraplu’s, grids en beauty dishes zijn ontworpen met een bepaald montagesysteem dat afhankelijk is van het merk. Zo heb je een Bowens-mount, een Elinchrom-mount, een Profoto-mount, een Broncolor-mount enz….

Het is dus belangrijk om te controleren of de lichtvervormer compatibel is met het specifieke montagesysteem van je studioflitser. Sommige merken kunnen hun eigen unieke montagesystemen hebben die mogelijk niet compatibel zijn met lichtvervormers van andere merken zonder gebruik van adapters of specifieke accessoires.

6 tips voor de aankoop van een studioflitser

6. Flitser op batterijen of op stroom

Er bestaan zowel flitsers die werken met batterijen als flitsers die werken op stroom.

Als je niet van plan bent een mobiele studio te beginnen dan zijn flitsers op stroom ideaal voor studiofotografie als je een locatie hebt waar je de flitser permanent van stroom kan voorzien. Deze flitsers zijn vaak ook krachtiger dan flitsers op batterijen vanwege het vermogen dat ze uit het stopcontact kunnen halen.

Een nadeel is dat ze minder draagbaar zijn en dat ze afhankelijk zijn van de beschikbaarheid van elektriciteit, wat op locatie soms een moeilijkheid kan zijn.

Als je van plan bent om een mobiele studio te beginnen dan is het zeker interessant om ook het aanbod van flitsers met batterijen eens te bekijken zodat je ook in omstandigheden waar geen neststroom aanwezig is toch de mooiste plaatjes kan maken.

Wil jij starten met studiofotografie maar weet je niet goed waar te beginnen? Overweeg dan een privé workshop studiofotografie. Vertel me meer over de ruimte die je ter beschikking hebt en de doelen die je graag wil realiseren en ik toon je graag alle mogelijkheden die er zijn om thuis je eigen studio van start te gaan!

Nederlands

6 tips voor de aankoop van een studioflitser

6 tips voor de aankoop van een studioflitser Meer lezen »
Scroll naar boven