English

Dogs love to run and play during a photoshoot, but capturing this sharply and with quality in your photos can be quite a challenge! In this article, I’d like to share 10 tips for anyone who wants to learn how to photograph dogs in action.

1. Spontaneous yet controlled

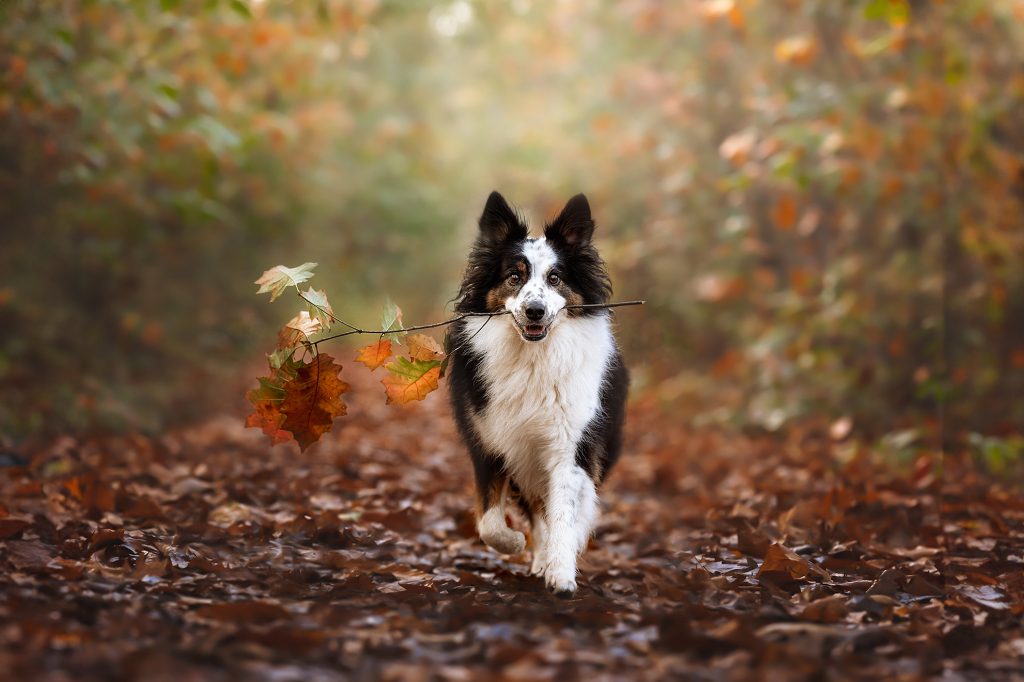
An action shot should look spontaneous, but it’s not a good idea to let the dog run wildly and then snap away “on a wing and a prayer.”

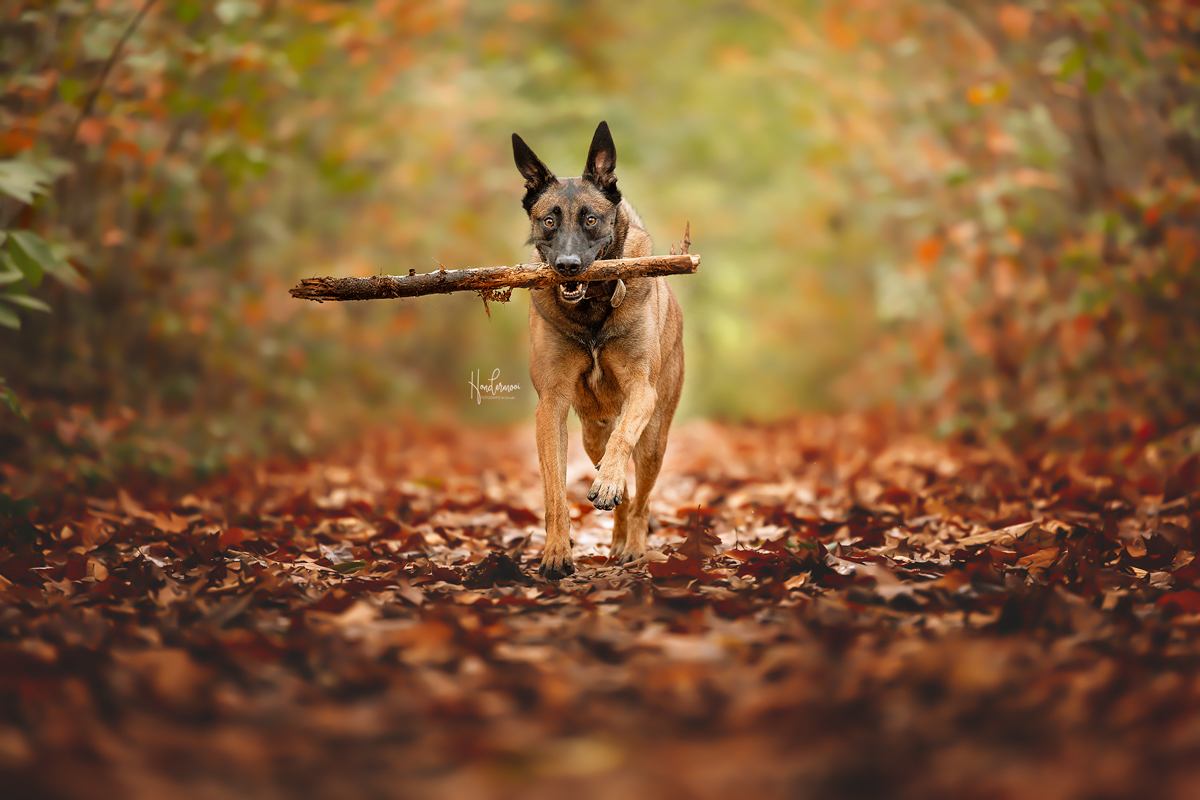
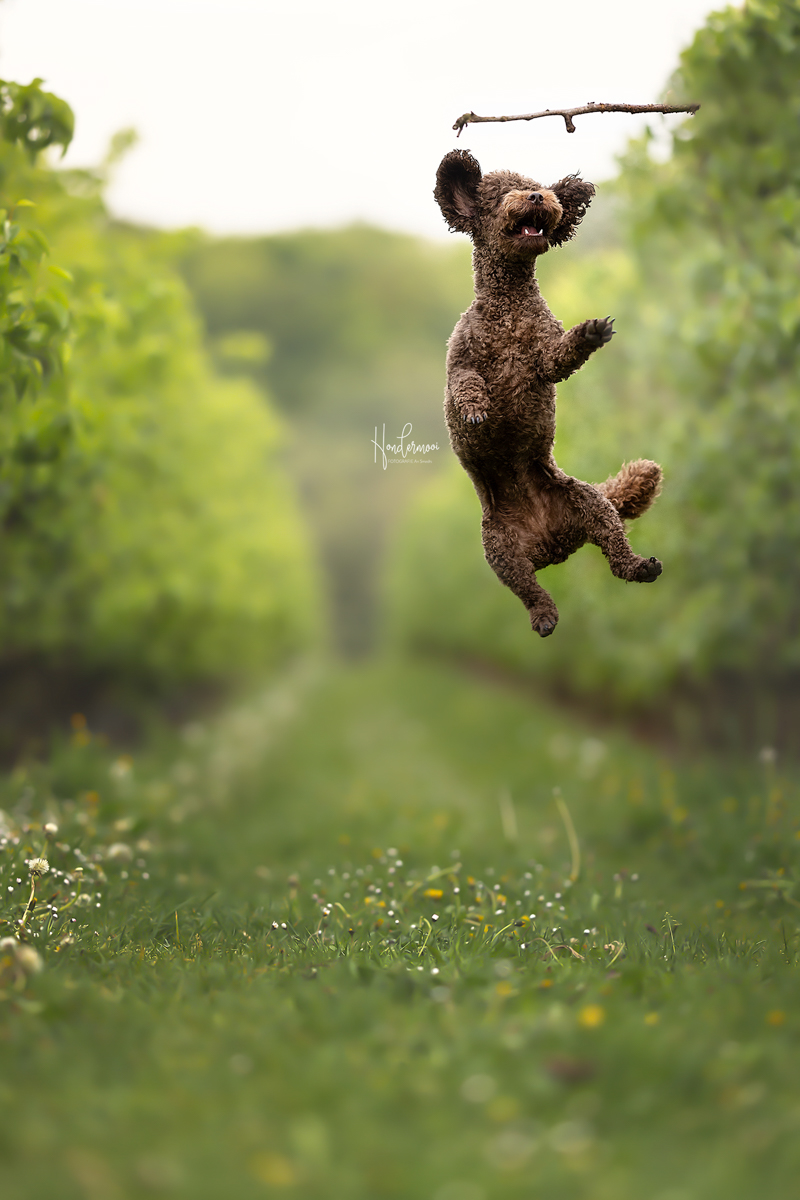
Observe the dog carefully during your shoot and try to figure out what action it will enjoy the most. Is the dog a bit older? Then a simple sprint towards the photographer might be quite a challenge! Do you have a real agility champion in front of your lens? Then you can raise the bar a bit higher! Is there a real playful pup in front of your lens? Then go for an action shot including its favorite toy!

If the dog can sit and stay well, you’re lucky; the owner can stand over you and call the dog. However, if the dog is not one to sit still, you’ll need to get a bit more creative. If you don’t have much experience with action photography, it’s helpful to lay a stick on your path for the dog to jump over. This way, you’ll know exactly where the “action” will take place, and with luck, you’ll capture a beautiful flying dog in action right away.

10 tips for photographing dogs in action

2. Camera settings and lenses

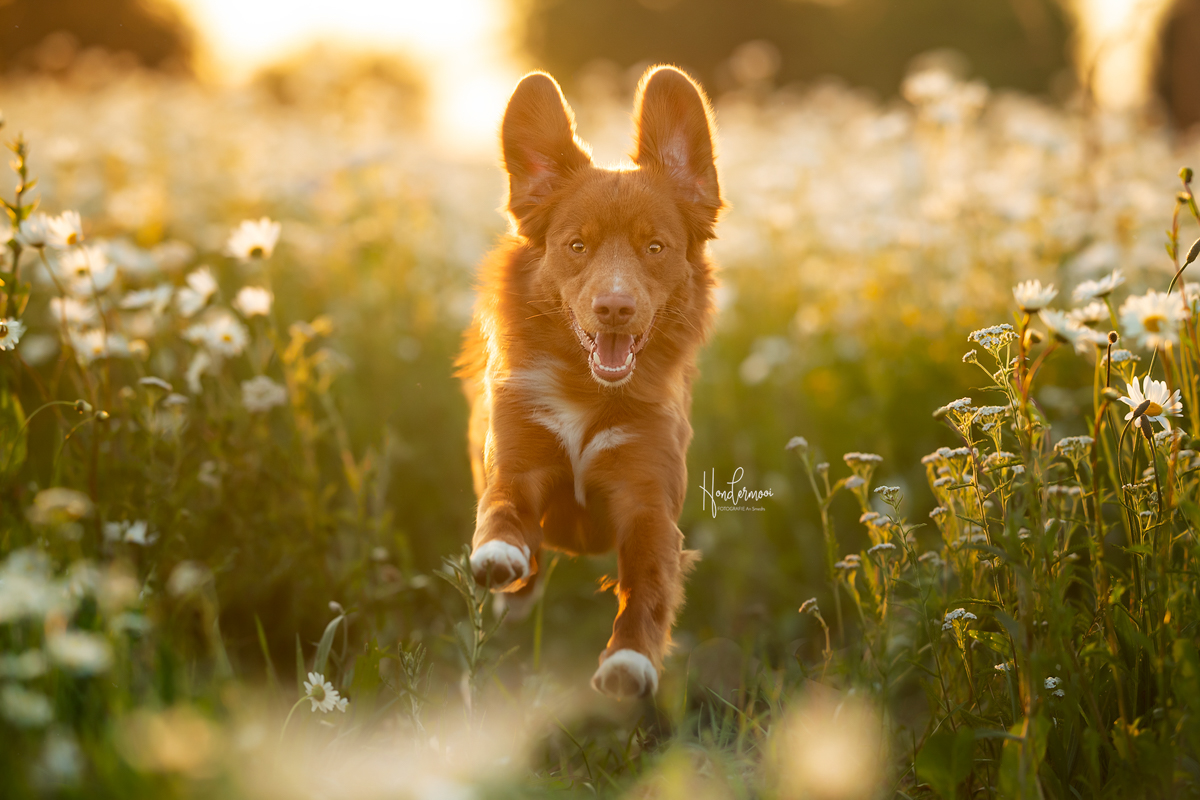
To capture a sharp action shot, you need a fast shutter speed. Typically, 1/1000 sec is sufficient to freeze the action.

I prefer a blurred background in my photos to make the dog stand out. To achieve this, use the widest aperture available to you. For example, if you’re shooting with a 70-200mm lens – a popular choice for action photography – zoom in to 200mm and use an aperture of f/2.8.

The ISO value determines the amount of noise in your photo, and with a high shutter speed, your ISO value can quickly escalate. Therefore, it’s crucial to carefully choose your location when shooting action scenes (see point 7). Ideally, an ISO of 100 is perfect, but you’ll need to adjust according to the lighting conditions.

I shoot with a mirrorless camera (Canon R6 and Canon R5) and use the automatic animal eye autofocus for all my shoots to achieve sharp focus. If you’re using a DSLR or don’t have this function, use a single focus point and focus on the nearest eye.

Switch to continuous autofocus mode to keep the moving dog in focus. This allows the camera to continuously adjust focus as the subject moves.

Finally, utilize burst mode to capture multiple photos rapidly. The number of shots you can take in burst mode depends on your camera. Ensure you have a fast memory card to store all this data without your camera starting to lag; more on this in the point below!

10 tips for photographing dogs in action

3. Check your memory card!

For photographing dogs in action, it’s important to use a fast memory card. This is often overlooked. You can have a camera that can capture a perfect number of images per second, but if you insert a slow memory card, your camera will quickly lock up because it can’t write the data fast enough.

On a camera’s memory card, you’ll find various symbols and numbers that indicate the card’s specifications and performance. Buy a memory card with sufficient capacity (I personally use a 128GB card) and a high write speed. These are the actual read and write speeds of the card, expressed in megabytes per second (MB/s). I prefer a card with a write speed of 300 megabytes per second.
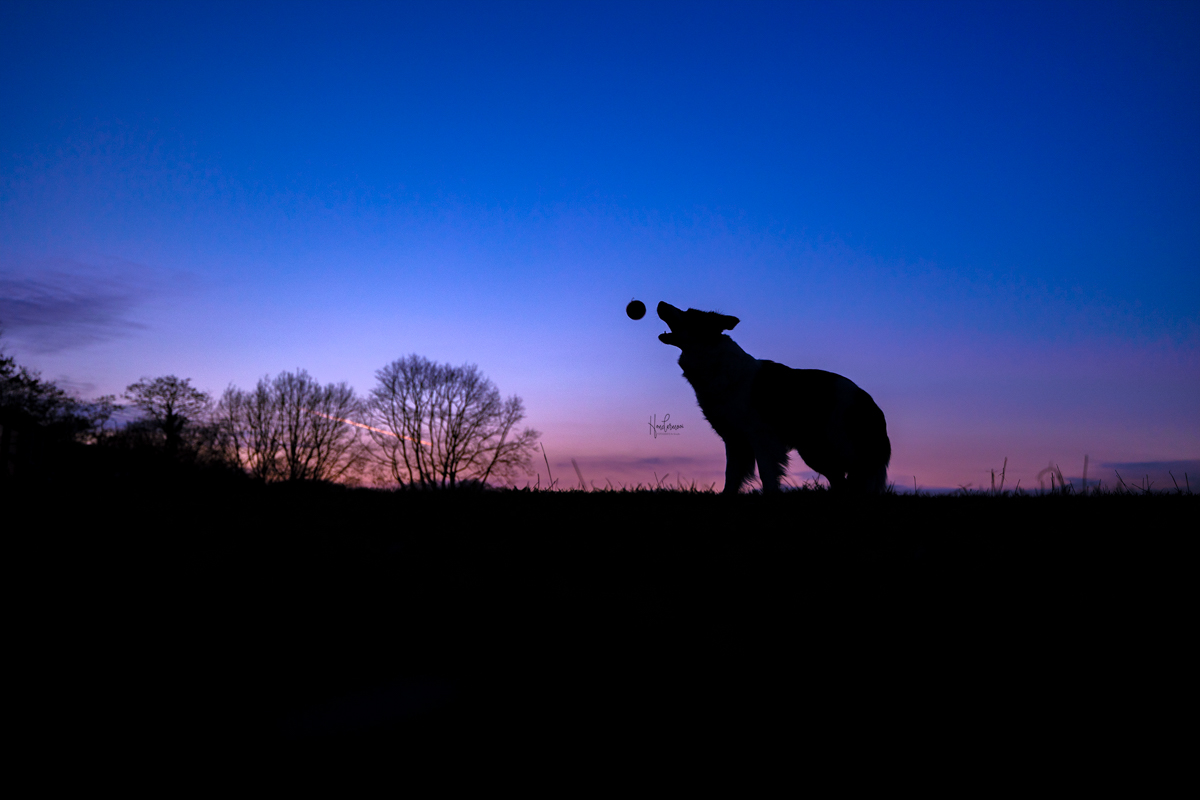
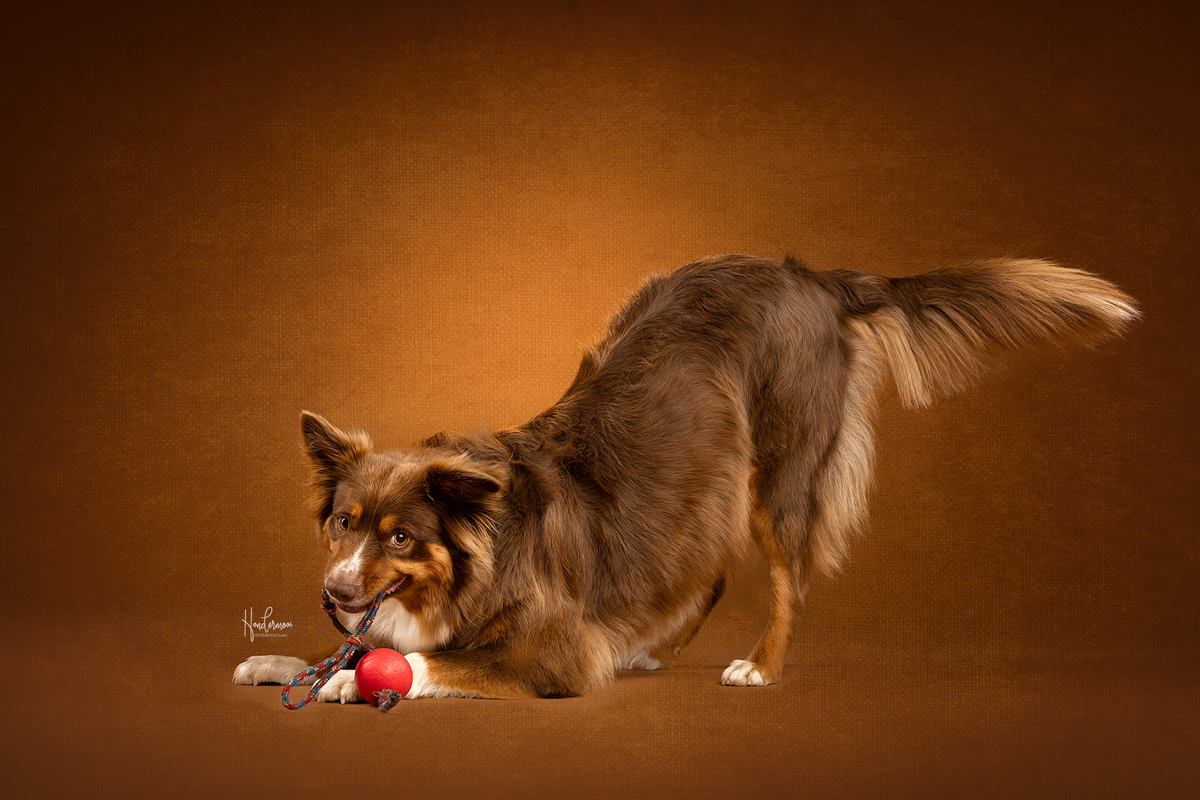
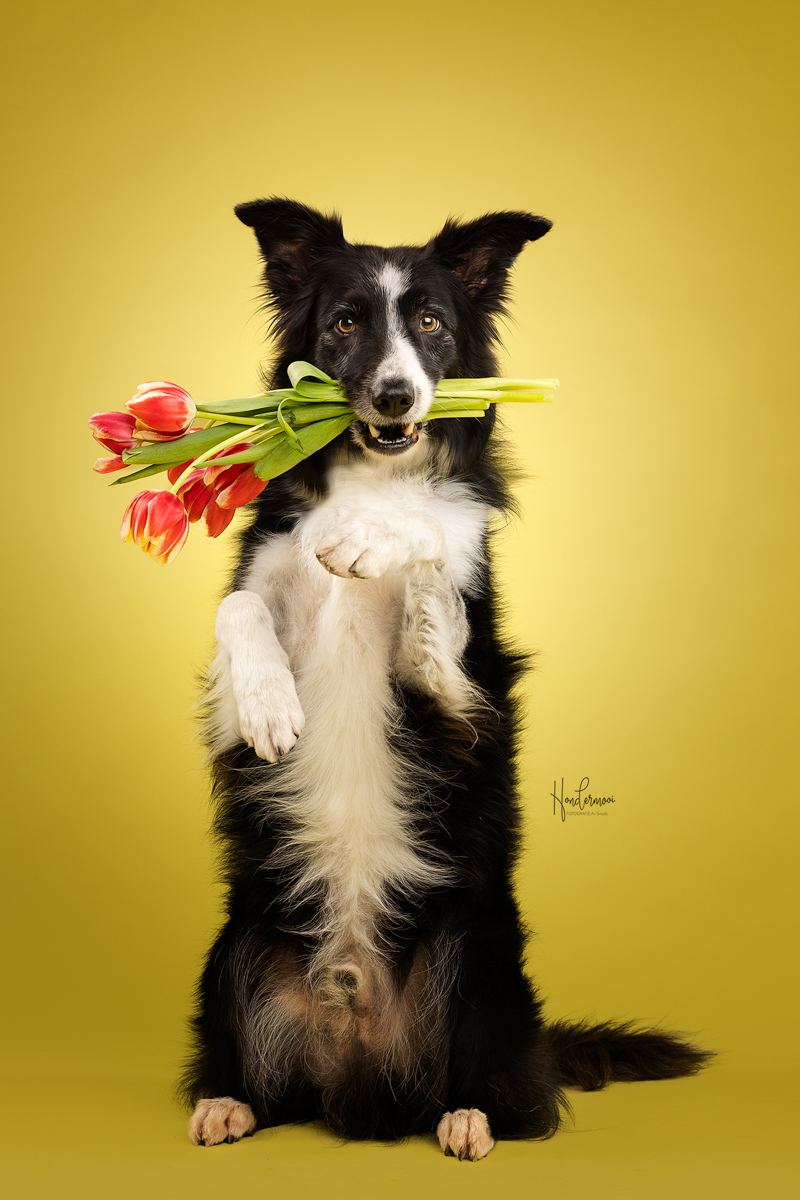
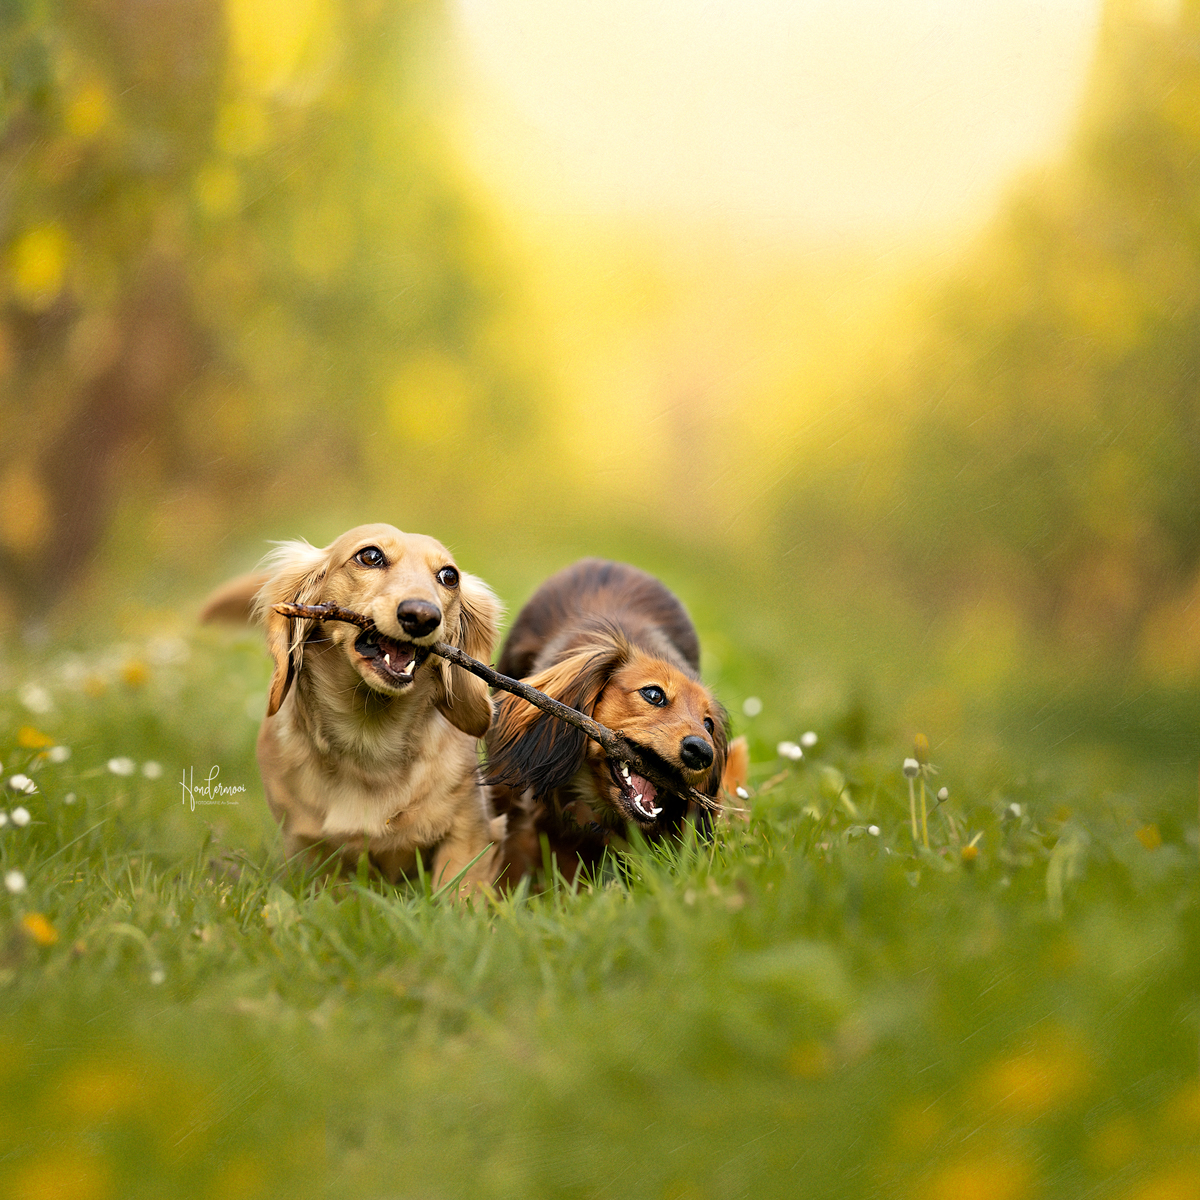
10 tips for photographing dogs in action

4. Use a toy!

Some dogs go absolutely wild when you bring out their favorite toy, so it’s extra fun to include it in the photos too!

10 tips for photographing dogs in action

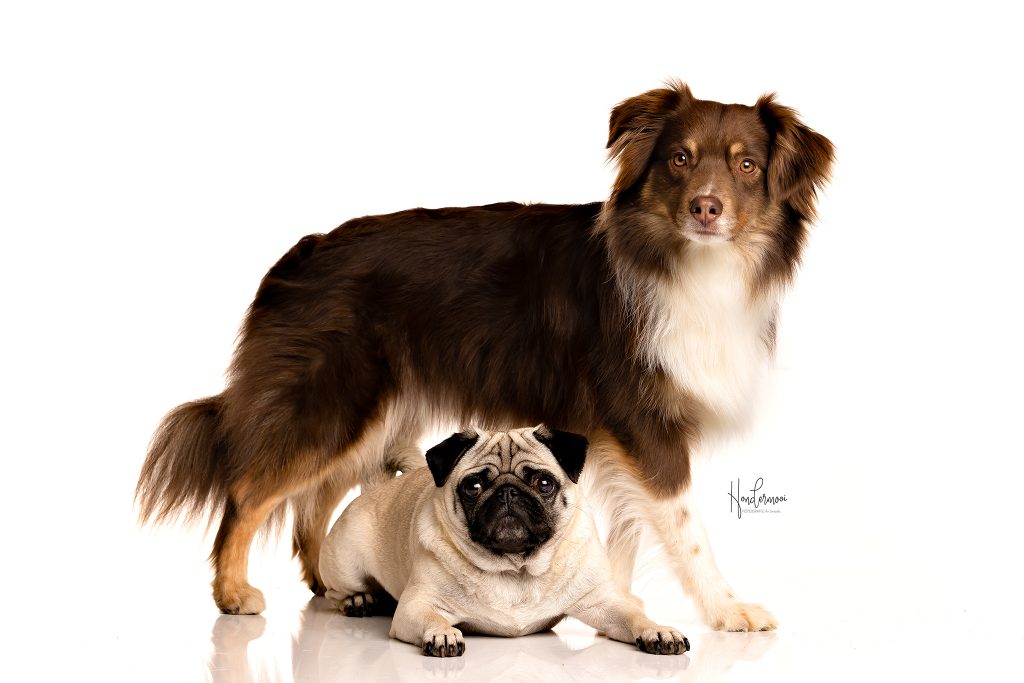
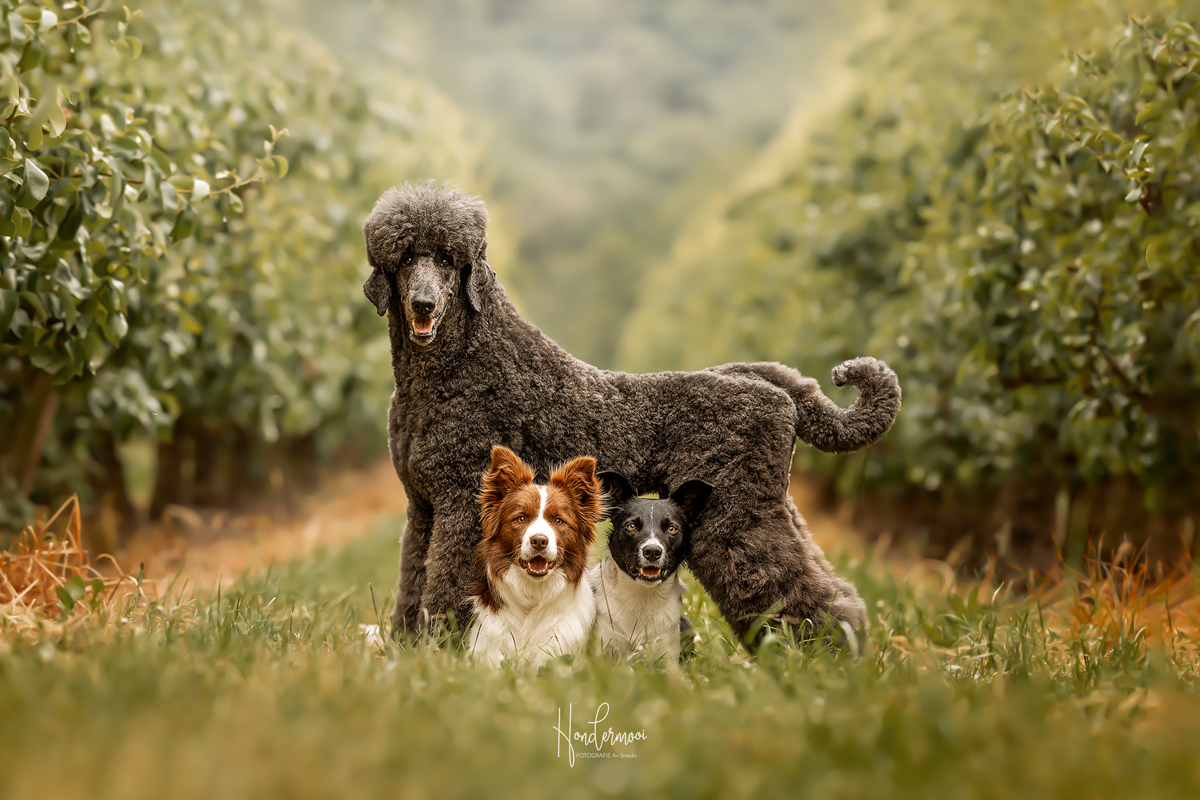
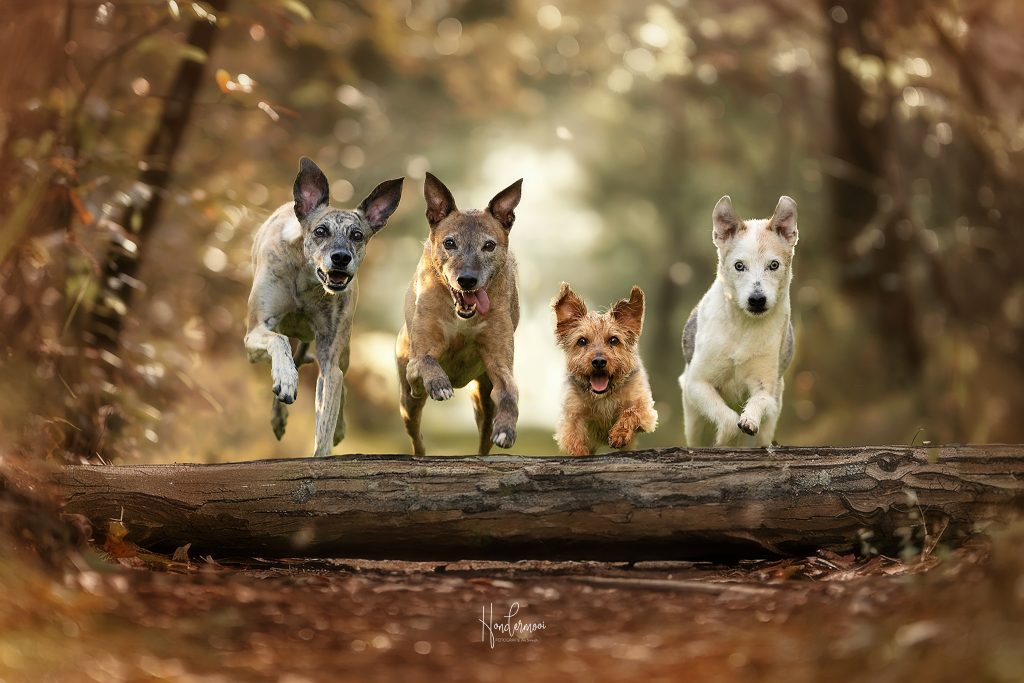
5. Multiple dogs in action

When owners come with multiple dogs, it’s always fun to capture an action shot of them together. However, it’s quite a challenge to get both dogs sharply in focus because they rarely walk in a straight line together.

Opt for a location with a lot of depth, blur your background as much as possible (read in this article how to achieve this), and keep in mind that Photoshop can come to the rescue if they don’t walk neatly side by side!

10 tips for photographing dogs in action

A stick or another toy can be very helpful in keeping your models more or less in the same position while they are still in full action!
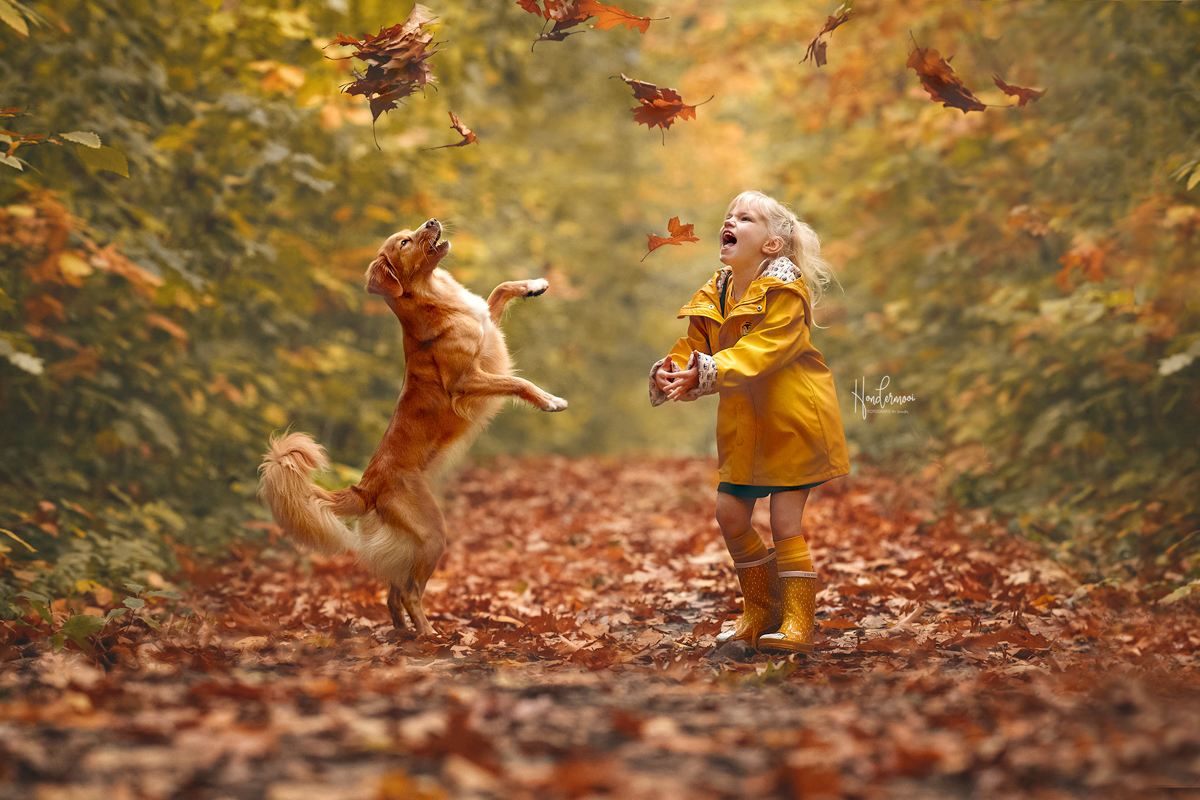
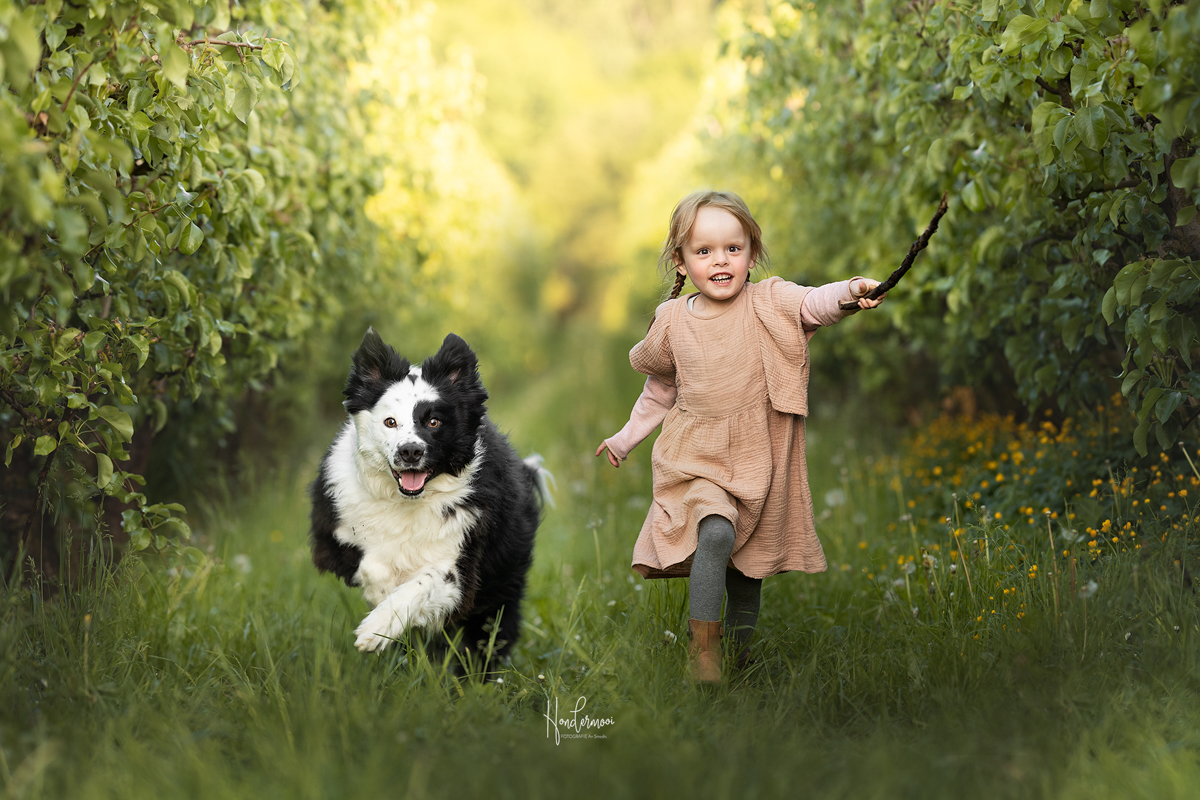
10 tips for photographing dogs in action

6. Run together!

If you encounter a sporty owner or an enthusiastic child who wants to join in the photo, I always love capturing them running together. With children, this results in delightful spontaneous photos; they stay warm and didn’t expect the photoshoot to be so fun and active!
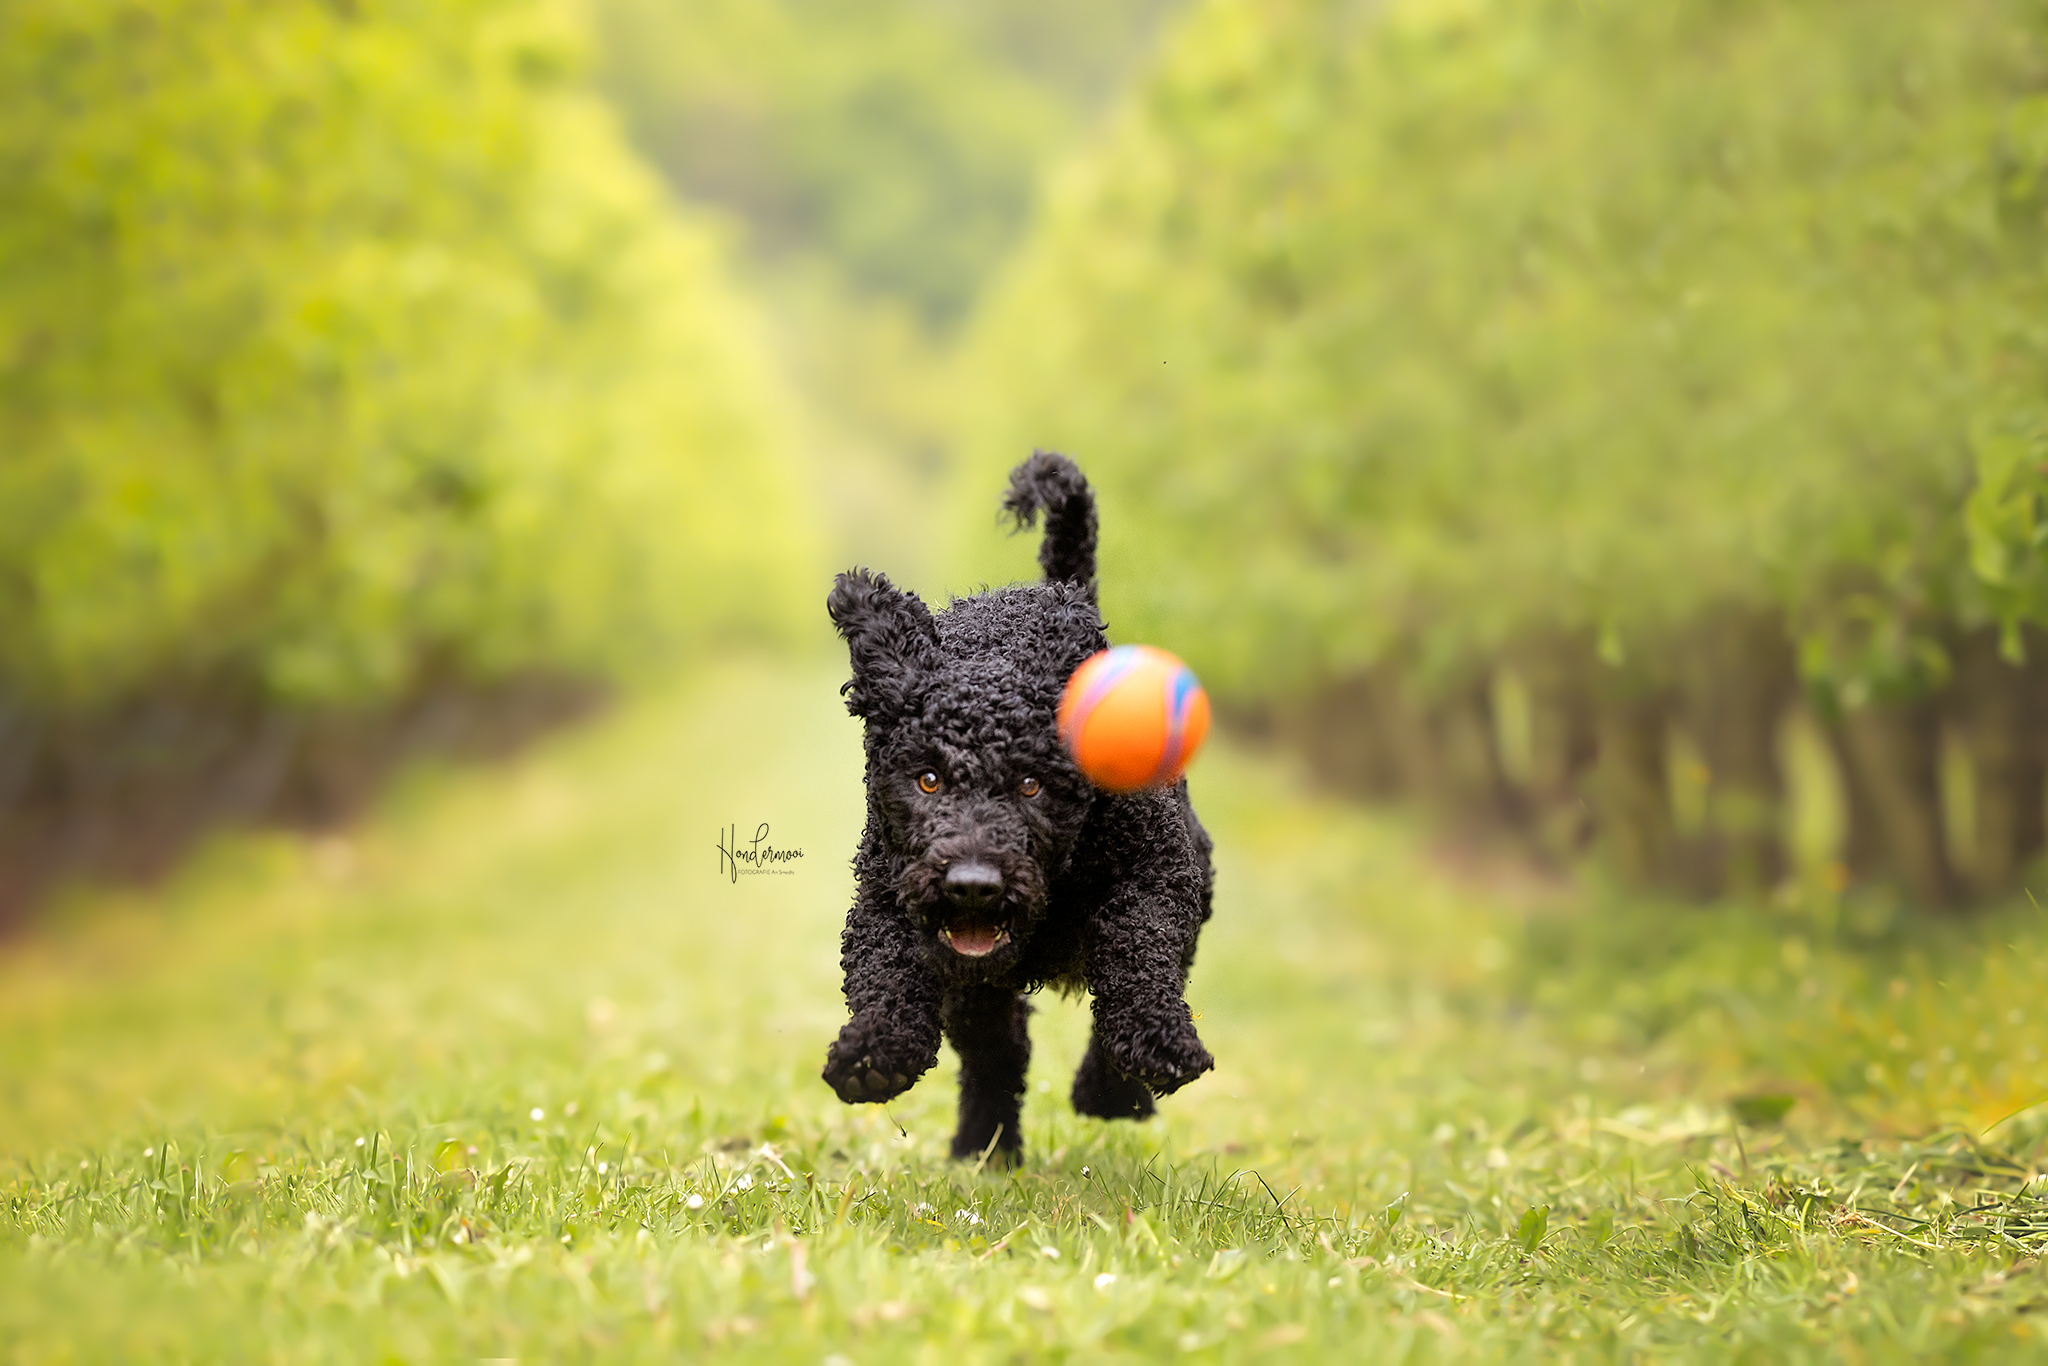
10 tips for photographing dogs in action

7. Location choice

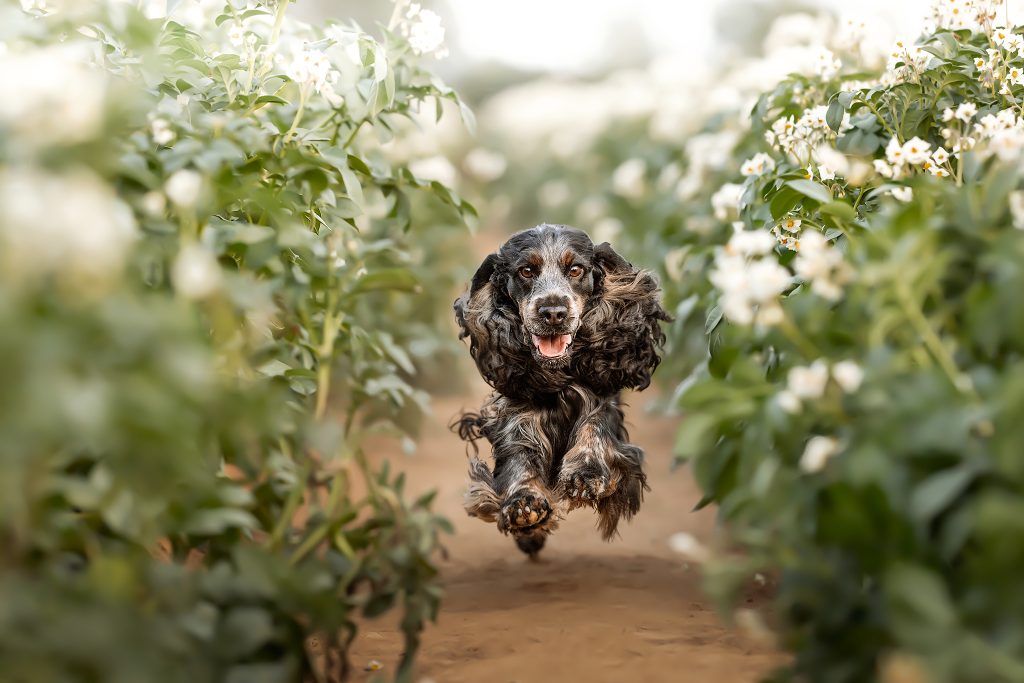
Since you use a high shutter speed for action photography, the choice of your location is extra important if you want to capture action shots. With a high shutter speed, your ISO can quickly escalate in a dark environment, resulting in low-quality photos with a lot of noise.

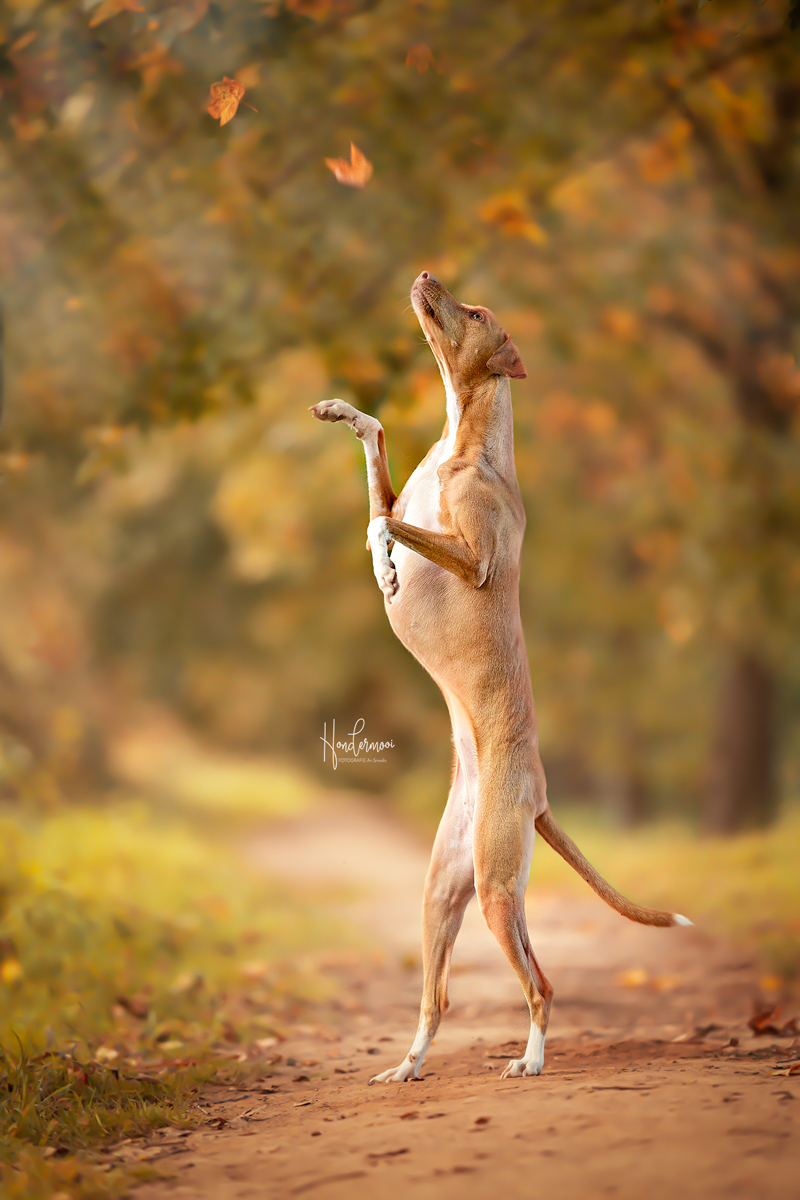
An open field is therefore my preference for capturing action shots. Below, the cocker spaniel is running in a potato field. The direction of movement is “under control,” there is enough light to keep your ISO low, and you immediately have an original environment with “flowers” in your photo! An orchard or the winter forest when the trees are bare also lend themselves excellently to action shots.

10 tips for photographing dogs in action

8. Back button focus

You love it or you hate it, but I am already a fan!

Back button focus is an advanced technique in photography where the autofocus function of a camera is decoupled from the shutter button and assigned to a separate button on the back of the camera, often referred to as the AF-ON button.

Normally, the autofocus of a camera is activated when you half-press the shutter button. This means the camera activates both focusing and capturing the image when you press the shutter button. With back button focus, however, autofocus is activated by pressing the AF-ON button on the back of the camera, while the shutter button is only used to actually take the photo.

This has various benefits for photographing dogs in action! By separating autofocus from the shutter button, you have more control over the focusing point. For example, you can focus on a subject and lock the focus by holding down the AF-ON button, allowing you to adjust the composition without changing the focus.

Since autofocus is set before pressing the shutter button, the camera can react faster to changing scenes or moving subjects. This is especially useful for our fast-moving dogs!

Furthermore, you reduce the chance of blurry photos because autofocus isn’t reactivated every time you press the shutter button!

Refer to your camera’s manual for the best setup and give it a try to see if you like it!
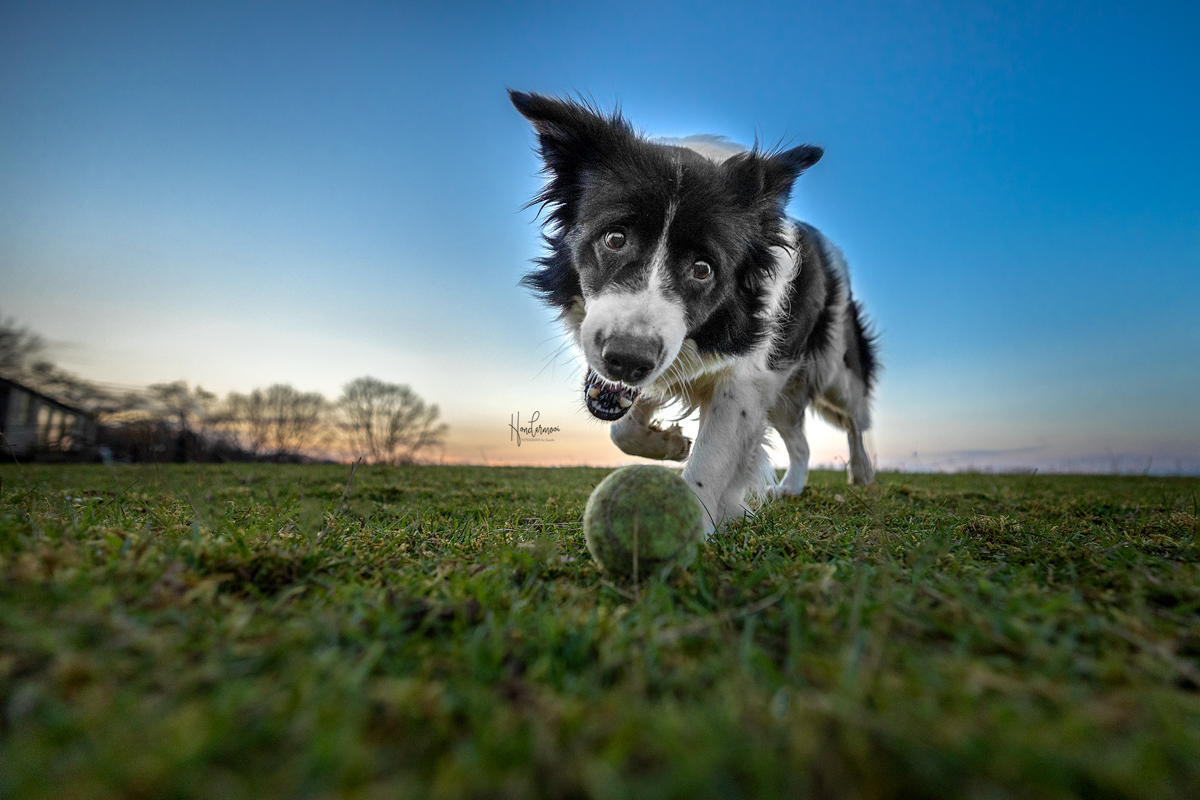
9. Low perspective

Lie down on the ground when taking action photos; this makes the dog really pop in your photo and gives it an imposing presence. Also, try experimenting with a wide-angle lens like in the photo below (taken with the RF 16-35mm) if you want to capture more of the surroundings in your shot.

10. Additional tips

  • If you also want to take portrait photos during the shoot, start with those first before switching to action shots; otherwise, you might end up with portrait photos with reaaaaaally long tongues and tired looks!
  • Always bring enough water for the dog and avoid action shots when temperatures are too high. Winter is the most ideal season for action!
  • Ensure a safe environment with minimal distractions and respect the dog’s boundaries if you notice it starting to get tired.
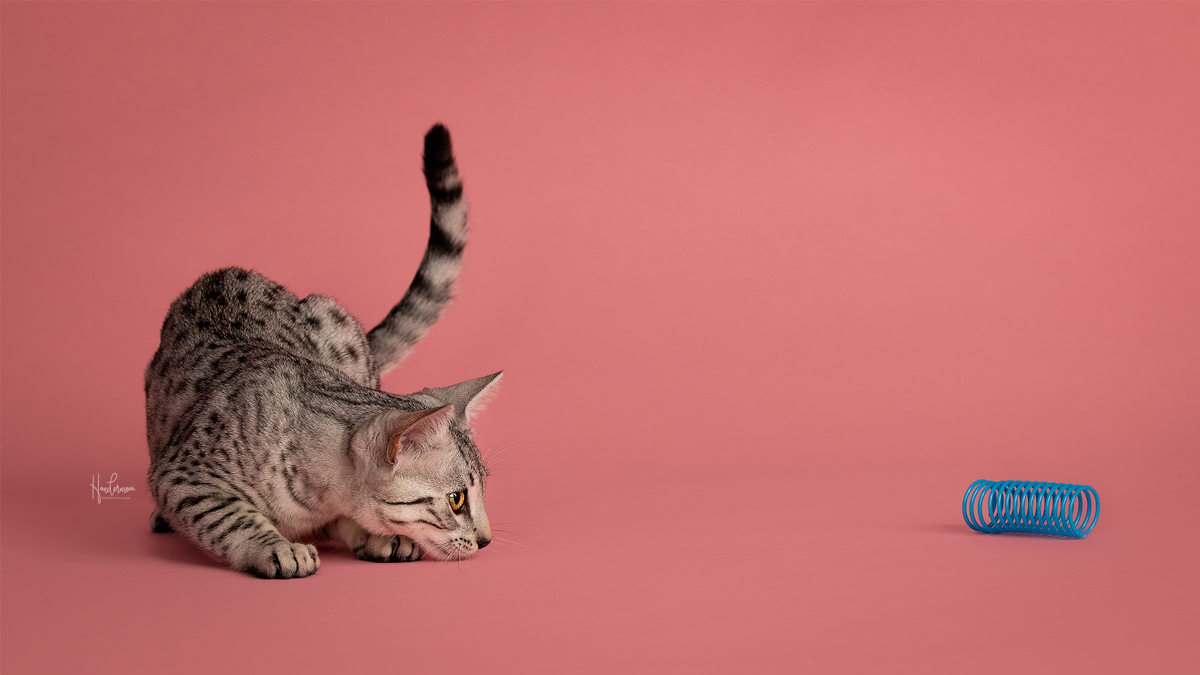
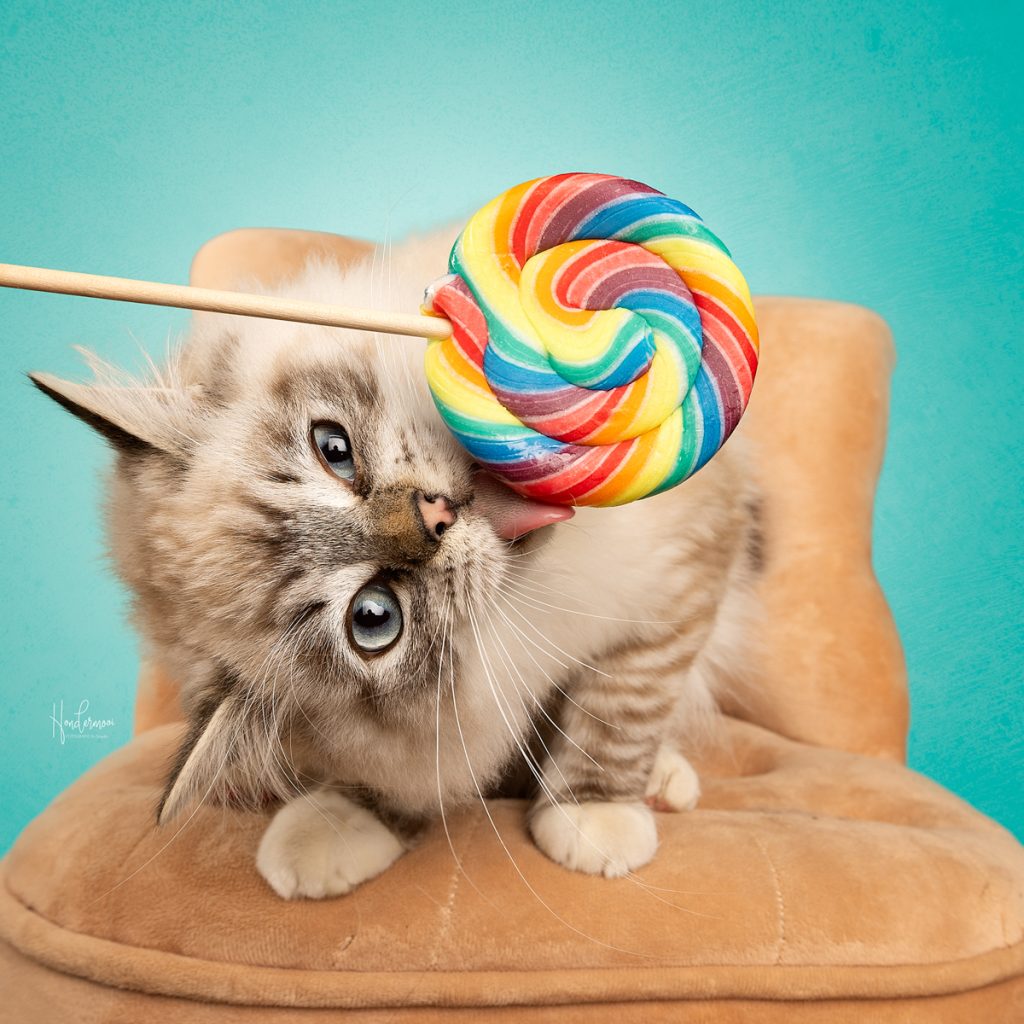
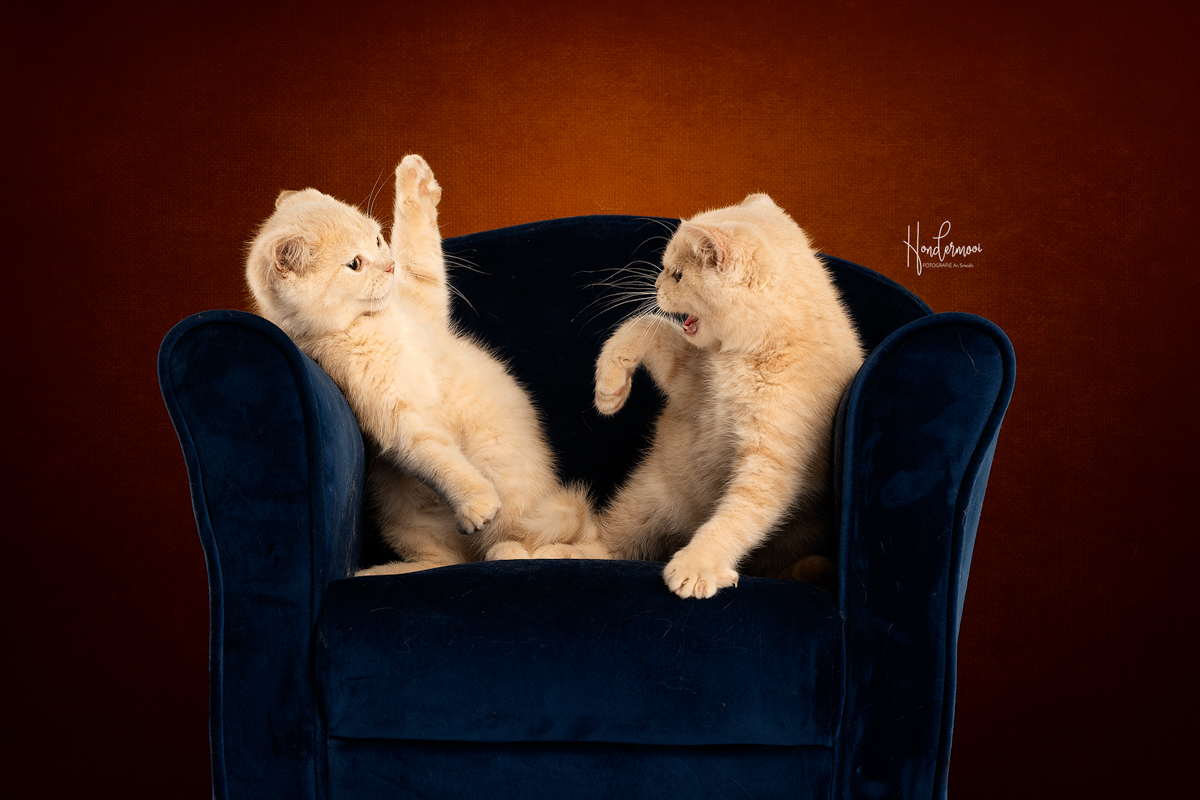
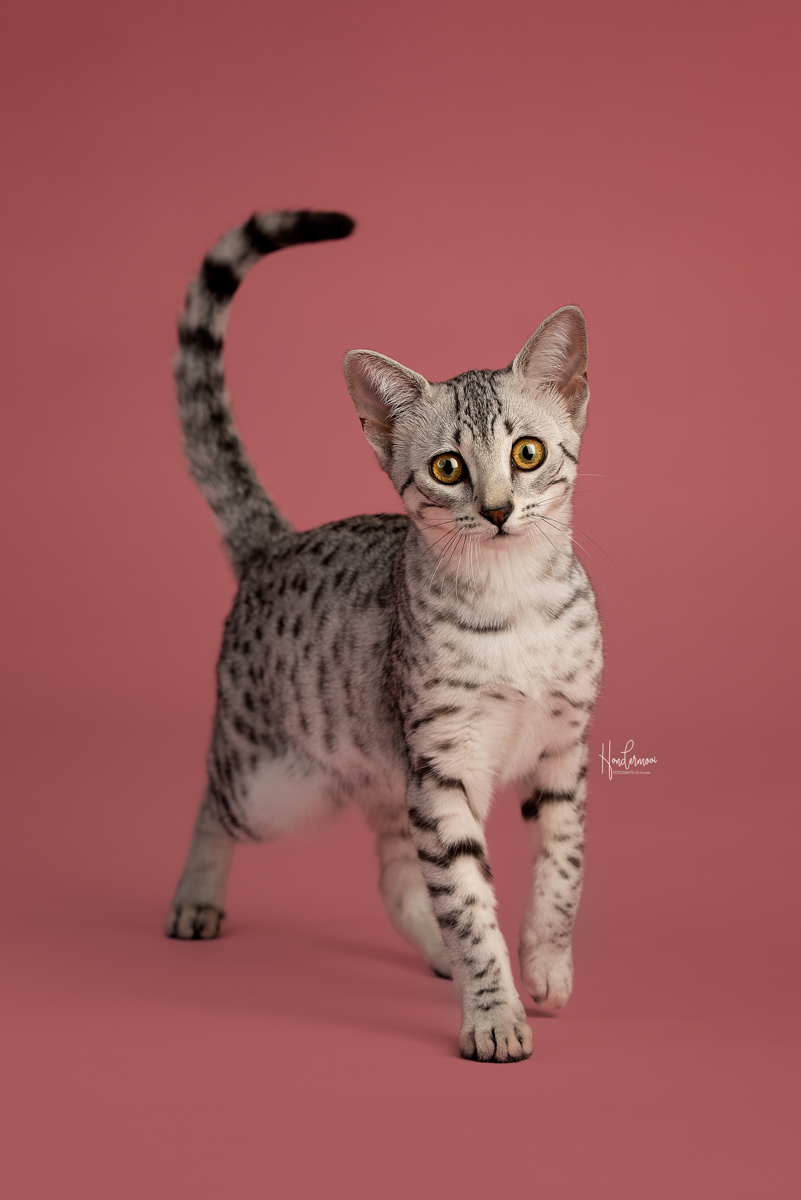
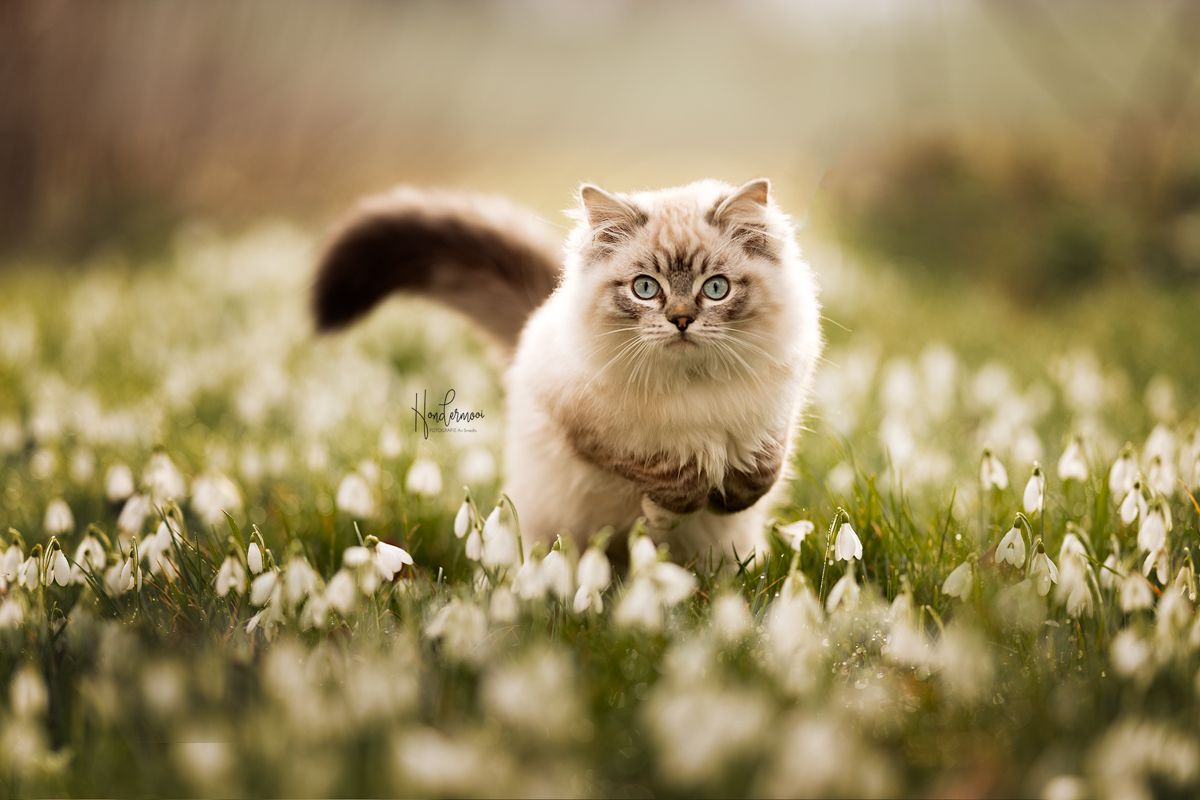
  • Try it with a cat too if you want to challenge yourself; they also enjoy a sprint now and then 🙂

Are you looking to further specialize in dog photography and learn how to capture dogs in an artistic way? Consider attending a workshop on artistic dog photography to boost your skills and take your photography to a new level!

English

10 tips for photographing dogs in action

10 tips for photographing dogs in action Meer lezen »

In the TV program “The Perfect Picture” 8 well-known Flemish personalities, under the direction of presenter Manu Van Acker, compete against each other to take the perfect photo!

Each episode features two specializations in photography, and of course, dog photography couldn’t be left out!

So one day, I was contacted by the production company asking if I wanted to participate in this episode. Of course, I immediately agreed and off we went!

A quick touch of makeup before meeting the contestants and explaining the task to them!

Catching treats for "The perfect picture" on Play4

Theme

The theme was “dogs catching treats” and the celebrities descended to Pellenberg where they were each assigned a wonderful model to work with in my studio.

Ingeborg Sergeant was assigned Niké the border collie as a model. Bie Baert got to work with the super cute Cas the bichon frisé. Filip Peeters had Aslan the standard poodle in front of his lens, Joffrey Anane had Bean the beautiful wolfhound, and Julius Persoone got to throw treats for Nysha the toller.

They were given a time limit of 30 minutes to complete the task, and there had to be a clear “action” in the photo.

Especially for those who had no experience with dogs, it became quite a challenge to complete the task successfully, but all’s well that ends well! After 30 minutes, they had all managed to deliver at least 1 “Perfect Picture”!

Catching treats for "The perfect picture" on Play4

Next, the photos were printed, and as a jury member, I got to give points alongside the regular judges Sofie Van De Velde and Zeger Garré, and assess who had executed the task the best.

Catching treats for "The perfect picture" on Play4

Catching treats for "The perfect picture" on Play4

Julius immediately succeeded in gaining the trust of Nysha with his calm approach and even added an original extra touch by combining a trick with the catching action.

A big congratulations to Julius on your well-deserved victory!

Catching treats for "The perfect picture" on Play4

Would you like to try this yourself with your dog? Below, I’ll gladly give you some tips to help you succeed!

1. Use a wide-angle lens

With a wide-angle lens, you can get close to your dog and throw the treat at the right moment. Your eye-hand coordination will be put to the test, but by throwing it yourself, you can easily capture the right “action moment.” If you have trouble holding your camera steady, use a camera hand strap; it will also support your wrist more.

2. The right flash equipment

When working with flash lighting, you need a flash with a short flash duration and a fast recycle time. Personally, I use broncolor siros flashes for this purpose. Each flash has a different flash duration, and at full power, the flash has a slower speed than at half power.

Now, getting a bit technical… You need to look for the T1 value of your flash. This indicates the time needed for 90% of the total flash to be discharged.

Many photographers in Belgium use Godox, so let’s take a look at the T1 values of the Godox AD600 Pro:

  • 1/1 1/220
  • 1/2 1/740
  • 1/4 1/1470
  • 1/8 1/2352
  • 1/16 1/3448
  • 1/32 1/4651
  • 1/64 1/5780
  • 1/128 1/8130
  • 1/256 1/10000

To photograph dogs in action outdoors, a shutter speed of 1/1000 is sufficient, but in the studio, it’s a bit different. You can expect that from a shutter speed of 1/2000 or more, you have a good chance of completely freezing your motion and keeping it sharp.

3. Camera settings

Each camera brand and model has its own sync speed. This is the maximum shutter speed at which the camera can work with the flash. If you’re unsure of yours, check the manual or use 1/160 to avoid black bars in your image.

Once you’ve set the shutter speed, adjust your ISO. This is the sensitivity of the sensor. I prefer to shoot in the studio at ISO 100 for optimal quality!

Finally, choose your aperture; I typically use around f/8 in the studio.

I set the white balance to flash and for focusing, I use automatic eye autofocus for animals on my mirrorless camera (Canon R6 and Canon R5). If you’re using a DSLR, use a single focus point and focus on the nearest eye.

4. Extra tips

  • If you want a real “catch” photo, it’s important that the dog knows how to do this. Most dogs won’t catch at a treat if they haven’t been taught to do so. Of course, this can also result in hilarious photos!
  • Use a toy as an alternative if the dog doesn’t want to catch the treat.
  • Create a collage in Photoshop instead of a single catching photo if you can’t decide which photo you like the most!
  • Always check with the owner first if the dog has any food allergies before using your own treats.
  • Practice! Practice! Practice! Your dog certainly won’t get tired of those treats quickly!
  • Once you’ve mastered it, experiment with what you throw. Maybe shaping a letter of the dog’s name with a letter-shaped treat is just that bit more original than a regular treat. Ultimately, we aim for nothing less than “The Perfect Picture” 🙂 !

G O O D L U C K !

English

Catching treats for “The perfect picture” on Play4

Catching treats for “The perfect picture” on Play4 Meer lezen »

In this article, I’d like to share 10 dog photography tips for beginners who are embarking on their journey as a dog photographer!

1. Work with natural light

If you want to create a beautiful atmosphere in your photos, it’s important to work with the right light.

The most beautiful light is usually found during the blue hour, an hour after sunrise, or during the golden hour, an hour before sunset. During these times, the light is less harsh, resulting in softer shadows and a more gentle atmosphere in your images.

Even a cloudy day is fine for photos. The cloud cover provides a beautiful even distribution of light with a soft effect on your subject!

10 dog photography tips for beginners

2. Pay attention to the background

Choose your location carefully, paying special attention to the background. Avoid placing the dog directly in front of a tree, as it may appear as if the tree is growing out of its head! Look for a location with ample depth, such as an alleyway or a long forest path. This way, you can keep the background nicely blurred, directing all the attention to your subject!

Read more here about how to create a soft background in your photos!

10 dog photography tips for beginners

3. Work at the dog’s eye level

During an outdoor photoshoot, I typically lie flat on the ground! This creates the impression that the dog is stepping directly into your camera, resulting in a more engaging image compared to shooting the dog from above.

Of course, rules are also meant to be broken, and occasionally, you can choose a different perspective to add some variety to your shoot.

10 dog photography tips for beginners

4. Focus on the closest eye

Use a single focus point in your camera or utilize the animal eye autofocus if available. Always focus on the closest eye.

If you’re working with multiple dogs, try to align them on the same plane so that they are all in focus.

10 dog photography tips for beginners

5. Use a high shutter speed

Dogs love to run and be active. Even during a portrait session, the dog may not always remain completely still. Anticipate this by setting your shutter speed high enough.

A shutter speed of 1/1000 is a good starting point to freeze the motion of a dog in action.

10 dog photography tips for beginners

6. Reward!

The most crucial aspect during a photoshoot with dogs is that the dog enjoys it! Of course, the dog won’t care much about the owner wanting a beautiful photo on the wall, but the more fun the dog has during the shoot, the more it will reflect in the photos!

Reward the dog generously with treats, its favorite toy, or a big cuddle during the session!

10 dog photography tips for beginners

7. Capture attention with your voice

Of course, the dog doesn’t need to look directly into the camera for every photo, but for creating a compelling portrait, it’s helpful if you can quickly grab their attention. Personally, I prefer using my voice. It’s always with you, and you don’t need to hold a squeaker or anything else in your hand.

Make high-pitched squeaking noises or an unexpected sound to grab attention. Also, words like “treat?” can have a good effect! This results in an expressive gaze with beautifully perked-up ears! However, avoid calling the dog’s name; many dogs will come to you then!

10 dog photography tips for beginners

8. Introduce variation into your shoot

Once you’ve immortalized the “classic” poses like “sit” and “down,” it’s fun to bring some more diversity into your shoot. Ask the owner if the dog knows any other commands, switch lenses, try a different perspective, or bring a prop like a bag, scarf, lantern, blanket, or cart for some variety!

Who knows, the dog might also know some fun tricks that you can integrate into your shoot? Read this article if you want more inspiration for fun dog tricks!

9. Save your action shots for last!

Action shots are always fun but also tiring for the dog. If you start with them and let the dog run around several times, its tongue will soon be hanging out, especially in the summer! It then becomes much harder to take beautiful portraits afterward. That’s why I always save the action shots for last, and it’s also a positive way to end the shoot!

10. Don’t forget the owners…

Many owners take endless photos of their beloved four-legged friends but have hardly any photos with themselves in them. So, it’s nice to give them a moment during the shoot to be in the spotlight together with their dog!

Are you looking to further specialize in dog photography and learn how to capture dogs in an artistic manner? Consider taking a workshop on artistic dog photography to boost your skills and elevate your photography to a new level!

English

10 dog photography tips for beginners

10 dog photography tips for beginners Meer lezen »

A frequently asked question during studio photography workshops is which studio flash is best to purchase when working with dogs. It’s difficult to give a straightforward answer because it depends on your budget, the space you have available, whether you also want to capture action, and so on…

In the article below, I’d like to provide some guidelines to consider when purchasing a flash.

1. Flash power

The power of a studio flash is expressed in Watts and determines how much light the flash emits. The smaller your space, the quicker you’ll get by with less power; the larger your space, the more you’ll benefit from a flash with higher power. Also, if you plan to photograph multiple dogs simultaneously, higher power can be advantageous.

Specifically for dogs, it’s important to consider that the higher you set the flash output, the more “noise” the flash will make, which could be disturbing for some breeds sensitive to noise. From that perspective, it’s interesting to invest in a flash with higher power so that you don’t have to set it at full power, making it less threatening for the dog.

Personally, I have a large space available and work with flashes at 400 and 800 Watts. Also, keep in mind that the more power you bring in, the more expensive your purchase will be.

6 tips for purchasing a studio flash

2. Flash speed

When purchasing your studio flash, it’s important to determine what you want to capture in your studio. Are you primarily planning to take portraits, or do you also enjoy capturing movement, such as dogs catching treats?

In the latter case, it’s important to buy a flash with a sufficiently short flash duration. This way, you can freeze the movement perfectly!

6 tips for purchasing a studio flash

3. Flash recycle time

In addition to speed, it’s also important that your flash has a sufficiently fast recycle time.

The recycle time of a studio flash refers to the time it takes for the flash to recharge after firing a flash.

Generally, studio flashes have recycle times that vary from a fraction of a second to several seconds, depending on their power and design. Some professional studio flashes can have a very short recycle time, allowing them to flash rapidly in succession. Other models may require more time to recharge between flashes.

If you’re working with dogs and you want to capture the puppy like in the photo below, you can imagine that you need to quickly take multiple photos in succession to capture this moment at the right time.

6 tips for purchasing a studio flash

4. Flash sound

You might be considered crazy if you ask about the sound a flash makes in the store, but for dogs, this is indeed important. The quieter the flash, the less some sensitive dogs will have problems with it; the louder the flash, the more sensitive the reaction might be.

Most flashes also have built-in ventilation, which can sometimes be very distracting for a dog when it suddenly starts to “cool down.” So, the quieter the flash, the better! As you could already read in point 1, you can also purchase a flash with higher power with the intention of not using it at maximum power to make less noise.

6 tips for purchasing a studio flash

5. Compatibility with light modifiers

In addition to purchasing a studio flash, you will also need a light modifier to mount on your flash.

Light modifiers, such as softboxes, umbrellas, grids, and beauty dishes, are designed with a specific mounting system that depends on the brand. There are Bowens mounts, Elinchrom mounts, Profoto mounts, Broncolor mounts, and so on…

Therefore, it’s important to check whether the light modifier is compatible with the specific mounting system of your studio flash. Some brands may have their own unique mounting systems that may not be compatible with light modifiers from other brands without the use of adapters or specific accessories.

6. Flash with batteries or not?

There are both flash units that operate with batteries and those that operate on mains power.

If you don’t plan to start a mobile studio, then mains-powered flashes are ideal for studio photography if you have a location where you can permanently supply power to the flash. These flashes are often more powerful than battery-powered flashes because of the power they can draw from the outlet.

A disadvantage is that they are less portable and rely on the availability of electricity, which can sometimes be a challenge on location.

If you plan to start a mobile studio, it’s definitely worth looking into the range of battery-powered flashes so that you can capture the best shots even in situations where mains power isn’t available.

Are you looking to start with studio photography but not sure where to begin? Consider a private studio photography workshop. Tell me more about the space you have available and the goals you’d like to achieve, and I’ll be happy to show you all the possibilities for starting your own studio at home!

English

6 tips for purchasing a studio flash

6 tips for purchasing a studio flash Meer lezen »

Kattenfotografie


Photographing cats in an unfamiliar environment can be quite a challenge! Moreover, cats have their own will and often prefer to do things their own way.

Cats are amazing creatures, and once they are comfortable, you can quickly capture the most beautiful photos of them! However, keep in mind that not all cats are suitable for being photographed in an unfamiliar environment. Many cats are only transported when they go to the vet, so it is not always easy to relax them in a strange environment.

Below, I’ll give you some tips to ensure that the cat feels as comfortable as possible during the photoshoot!

1. Put the cat in a basket

Don’t immediately expose the cat to the scene, but place them somewhere first. This could be a basket, a cardboard box, anything as long as the cat can hide in it.

Many cats will tend to hide in a strange environment.

From the basket or box, they can decide at their own pace when they are ready. Usually, curiosity wins out after a while, and they come out!

This ragdoll kitten was a bit impressed by the new environment but gradually peeked out!

8 tips for a relaxed cat in the studio

The Maine Coon cat below felt no need for acclimatization and decided to strike a top pose right away in the basket!

8 tips for a relaxed cat in the studio

2. Work at height

Use a platform or table to elevate the cat. A cat will feel safer when they are elevated, and it’s also much easier for the photographer during the shoot if they don’t have to bend down all the time. This beautiful Maine Coon was sitting on a high table where I placed a mirror. You can read more about different studio surfaces here.

8 tips for a relaxed cat in the studio

Most cats enjoy climbing, so you can also take advantage of that during your shoot by providing a ladder. It’s also convenient if you’re working with multiple cats at once!

8 tips for a relaxed cat in the studio

3. Catnip

Catnip produces a substance that has a strong attraction for many cats.

Therefore, it is often incorporated into cat toys to give cats a good feeling. Not all cats respond to catnip, but it is definitely worth having it at home and trying it out!

In the toys below, catnip is incorporated, and it had a positive effect on the cat!

8 tips for a relaxed cat in the studio

8 tips for a relaxed cat in the studio

4. Different cat toys

Every cat is different, and each cat also has a preference for a different type of toy. I have a Ragdoll and a Siberian cat myself. The Ragdoll loves feathers and even fetches them, but he doesn’t get excited about a wand toy. On the other hand, the Siberian doesn’t pay any attention to feathers but gets very excited when I bring out the wand toy!

Therefore, it’s handy to have different types of cat toys at home and find out what they prefer. Often, the owners know this best and already bring the right toys along during the photoshoot. Many cats may not start playing immediately, and this is perfectly normal. Let them get used to the environment first, and then see if you can make them happy with a game!

This Egyptian Mau was very excited to play with the feather, while the cats below found the wand much more enjoyable!

8 tips for a relaxed cat in the studio

5. Keep owner nearby

Personally, I try to avoid touching or handling the cat because this can be very threatening for some cats. For dogs, it’s often a good idea to completely ignore them at first and let them take the initiative if they want to make contact with you. Explain to the owner as clearly as possible where you want the cat to be, and set up your lighting so that the owner can always stay nearby. The cat will feel much more comfortable.

6. Experiment with liquid snacks

Liquid snacks for cats are treats specially designed to reward a cat. You can buy them in convenient packaging or tubes, and they often contain flavors that cats love, such as chicken, fish, or liver. I always have a variety of liquid snacks with different flavors at home.

As you can see in the photos below, they can also come in handy to lure a cat through a cardboard box with its head or to create fun lollipop photos!

8 tips voor een relaxe kat in de studio

8 tips voor een relaxe kat in de studio

7. Be patient and respectful

As with all animals, patience is necessary when dealing with cats. The more you force the cat, the more it will withdraw and be unwilling to cooperate. Let them acclimate and try to figure out what the cat needs to feel comfortable.

Once the cat has decided that the environment is safe, it will strike the most beautiful poses that you could never have dreamed of! Look at this handsome one below just rolling around blissfully, and even the ragdoll was fine with posing together with a toy after a while.

8 tips voor een relaxe kat in de studio

8 tips voor een relaxe kat in de studio

8. Knowledge of cat behaviour

Personally, I find it fascinating to read books about cats and their behavior. It doesn’t have to be about photography at all. Books about cat breeding, behavioral problems in cats, different cat breeds and their specific characteristics, etc… It gives you a better understanding of the marvelous “being” of the cat and helps you to understand a cat’s behavior more quickly.

Bengal cats, like the one in the photo below, have a completely different character than, for example, a ragdoll. It’s useful to be able to adapt to this during the photoshoot.

It’s also helpful to quickly recognize aggression signals in cats such as growling, hissing, fixating, etc… to avoid further escalation. The British Shorthair kittens clearly had no intention of sharing the couch for the photo!

8 tips voor een relaxe kat in de studio

8 tips voor een relaxe kat in de studio

Cats are wonderful animals to work with in the studio, and once they are comfortable, you can capture beautiful photos of them! I hope the above tips can help bring out the best in your model!

Would you like to further specialize in photographing cats? Consider attending a cat photography workshop to learn everything about it!

8 tips voor een relaxe kat in de studio
English

8 tips for a relaxed cat in the studio

8 tips for a relaxed cat in the studio Meer lezen »

In this article I will tell you more about surfaces in the studio I use in my images for a creative effect.

Every week, I receive questions on Instagram about how I achieve the mirror effects in my studio photos. Apparently, it fascinates many people! Therefore, it became high time to write this blog about surfaces in the studio.

First and foremost, I want to emphasize that the well-being of the dog should always come first! A dog needs to feel safe and comfortable during the photoshoot to put his best paw forward.

So, keep in mind that in some cases, placing the dog on a smooth surface may not be a good idea. Older dogs, dogs with arthritis, or hip problems benefit more from a firmer, more rough surface. Therefore, always inquire about the age of the dog when preparing for your shoot and consider what your model can handle!

Let me list my different surfaces and their advantages and disadvantages for you:

SOFT SURFACE

This will undoubtedly be the preference of most dogs. Who doesn’t like to be a photo model in a comfortable chair? Cats also love the comfort of a soft seat.

surfaces in the studio

surfaces in the studio

Advantage:

  • Your model won’t complain

Disadvantages:

  • Takes up a lot of space
  • A whole shoot in a chair is not very varied
  • You need different chairs for different sizes of dogs
  • Some dogs are not allowed on the couch at home and may look surprised when you suddenly ask them to sit there during the shoot!
PAPER SURFACE or VINYL

If you notice that your model is somewhat fearful and insecure, avoid using a smooth surface and start with paper or vinyl.

surfaces in the studio

surfaces in the studio

Advantages:

  • Many fun colors to choose from
  • Comfortable for most pets
  • Vinyl is washable and can be reused

Disadvantages:

  • Paper is not reusable; it gets dirty after a while and needs replacement
  • Vinyl requires some elbow grease after the shoot to get your surface clean again
TRANSPARENT PLEXI

A transparent plexi provides a beautiful subtle reflection of your model.

surfaces in the studio

Advantages:

  • Beautiful subtle reflection
  • Your paper stays protected and clean, making it last longer
  • Less post-processing work compared to a mirror
  • Compatible with various backgrounds

Disadvantages:

  • Dogs may find a slippery surface intimidating
  • Scratches and dirt need to be removed in post production
  • Background paper must be completely unrolled to have the same color in your surface
  • The plexi edge needs to be removed in post production
MIRROR

A plexi or acrylic mirror give a more detailed and full reflection of your model.

Hondenfotografie

Advantages:

  • Full and detailed reflection of your model
  • Beautiful additional catchlight in the eyes
  • You don’t need to unroll your background paper completely, allowing you to use your last meters effectiently
  • Compatible with various background colors
  • It’s fun to fully “double” your model for an artistic effect

Disadvantages:

  • Dogs may find a slippery surface intimidating
  • Some dogs may be fascinated by their own reflection and not look up anymore
  • Scratches appear quickly, and every detail and speck are visible in the reflection, requiring a lot of post-processing
  • The mirror edge needs to be removed in post-processing
WHITE PLEXI

A non-transparent white plexi plate also provides a beautiful subtle reflection.

Advantages:

  • Soft, subtle reflection
  • Fewer visible scratches compared to a mirror or transparent plate
  • Beautiful additional light reflection

Disadvantages:

  • Dogs may find a smooth surface intimidating
  • Only compatible with a white background
  • The plexi edge needs to be removed in post-production
BLACK PLEXI

A black background is always stylish and classic, and many people find it very beautiful for their interior!

Advantages:

  • Soft reflection
  • With the right lighting technique, you don’t need to remove the edge in post-production
  • It’s fun to fully “double” the dog or cat for an artistic effect

Disadvantages:

  • Dogs may find a smooth surface intimidating
  • Black dogs reflect less on black than lighter-colored dogs
  • Scratches and dirt need to be removed in post-production
PROP ON MIRROR

Of course, you can also go for something in between and use a prop on one of your reflecting surfaces.

Advantage:

Your model doesn’t have to stand on the reflecting surface, and you still get a nice mirror effect.

Disadvantage:

  • Limited variation possible
  • The plate edge needs to be removed in post production

As you can see, the possibilities are endless to bring variety to your shoot and experiment with different surfaces and backgrounds.

As long as you prioritize the comfort of your model, any of the above settings will yield great results!

If you want to know more about the practical use of different surfaces and their combination with backgrounds such as paper, fabric, vinyl, etc., I’m happy to brainstorm with you during a studio photography workshop so that you can achieve this in your own studio or on location for your clients!

English

Surfaces in the Studio

Surfaces in the Studio Meer lezen »

Hondenfotografie

In this article, I’d like to show you 12 fun tricks for dog photography for those who are interested in giving them a try.

Does your dog need to know tricks for a successful photoshoot? Absolutely not! As long as your dog is not fearful, we can always make it enjoyable! Not every dog is equally enthusiastic about learning tricks; some dogs may not enjoy it at all, and that’s perfectly fine too!

However, you don’t need to have a border collie or a Belgian malinois at home to teach some fun tricks. As you’ll see in the examples below, you can achieve something enjoyable with any breed, both in the studio and outdoors!

Many people often come for a second or third photoshoot with their dog. If they enjoy it, I’m happy to give them some tips to practice, so we can add a fun and original extra during the next shoot! So, here’s some inspiration below!

1. Stand

Often, you can capture great photos in a standing position even if the dog hasn’t been trained for it. However, it’s especially helpful if your dog is already familiar with this command.

For breeds with distinctive tails, it’s enjoyable to highlight this feature!

12 fun tricks for dog photography

12 fun tricks for dog photography

2. Place paws somewhere

If your dog can easily place its paws somewhere, it opens up many additional possibilities during the photoshoot. In the studio, we can use this to position the paws on a fun prop, and outdoors, it comes in handy when there’s a nice low tree stump or another low object in the surroundings. The level of difficulty can vary. Placing paws on a stable object like a vintage TV or a low tree stump is much easier than placing them on a moving object like a vintage carriage or wheelbarrow.

12 fun tricks for dog photography

12 fun tricks for dog photography

12 fun tricks for dog photography

12 fun tricks for dog photography

3. Shake paw

Many dogs can shake paw. It reflects the bond between the dog and the owner, so it can result in even more charming photos, both in close-up and in full-frame!

Hondenfotografie

12 fun tricks for dog photography

4. Waving or paws in the air!

Waving is the advanced version of “shake paw” without the owner’s hand touching the dog’s paw. Paws in the air is a breeze for many dogs when you simply hold something tasty in front of their noses!

12 fun tricks for dog photography

12 fun tricks for dog photography

12 fun tricks for dog photography

12 fun tricks for dog photography

5. Catching treats or toys

Catching treats may seem easy, but if your dog is not accustomed to having treats thrown to him, he may not always catch them spontaneously. It’s useful to practice this a bit so that your dog understands what’s expected. Afterward, he’ll be unstoppable in performing this fun trick!

Some dogs find catching toys even more enjoyable than catching treats. All good! As long as the dog is having fun during the photoshoot, it will result in delightful pictures!

12 fun tricks for dog photography

12 fun tricks for dog photography

12 fun tricks for dog photography

6. Head down

Head down is by far one of my favorite tricks for both studio and outdoor photography. Some dogs do this spontaneously, but if they don’t, it’s not so easy to coax. It’s handy if the dog simply knows this as a command!

Many large breeds that quickly stick out their tongues don’t do so when they lay their heads down, an additional advantage for an expressive look!

12 fun tricks for dog photography

This aussie performs “head down for advanced” with an additional twist of adding a little leaf!

12 fun tricks for dog photography

7. Bow

Many dogs bow as a way to initiate play. Fun for the dog and fun for the photo, whether with or without a toy!

Hondenfotografie

12 fun tricks for dog photography

8. Beertje

For this trick, the dog remains seated while lifting its paws in the air. Not easy to teach, but very enjoyable to photograph when the dog can do it!

Hondenfotografie

Lola the border collie has created her own variation!

12 fun tricks for dog photography

9. Pang!

With “pang” or “dead,” you make a shooting motion, and the dog lies on its side.

If dogs know this, we can try “advanced pang” with a toy between the paws! Adorable, isn’t it?

Even a happy face can come after this trick, as you can see with this golden retriever!

Billie also creates his own variation of “pang” by looking up at the same time.

10. Holding something

Many dogs can easily hold something in their mouth when they are in action, but holding something while standing still is a bit more challenging. It’s worth practicing, and you can vary with different materials.

Luna is holding a toy, nice and soft, making it relatively easy to teach.

Holding a metal fork is a lot more challenging, especially when it’s pierced with a delicious sausage! Nevertheless, Kyle managed to perform this trick because he knew a tasty reward would follow afterward. The owner was also motivated to practice this at home in advance of the shoot!

Fake flowers are more convenient than real ones because they give you the chance to make multiple attempts to achieve the perfect photo without the flowers being damaged right away!

The dog’s favorite toy is also super fun to hold!

An action shot with something in the mouth is much easier than a still photo because it feels more natural for most dogs.

Border collies always like to go the extra mile when it comes to tricks. Fay effortlessly goes for a combination of 2 tricks!

Hondenfotografie

11. Crossed position

Even with multiple dogs, you can create more creative photos than the standard “sit” and “lie down.” One of my favorite poses is the crossed position where one dog is standing, and the other dog is lying underneath. This is certainly not straightforward for every breed to execute, so the message here is, once again, to first check whether this is a feasible idea!

This creates a nice effect with different breeds if their sizes are compatible!

And here, you can once again try an advanced variation by involving three dogs!

12. Eye photo

Eye photos are currently very popular, and many people include them in their wishlist when they come for a photoshoot. However, it is not necessarily easy to capture this type of photo. Many dogs like to be close to their owner, but that doesn’t necessarily mean they also enjoy standing “eye to eye” with them.

Usually, I also ask to practice this at home beforehand. The dog becomes somewhat accustomed to the action when coming for a photoshoot, and usually, it quickly becomes apparent whether it’s feasible or not.

It is fascinating to see how many beautiful dog and human eyes there are!

Hondenfotografie

With one of my own cats, I once tried to create a variation of the eye photo. Completely different but still fun! It just shows that with any animal of any size, there’s always something enjoyable to capture!

I have an Australian Shepherd myself who loves learning tricks. If you want to try one of the above things with your own dog but have no clue how to teach it, just let me know, and I’ll be happy to help you out!

English

12 fun tricks for dog photography

12 fun tricks for dog photography Meer lezen »

In this article you can read everything about my gear for photographing pets.

I have been a loyal Canon user for years. Currently, I work with the Canon R5, and the Canon R6 serves as my backup camera. Since I switched from a DSLR to a mirrorless system camera, I don’t want to go back.

I find it convenient not to have to look through the viewfinder with a system camera, allowing me to maintain better contact with the owner and the dog. A successful photoshoot is ultimately teamwork! The automatic eye recognition also makes a world of difference in quickly focusing and not missing the perfect moment!

Finally, I appreciate the lighter weight of a system camera compared to a DSLR. Especially when shooting a lot, you begin to feel the difference quickly!

What lenses are in my camera bag?

RF 15-35 mm 2.8

I enjoy using this lens to photograph my own cats. When photographing my own animals, there’s usually no helping hand nearby. It’s handy not to have to take too much distance because they might have other plans than cooperating with the photoshoot 🙂

About my gear


This lens is also ideal for capturing moments like a dog catching treats. You are close to the dog and can easily throw the treat yourself to capture the perfect moment.

About my gear


I also frequently bring this lens to outdoor shoots to create more creative photos from a different perspective, as seen in the photo below with the labrador puppy and the owners.

About my gear

Sigma Art 85 mm 1.8

I use this lens with an adapter ring on the R5, and all functions are perfectly retained. For storytelling photos, I rely on the 85 mm, especially when you don’t have enough space indoors to use a telephoto lens and want to avoid too much distortion in your portraits.

About my gear


I occasionally use this lens outdoors, as shown in the photo below.

About my gear

Sigma Art 135mm 1.8

This is my favorite lens for outdoor photography, also used with an adapter. The wide aperture provides a beautiful blurry background in your photos, and personally, I find it valuable not to have to take too much distance from your subject, allowing good communication with the owner.

About my gear

RF 70-200mm 2.8

My favorite studio lens! I know this is the “go-to” lens for many dog photographers outdoors, but I prefer using this lens in the studio. You do need sufficient space to maintain an adequate distance, but fortunately, I have a large studio space. It’s handy to be able to zoom in and out occasionally with fast-moving animals, ensuring you don’t miss any opportunities or can quickly switch between headshots and full body shots, which is almost impossible with a fixed lens. The RF 70-200mm is smaller than the EF version for DSLR cameras and therefore more “ergonomic” for longer shoots. Top quality for your clients is guaranteed with this lens.

About my gear

RF 100mm 2.8

Finally, I have this macro lens, which I occasionally use to capture high-quality, detailed photos of eyes and noses.

About my gear

Do you want to learn more about dog photography? During a workshop you can use my camera and lenses and I will help you to find out which gear will work the best for you!

Subscribe for the newsletter if you don’t want to miss any updates!

English

About my gear

About my gear Meer lezen »

Scroll naar boven